Operation
CONTROL PANEL
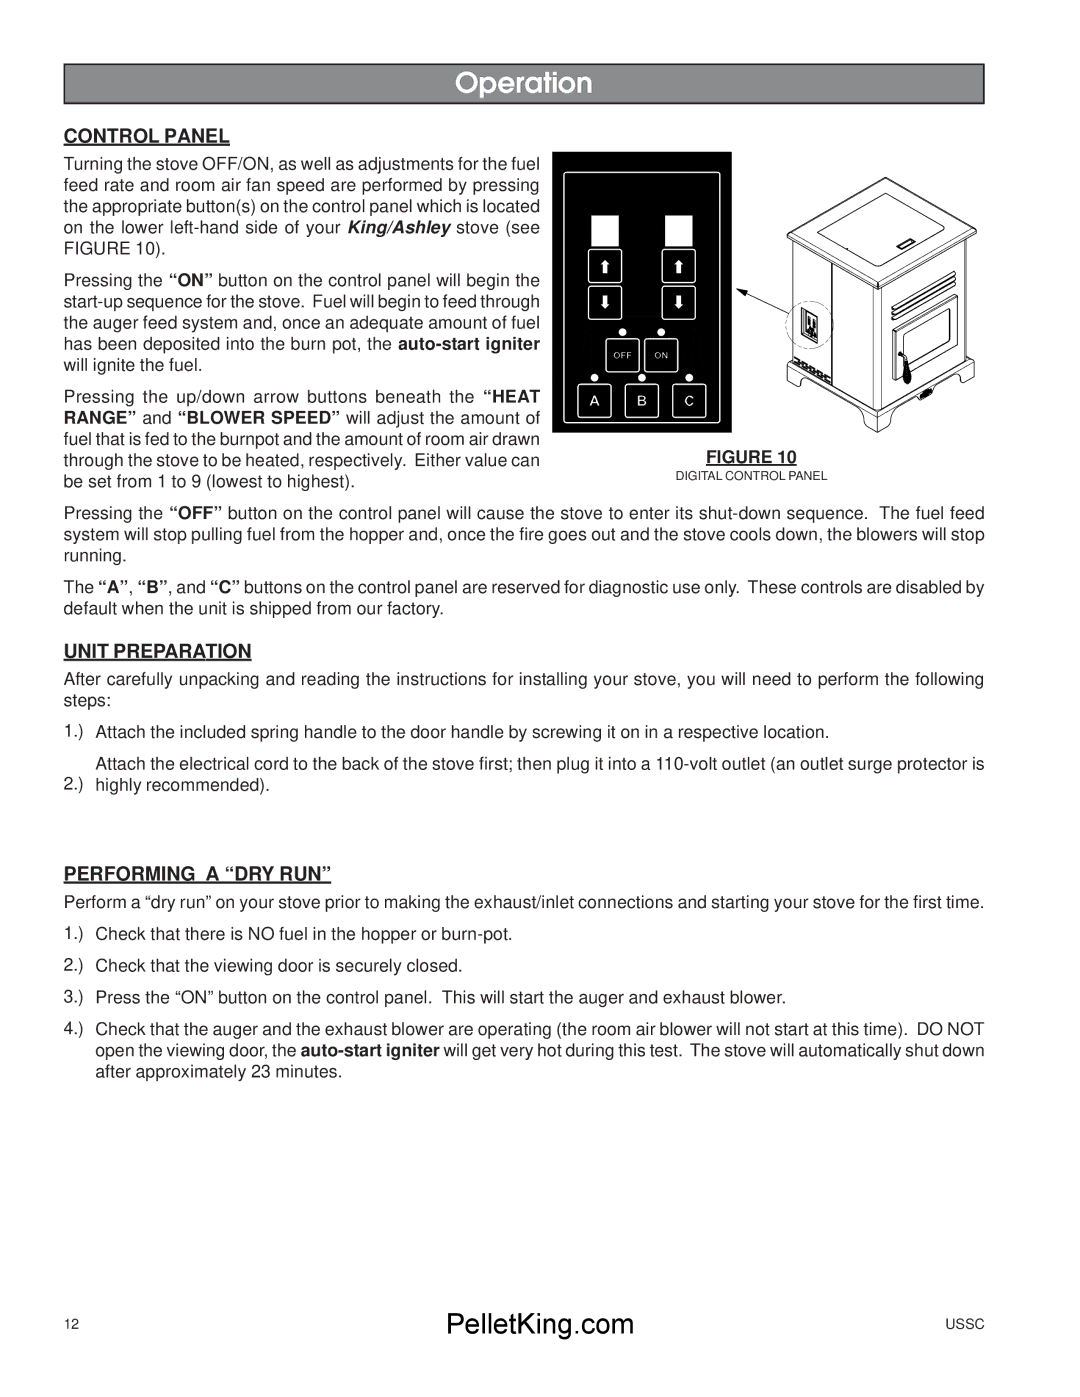
Turning the stove OFF/ON, as well as adjustments for the fuel feed rate and room air fan speed are performed by pressing the appropriate button(s) on the control panel which is located on the lower
Pressing the “ON” button on the control panel will begin the
Pressing the up/down arrow buttons beneath the “HEAT RANGE” and “BLOWER SPEED” will adjust the amount of fuel that is fed to the burnpot and the amount of room air drawn through the stove to be heated, respectively. Either value can be set from 1 to 9 (lowest to highest).
FIGURE 10
DIGITAL CONTROL PANEL
Pressing the “OFF” button on the control panel will cause the stove to enter its
The “A”, “B”, and “C” buttons on the control panel are reserved for diagnostic use only. These controls are disabled by default when the unit is shipped from our factory.
UNIT PREPARATION
After carefully unpacking and reading the instructions for installing your stove, you will need to perform the following steps:
1.) Attach the included spring handle to the door handle by screwing it on in a respective location.
Attach the electrical cord to the back of the stove first; then plug it into a
2.) highly recommended).
PERFORMING A “DRY RUN”
Perform a “dry run” on your stove prior to making the exhaust/inlet connections and starting your stove for the first time. 1.) Check that there is NO fuel in the hopper or
2.) Check that the viewing door is securely closed.
3.) Press the “ON” button on the control panel. This will start the auger and exhaust blower.
4.) Check that the auger and the exhaust blower are operating (the room air blower will not start at this time). DO NOT open the viewing door, the
12 | PelletKing.com | USSC |
|
