OPERATING HEATER (NON-THERMOSTAT MODELS)

For Your Safety Read Before Lighting

Lighting Instructions

13

OPERATING HEATER

NON-THERMOSTAT MODELS

FOR YOUR SAFETY READ

BEFORE LIGHTING

WARNING: If you do not follow these instructions exactly, a fire or explosion may result causing prop- erty damage, personal injury or loss of life.

A.This appliance has a pilot which must be lighted by hand. When lighting the pilot, follow these instructions exactly.

B.BEFORE LIGHTING smell all around the appliance area for gas. Be sure to smell next to the floor because some gas is heavier than air and will settle on the floor.

WHAT TO DO IF YOU SMELL GAS

Do not try to light any appliance.

Do not touch any electric switch; do not use any phone in your building.

Immediately call your gas supplier from a neighbor’s phone. Follow the gas supplier’s instructions.

If you cannot reach your gas supplier, call the fire de- partment.

C.Use only your hand to push in or turn the gas control knob. Never use tools. If the knob will not push in or turn by hand, don’t try to repair it, call a qualified service techni- cian or gas supplier. Force or attempted repair may result in a fire or explosion.

D.Do not use this appliance if any part has been under water. Immediately call a qualified service technician to inspect the appliance and to replace any part of the control system and any gas control which has been under water.

LIGHTING INSTRUCTIONS

1.STOP! Read the safety information above.

2.Make sure equipment shutoff valve is fully open.

3.Turn control knob clockwise to the OFF position.

4.Wait five minutes to clear out any gas. Then smell for gas, including near the floor. If you smell gas, STOP! Follow “B” in the safety information above. If you don’t smell gas, go to the next step.

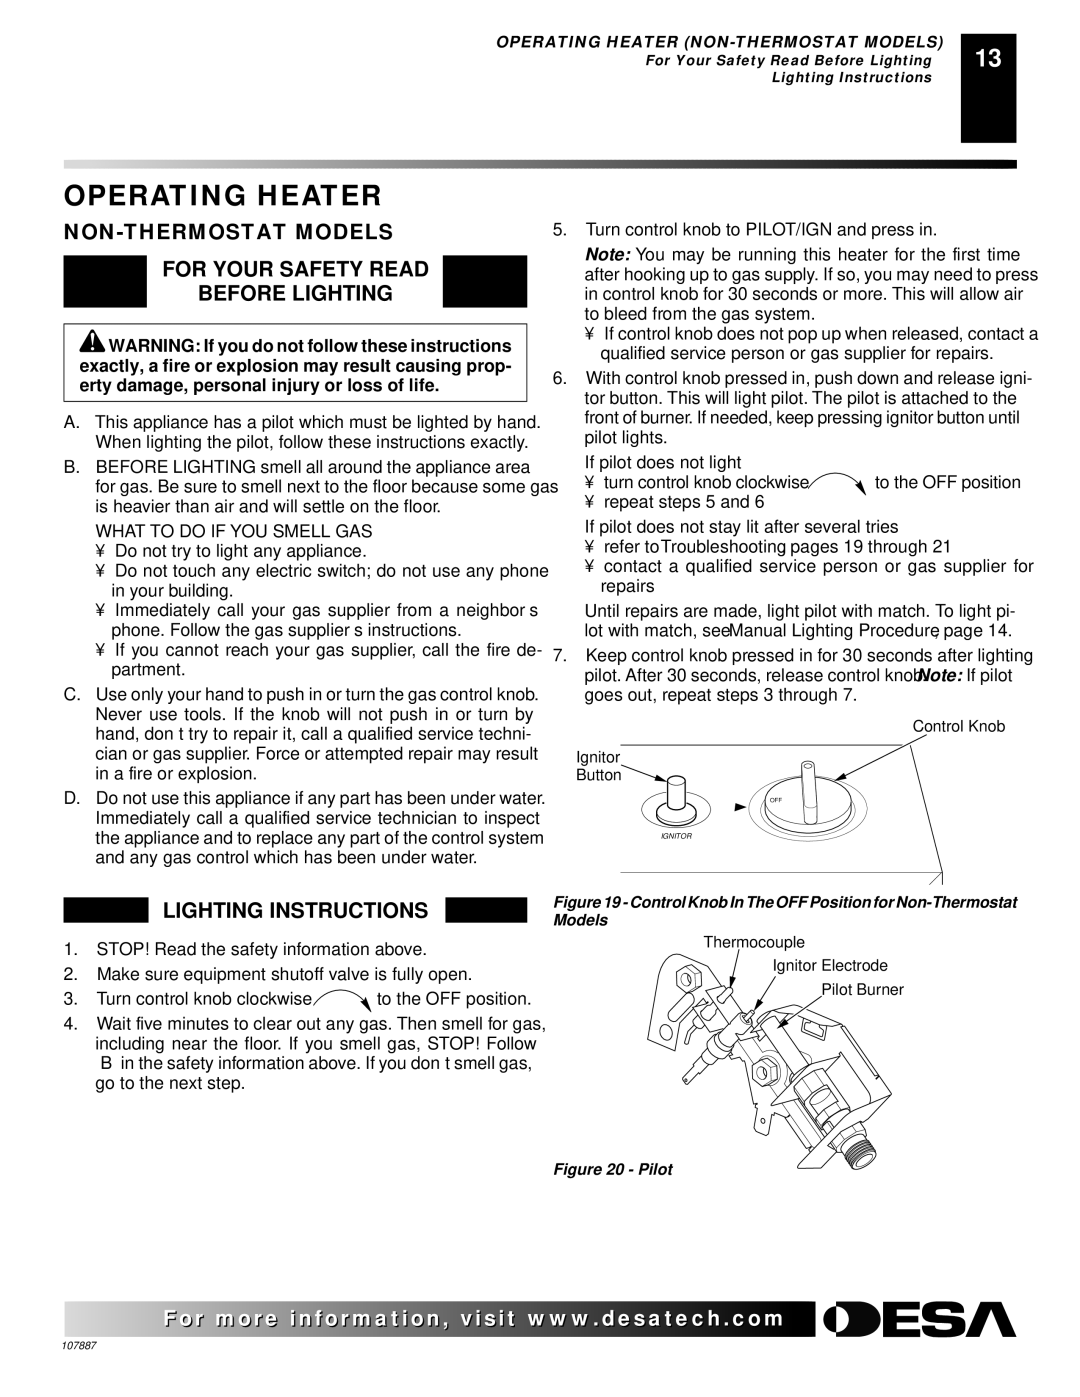
5.Turn control knob to PILOT/IGN and press in.

Note: You may be running this heater for the first time after hooking up to gas supply. If so, you may need to press in control knob for 30 seconds or more. This will allow air to bleed from the gas system.

If control knob does not pop up when released, contact a qualified service person or gas supplier for repairs.

6.With control knob pressed in, push down and release igni- tor button. This will light pilot. The pilot is attached to the front of burner. If needed, keep pressing ignitor button until pilot lights.

If pilot does not light

turn control knob clockwise to the OFF position

repeat steps 5 and 6

If pilot does not stay lit after several tries

refer to Troubleshooting, pages 19 through 21

contact a qualified service person or gas supplier for repairs

Until repairs are made, light pilot with match. To light pi- lot with match, see Manual Lighting Procedure, page 14.

7.Keep control knob pressed in for 30 seconds after lighting pilot. After 30 seconds, release control knob. Note: If pilot goes out, repeat steps 3 through 7.

Control Knob

Ignitor

Button

OFF

IGNITOR

Figure 19 - Control Knob In The OFF Position for Non-Thermostat Models

Thermocouple

Ignitor Electrode

Pilot Burner

Figure 20 - Pilot

For morevisit www..com

107887

Page 13
Image 13
Vanguard Heating VP26 Operating Heater, NON-THERMOSTAT Models For Your Safety Read Before Lighting, Lighting Instructions

VN18, VN18IT, VP16IT, VN25IT, VP26T specifications

Vanguard Heating offers a range of innovative heating solutions, including the VP16T, VP22IT, VN18T, VP16IT, and VP26 models. Each of these heaters is designed to provide efficient and reliable warmth for various spaces, making them suitable for both residential and commercial use.

The VP16T model is known for its compact size and powerful heating capabilities. It features an adjustable thermostat that allows users to maintain their desired temperature effortlessly. Designed for energy efficiency, the VP16T operates with minimal energy consumption while delivering consistent heat output. Its lightweight construction makes it easy to move and install in different areas as needed.

The VP22IT model expands on the VP16T's features, incorporating advanced technology for improved performance. It comes with a built-in timer function, allowing users to program their heating schedule. This feature enhances energy savings and convenience, as the heater can automatically turn on or off based on individual preferences. Additionally, the VP22IT includes a safety shut-off mechanism that activates in case of overheating, ensuring safe operation.

The VN18T is designed for versatile applications, featuring multi-directional airflow for optimized heating distribution. It is equipped with robust heating elements that provide quick warmth in a matter of minutes. This model is particularly popular for larger spaces due to its high heating capacity. The VN18T also includes a user-friendly digital control panel, making it easy to adjust settings.

The VP16IT combines the strengths of its predecessors, integrating smart technology for enhanced user experience. It features Wi-Fi connectivity, allowing users to control the heater remotely using a smartphone app. This model also supports voice command integration, making it compatible with smart home systems. Its sleek design adds a modern touch to any environment.

Lastly, the VP26 model offers the highest heating output among the Vanguard lineup. Tailored for large areas, it incorporates a dual-zone heating system that optimizes performance based on room size and heating requirements. Its advanced thermal insulation technology minimizes heat loss, contributing to efficiency and reduced energy costs.

In conclusion, Vanguard Heating's selection of VP16T, VP22IT, VN18T, VP16IT, and VP26 models features innovative technologies, safety measures, and user-friendly controls. These heaters are engineered to provide effective heating solutions that prioritize efficiency, convenience, and safety, making them a top choice for consumers seeking reliable warmth in any setting.