Parts and Functions
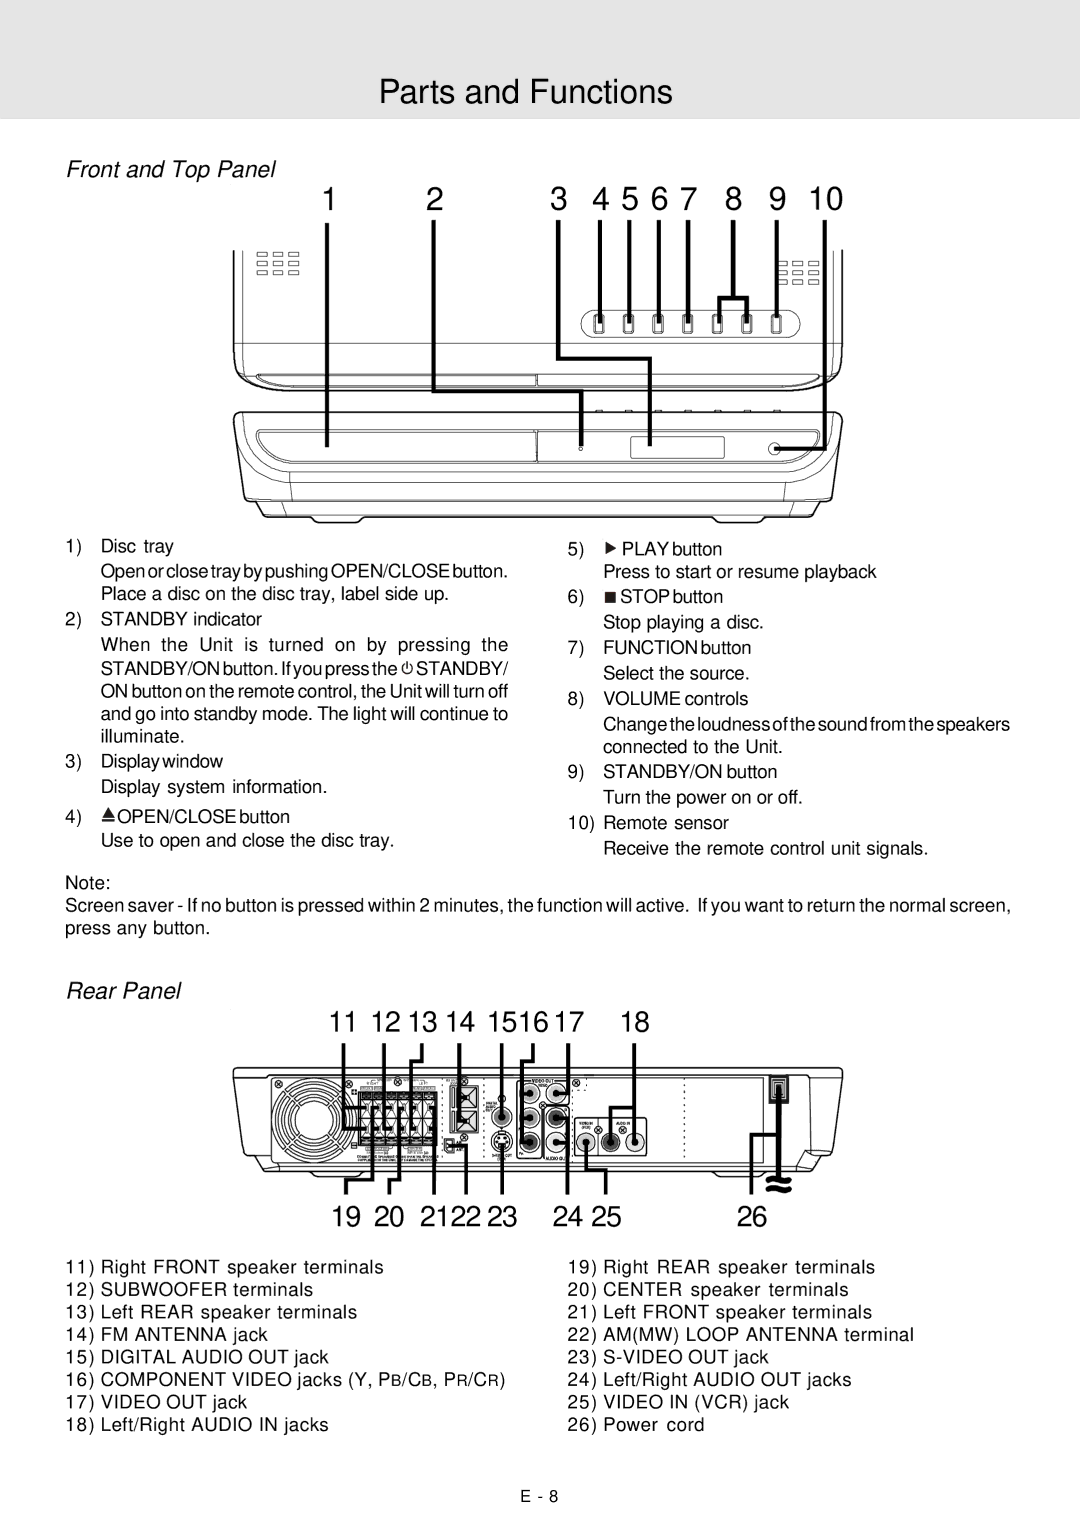
Front and Top Panel
1 | 2 | 3 | 4 5 6 7 | 8 | 9 | 10 |
1) | Disc tray | 5) |
|
| PLAY button | |||
| Open or close tray by pushing OPEN/CLOSE button. |
| Press to start or resume playback | |||||
| Place a disc on the disc tray, label side up. | 6) |
|
| STOP button | |||
|
|
| ||||||
|
|
| ||||||
2) | STANDBY indicator |
| Stop playing a disc. | |||||
| When the Unit is turned on by pressing the | 7) | FUNCTION button | |||||
| STANDBY/ON button. If you press the STANDBY/ |
| Select the source. | |||||
| ON button on the remote control, the Unit will turn off | 8) | VOLUME controls | |||||
| and go into standby mode. The light will continue to | |||||||
|
| Change the loudness of the sound from the speakers | ||||||
| illuminate. |
| ||||||
|
| connected to the Unit. | ||||||
3) | Display window |
| ||||||
9) | STANDBY/ON button | |||||||
| Display system information. | |||||||
|
| Turn the power on or off. | ||||||
4) |
|
| OPEN/CLOSE button |
| ||||
|
| 10) | Remote sensor | |||||
|
| |||||||
|
|
|
| |||||
Use to open and close the disc tray. | Receive the remote control unit signals. |
|
Note:
Screen saver - If no button is pressed within 2 minutes, the function will active. If you want to return the normal screen, press any button.
Rear Panel
11 12 13 14 1516 17 | 18 | |
IMP. ohm | FM ANT. |
|
R I GH T | LE FT300Ω |
|
FRONT | REAR | REAR | FRONT |
|
| CENTER |
|
| 6 ohm | IMP. 6 ohm |
|
| 19 20 2122 23 | 24 25 | 26 | |
11) | Right FRONT speaker terminals | 19) | Right REAR speaker terminals | |
12) | SUBWOOFER terminals | 20) | CENTER speaker terminals | |
13) | Left REAR speaker terminals | 21) | Left FRONT speaker terminals | |
14) | FM ANTENNA jack | 22) | AM(MW) LOOP ANTENNA terminal | |
15) | DIGITAL AUDIO OUT jack | 23) | ||
16) | COMPONENT VIDEO jacks (Y, PB/CB, PR/CR) | 24) | Left/Right AUDIO OUT jacks | |
17) | VIDEO OUT jack | 25) | VIDEO IN (VCR) jack | |
18) | Left/Right AUDIO IN jacks | 26) | Power cord |
|
E - 8
