BULB REPLACEMENT INSTRUCTIONS
Step 5: Closing the Bulb Clips
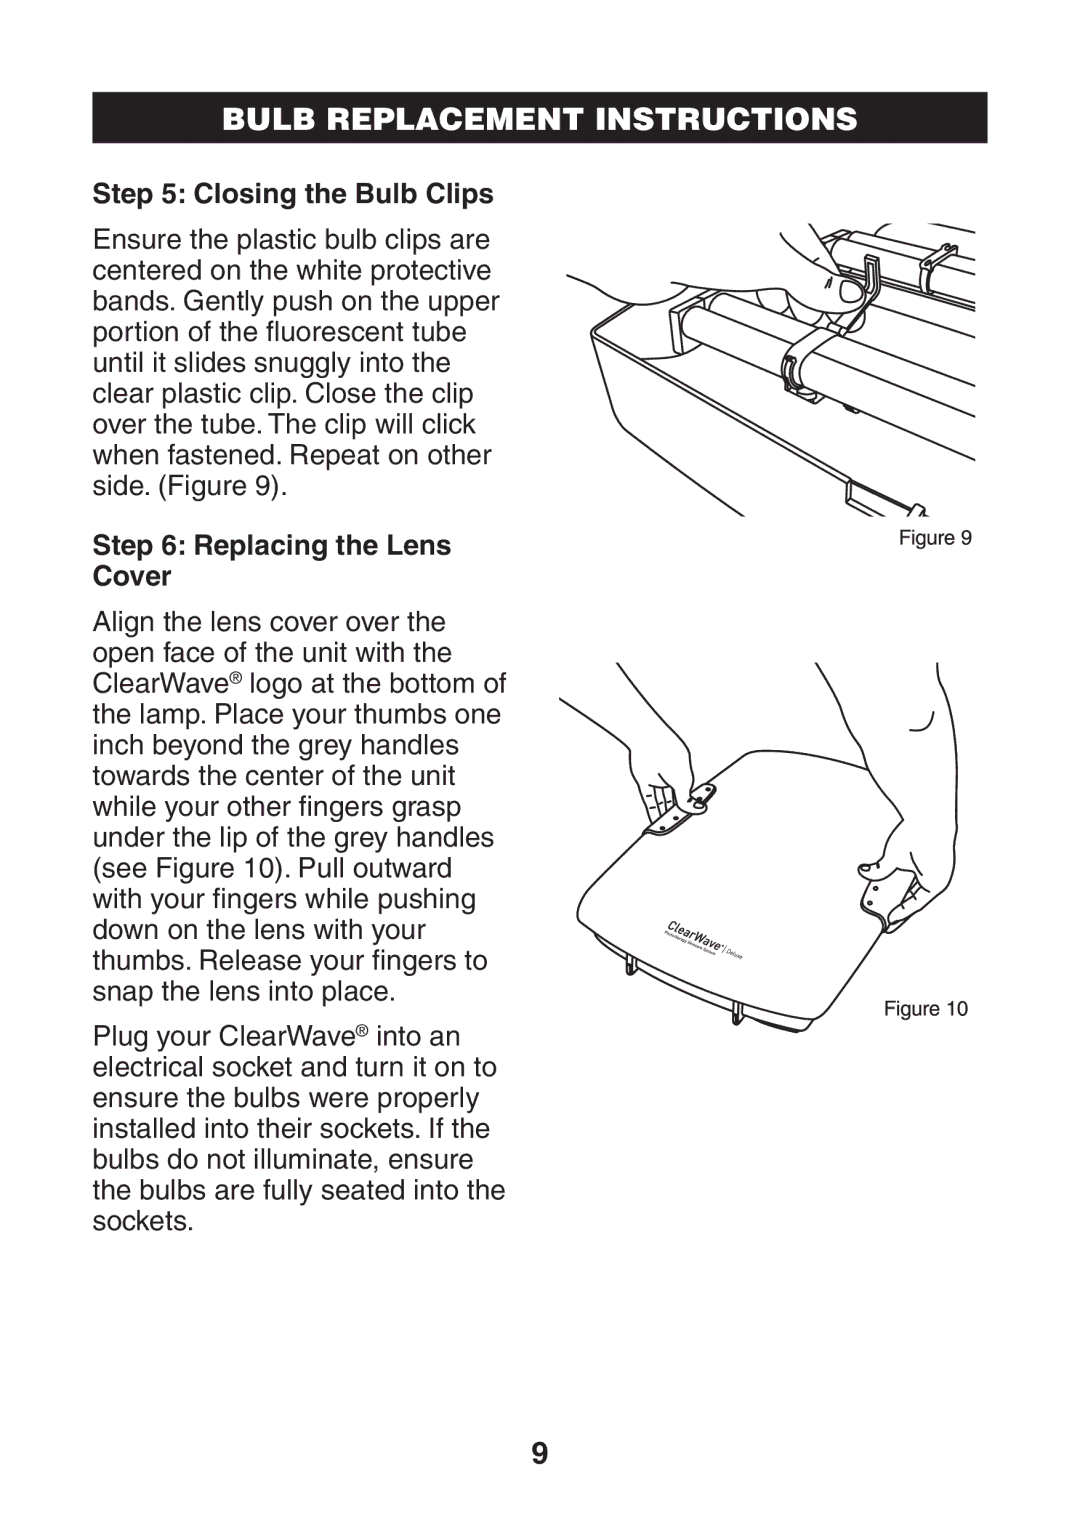
Ensure the plastic bulb clips are centered on the white protective bands. Gently push on the upper portion of the fluorescent tube until it slides snuggly into the clear plastic clip. Close the clip over the tube. The clip will click when fastened. Repeat on other side. (Figure 9).
Step 6: Replacing the Lens
Cover
Align the lens cover over the open face of the unit with the ClearWave® logo at the bottom of the lamp. Place your thumbs one inch beyond the grey handles towards the center of the unit while your other fingers grasp under the lip of the grey handles (see Figure 10). Pull outward with your fingers while pushing down on the lens with your thumbs. Release your fingers to snap the lens into place.
Plug your ClearWave® into an electrical socket and turn it on to ensure the bulbs were properly installed into their sockets. If the bulbs do not illuminate, ensure the bulbs are fully seated into the sockets.
9