
2477 specifications
The Vermont Castings 2477 is a highly regarded wood-burning stove that epitomizes both craftsmanship and modern technology, making it a favored choice among wood stove enthusiasts. This powerful yet stylish stove is designed to provide exceptional heating efficiency while enhancing the aesthetic appeal of any living space.One of the standout features of the Vermont Castings 2477 is its innovative design that combines traditional aesthetics with contemporary functionality. The stove features a large viewing window, allowing for a mesmerizing view of the flames, which creates a warm and inviting ambiance in any room. Its cast iron construction not only adds to the classic look but also ensures durability and long-lasting performance.
The stove has an impressive heat output, capable of heating spaces of up to 2,500 square feet, making it suitable for both small and medium-sized homes. It comes equipped with an efficient EPA-certified combustion system, which dramatically reduces emissions and optimizes fuel use. This technology allows users to enjoy a longer burn time with less firewood, thus enhancing overall efficiency and making it an environmentally friendly option.
The Vermont Castings 2477 features a secondary combustion system that enhances the burning process. By introducing air into the firebox, it ensures that gases are consumed efficiently, resulting in a cleaner burn. The stove is also equipped with a built-in ash pan that simplifies cleanup, allowing users to easily dispose of the ash without the hassle of removing the entire firebox.
In terms of customization, owners appreciate the variety of finishes available, ranging from classic black to vivid enamel colors, allowing for personalization to match different home decors. Additionally, the stove includes adjustable air controls, which enable users to regulate the burn rate and heat output based on their specific needs.
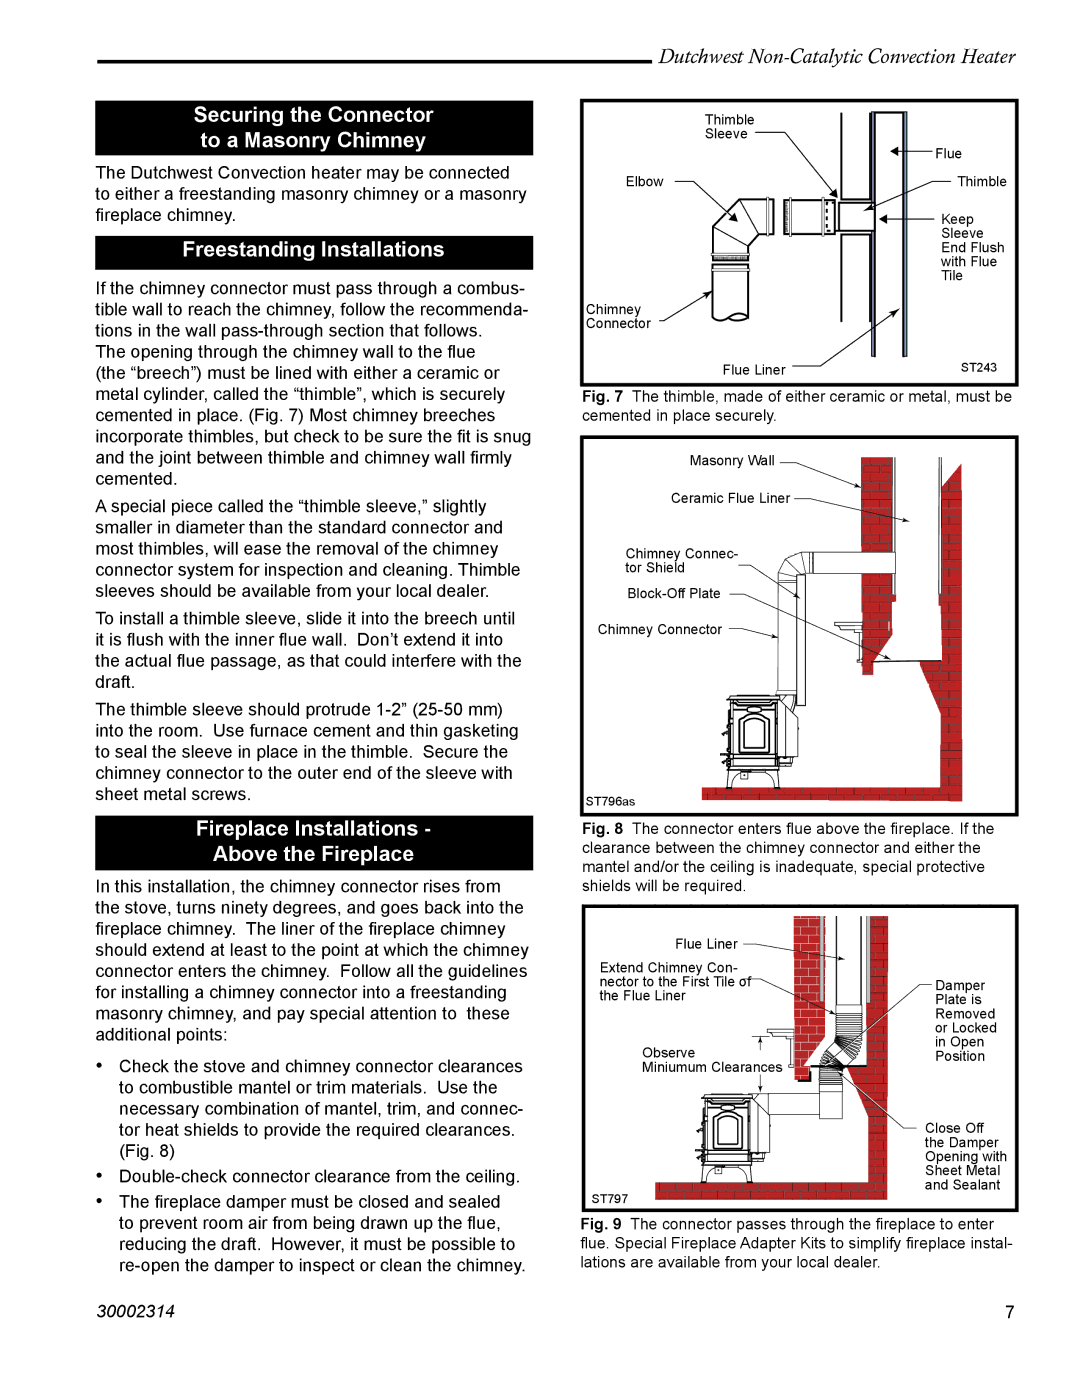
Lastly, installation of the Vermont Castings 2477 is straightforward, and it can be fitted with various chimney configurations, further enhancing its versatility. With its combination of style, technology, and efficiency, the Vermont Castings 2477 wood stove represents an excellent investment for anyone looking to embrace the warmth and charm of a wood-burning heating solution in their home.