VPI WIRELESS HDMI EXTENDER
OPERATION CONTROLS AND FUNCTIONS
Local Unit
Front Panel
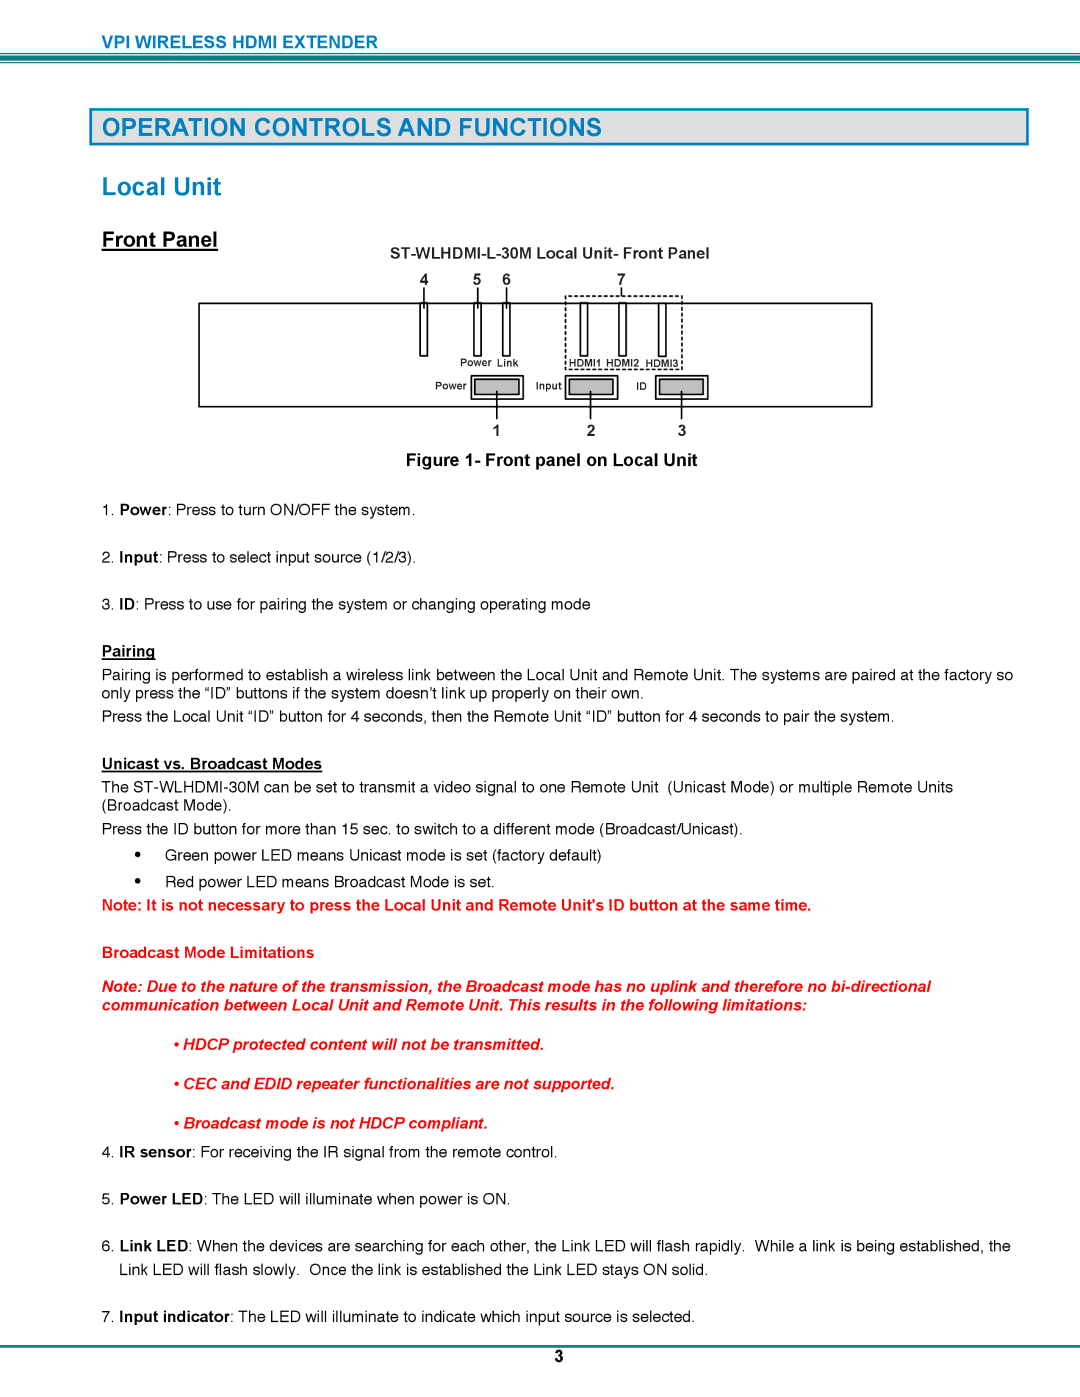
ST-WLHDMI-L-30M Local Unit- Front Panel
4 | 5 | 6 | 7 |
Power Link |
| HDMI1 HDMI2 HDMI3 | |||
Power |
| Input |
| ID |
|
|
|
| |||
1 2 3
Figure 1- Front panel on Local Unit
1.Power: Press to turn ON/OFF the system.
2.Input: Press to select input source (1/2/3).
3.ID: Press to use for pairing the system or changing operating mode
Pairing
Pairing is performed to establish a wireless link between the Local Unit and Remote Unit. The systems are paired at the factory so only press the “ID” buttons if the system doesn’t link up properly on their own.
Press the Local Unit “ID” button for 4 seconds, then the Remote Unit “ID” button for 4 seconds to pair the system.
Unicast vs. Broadcast Modes
The
Press the ID button for more than 15 sec. to switch to a different mode (Broadcast/Unicast).
•Green power LED means Unicast mode is set (factory default)
•Red power LED means Broadcast Mode is set.
Note: It is not necessary to press the Local Unit and Remote Unit's ID button at the same time.
Broadcast Mode Limitations
Note: Due to the nature of the transmission, the Broadcast mode has no uplink and therefore no
•HDCP protected content will not be transmitted.
•CEC and EDID repeater functionalities are not supported.
•Broadcast mode is not HDCP compliant.
4.IR sensor: For receiving the IR signal from the remote control.
5.Power LED: The LED will illuminate when power is ON.
6.Link LED: When the devices are searching for each other, the Link LED will flash rapidly. While a link is being established, the Link LED will flash slowly. Once the link is established the Link LED stays ON solid.
7.Input indicator: The LED will illuminate to indicate which input source is selected.
3
