Quick Setup
You can choose either standard mouse features shown below or the optional special program features for your ViewSonic Optical Mouse. For special program features, see the section on the next page, “Adding Special Program Features (optional)”. The standard mouse features with a USB or PS/2 connection are shown below.
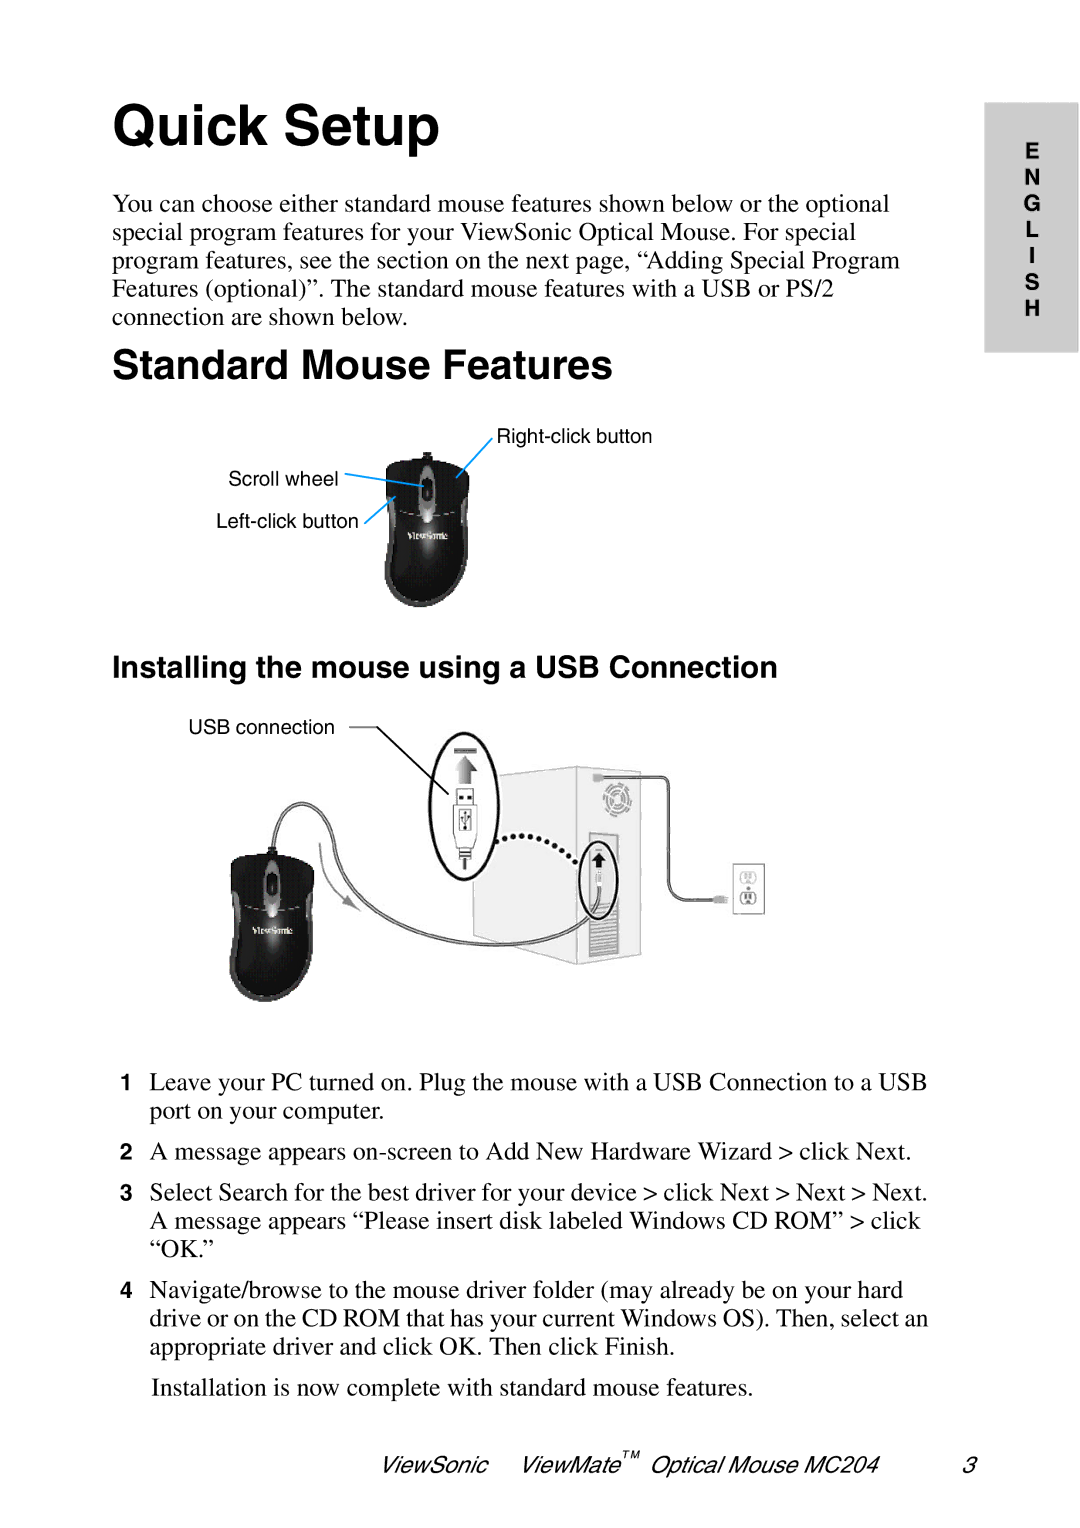
Standard Mouse Features
Scroll wheel
Installing the mouse using a USB Connection
USB connection
Mouse
1Leave your PC turned on. Plug the mouse with a USB Connection to a USB port on your computer.
2A message appears
3Select Search for the best driver for your device > click Next > Next > Next. A message appears “Please insert disk labeled Windows CD ROM” > click “OK.”
4Navigate/browse to the mouse driver folder (may already be on your hard drive or on the CD ROM that has your current Windows OS). Then, select an appropriate driver and click OK. Then click Finish.
Installation is now complete with standard mouse features.
E N G L I S H
ViewSonic ViewMate T M Optical Mouse MC204 | 3 |