GENERAL INFORMATION

Unpack

1.Remove banding from bottom of carton. Lift carton up and off of the unit.

2.Remove all tape and packaging material from the outside and inside of the cabinet.

3.Keep all carton packaging until your unit has been thoroughly inspected and found to be in good condition.

AREA REQUIREMENTS

Units Certified for Indoor Use - (black outer cabinet)

MUST BE INSTALLED IN AN AREA PROTECTED FROM THE ELEMENTS, SUCH AS WIND, RAIN, WATER (SPRAY OR DRIP).

1.Place unit so the front side will be completely unobstructed to provide proper air flow. The unit may be closed in on the top and three sides, but the front MUST BE unobstructed for air circulation and proper operation. Installation should be such that the cabinet can be moved for servicing if necessary.

2.Unit should be in a well ventilated area. Best results are obtained at temperatures between 650F (180C) and 800F (270C) for built-in products and 650F (180C) and 900F (320C) for freestanding products.

3.Provisions for electricity and water connection should be determined before placing unit in proper place.

Units Certified for Outdoor Use - (stainless steel outer cabinet)

1.Place unit so the front side will be completely unobstructed to provide proper air flow. The unit may be closed in on the top and three sides, but the front MUST BE unobstructed for air circulation and proper operation. Installation should be such that the cabinet can be moved for servicing if necessary.

2.Unit should be in a well ventilated area with temperature above 450F (7.20C) and below 1100F (430C). Best results are obtained at temperatures between 600F (160C) and 1000F (380C).

3.Provisions for electricity and water connection should be determined before placing unit in proper place.

4.For best performance, outdoor units should be installed away from direct sunlight or under a counter or shelter.

LEG LEVELER INSTALLATION

Read Before Installing Leg Levelers

WARNING: Do not lay unit on top, side, back, or front. If unit is accidentally laid in any position other than right side up, then the unit must remain in the right side up position for at least 24 hours before plugging the unit in.

1.Tip unit backwards so there is one foot of clearance on front of the unit. Have someone to assist you in tilting the unit to prevent it from falling on you while installing the leg levelers.

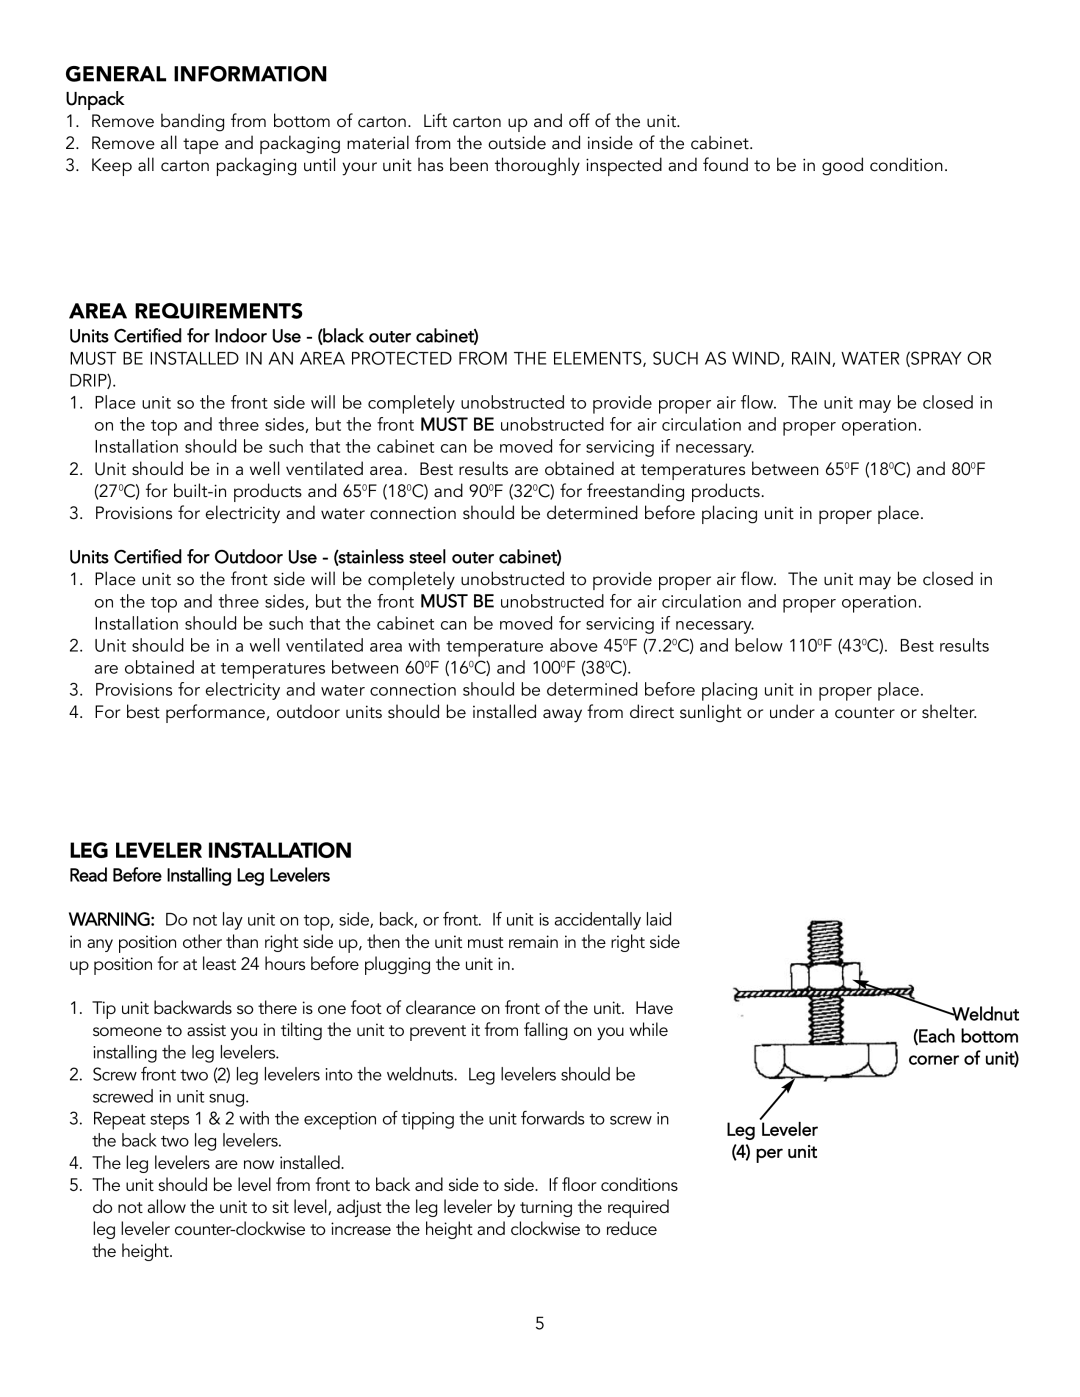
2.Screw front two (2) leg levelers into the weldnuts. Leg levelers should be screwed in unit snug.

3.Repeat steps 1 & 2 with the exception of tipping the unit forwards to screw in the back two leg levelers.

4.The leg levelers are now installed.

5.The unit should be level from front to back and side to side. If floor conditions do not allow the unit to sit level, adjust the leg leveler by turning the required leg leveler counter-clockwise to increase the height and clockwise to reduce the height.

Weldnut (Each bottom corner of unit)

Leg Leveler

(4) per unit

5

Page 5
Image 5
Viking Combination Beverage Center manual General Information, Area Requirements, LEG Leveler Installation

Combination Beverage Center specifications

The Viking Combination Beverage Center is an innovative appliance that perfectly merges style, functionality, and advanced technology, making it an ideal addition to any modern kitchen or entertainment space. Offering a versatile way to store and display beverages, this combination beverage center is engineered to meet the needs of both casual hosts and serious entertainers.

One of the key features of the Viking Combination Beverage Center is its dual-zone design. This allows users to maintain different temperature settings for various beverages, ensuring that wines, soft drinks, and other refreshments are kept at their optimal serving temperatures. The upper zone typically caters to wine, while the lower zone is perfect for other bottles and cans, helping to preserve the unique flavors and characteristics of each beverage.

In terms of storage, the Viking Beverage Center is designed with flexibility in mind. Its adjustable shelving, usually made of robust glass, allows for easy organization of both tall and short bottles, while the dynamic cooling system ensures that every beverage is chilled uniformly. Some models even include a distinctive Wine Rack, which can safely hold wine bottles horizontally, preventing cork drying and maintaining freshness.

Not only does the Viking Combination Beverage Center boast impressive performance features, but it also includes a range of sophisticated technologies designed for user convenience. The precise digital temperature control allows for easy adjustments with a simple touch, while LED lighting illuminates the interior beautifully, making it easy to browse selections, even in dim light. The Low-E glass door helps to insulate the interior while showcasing the beverages inside, providing energy efficiency alongside aesthetic appeal.

Moreover, the appliance is equipped with a fan that circulates air at consistent temperatures, preventing hot spots and ensuring that beverages are chilled evenly. The moisture control feature helps sustain a balanced humidity level, promoting the longevity of stored products, particularly for wines.

The Viking Combination Beverage Center is available in various sizes and finishes, allowing it to seamlessly blend with a plethora of kitchen decors. Its sleek design, coupled with high-quality stainless steel construction, makes it a standout piece that adds a touch of elegance to any environment.

In conclusion, the Viking Combination Beverage Center is a perfect blend of style, practicality, and advanced technology. With its dual-zone temperature control, flexible shelving, and user-friendly features, it is the ultimate solution for those who wish to keep their beverages at the perfect temperature while making a statement in their space.