Important - Please read and follow
•Before beginning, please read these instructions completely and carefully.
•DO NOT remove permanently affixed labels, warnings, or plates from the product. This may void the warranty.
•Please observe all local and national codes and ordinances.
•Please ensure that this product is properly grounded.
•The installer should leave these instructions with the consumer who should retain for local inspector’s use and for future reference.
![]() WARNING
WARNING
To reduce the risk of fire, electric shock, or injury when using your unit, follow these basic precautions:
•Read all instructions before using the unit.
•Never allow children to operate, play with, or crawl inside the unit.
•Never clean unit parts with flammable fluids. The fumes can create a fire hazard or explosion.
•Always turn the power on/off switch (located behind the air grille on top right side) to the OFF position before attempting to change light bulbs, clean, or service the unit.
FOR YOUR SAFETY
DO NOT STORE OR USE GASOLINE OR OTHER FLAMMABLE VAPORS AND LIQUIDS IN THE VICINITY OF THIS OR ANY OTHER APPLIANCE. THE FUMES CAN CREATE A FIRE HAZARD OR EXPLOSION.
It is your responsibility to be sure your ice machine is:
•located so the front is not blocked to restrict incoming or discharge air flow.
•properly leveled.
•located in a well ventilated area.
•connected to the proper kind of outlet, with the correct electric supply and grounding. A 115V, 60 Hz, 15 amp fused electrical supply is required. Note: Time delay fuse or circuit breaker is recommended.
•not used by anyone unable to operate it properly.
•used only for its intended purpose.
•properly maintained.
•SAVE THESE INSTRUCTIONS•
4
Initial Start Up
1.Turn on the water supply.
2.Switch on the electrical power.
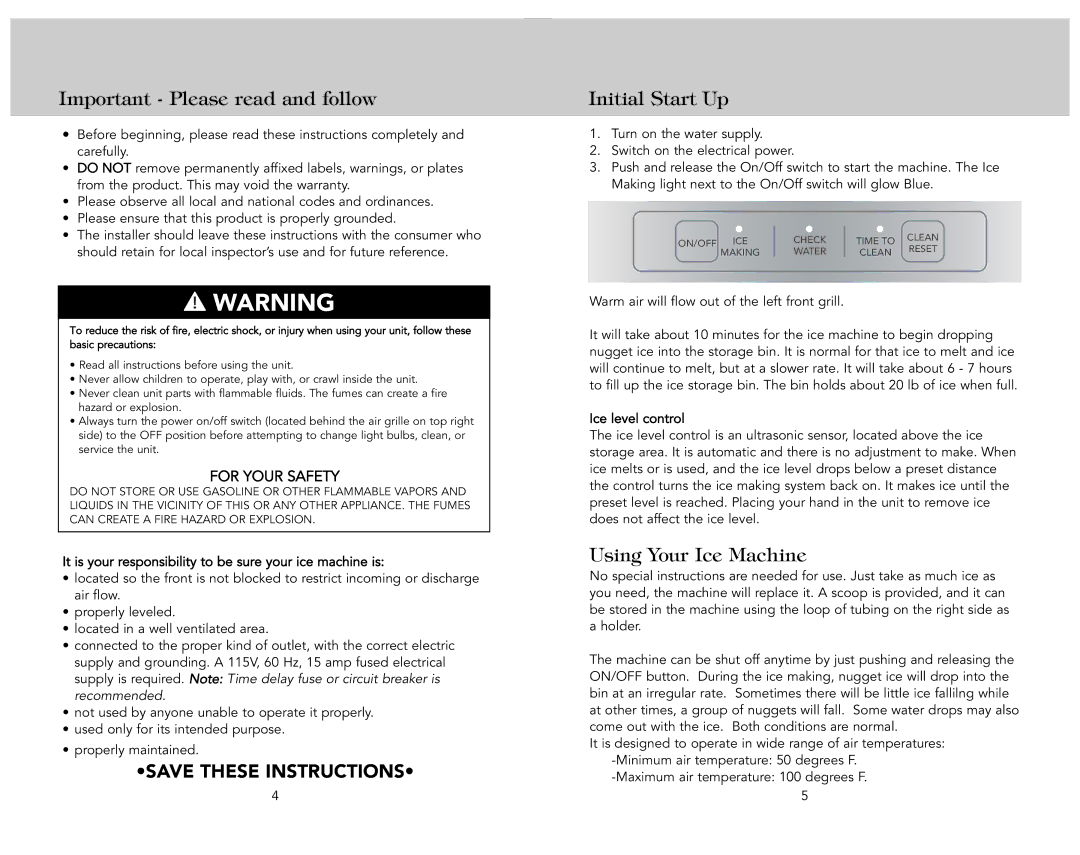
3.Push and release the On/Off switch to start the machine. The Ice Making light next to the On/Off switch will glow Blue.
ON/OFF ICE | CHECK | TIME TO | CLEAN |
| |||
MAKING | WATER | CLEAN RESET | |
Warm air will flow out of the left front grill.
It will take about 10 minutes for the ice machine to begin dropping nugget ice into the storage bin. It is normal for that ice to melt and ice will continue to melt, but at a slower rate. It will take about 6 - 7 hours to fill up the ice storage bin. The bin holds about 20 lb of ice when full.
Ice level control
The ice level control is an ultrasonic sensor, located above the ice storage area. It is automatic and there is no adjustment to make. When ice melts or is used, and the ice level drops below a preset distance the control turns the ice making system back on. It makes ice until the preset level is reached. Placing your hand in the unit to remove ice does not affect the ice level.
Using Your Ice Machine
No special instructions are needed for use. Just take as much ice as you need, the machine will replace it. A scoop is provided, and it can be stored in the machine using the loop of tubing on the right side as a holder.
The machine can be shut off anytime by just pushing and releasing the ON/OFF button. During the ice making, nugget ice will drop into the bin at an irregular rate. Sometimes there will be little ice fallilng while at other times, a group of nuggets will fall. Some water drops may also come out with the ice. Both conditions are normal.
It is designed to operate in wide range of air temperatures: