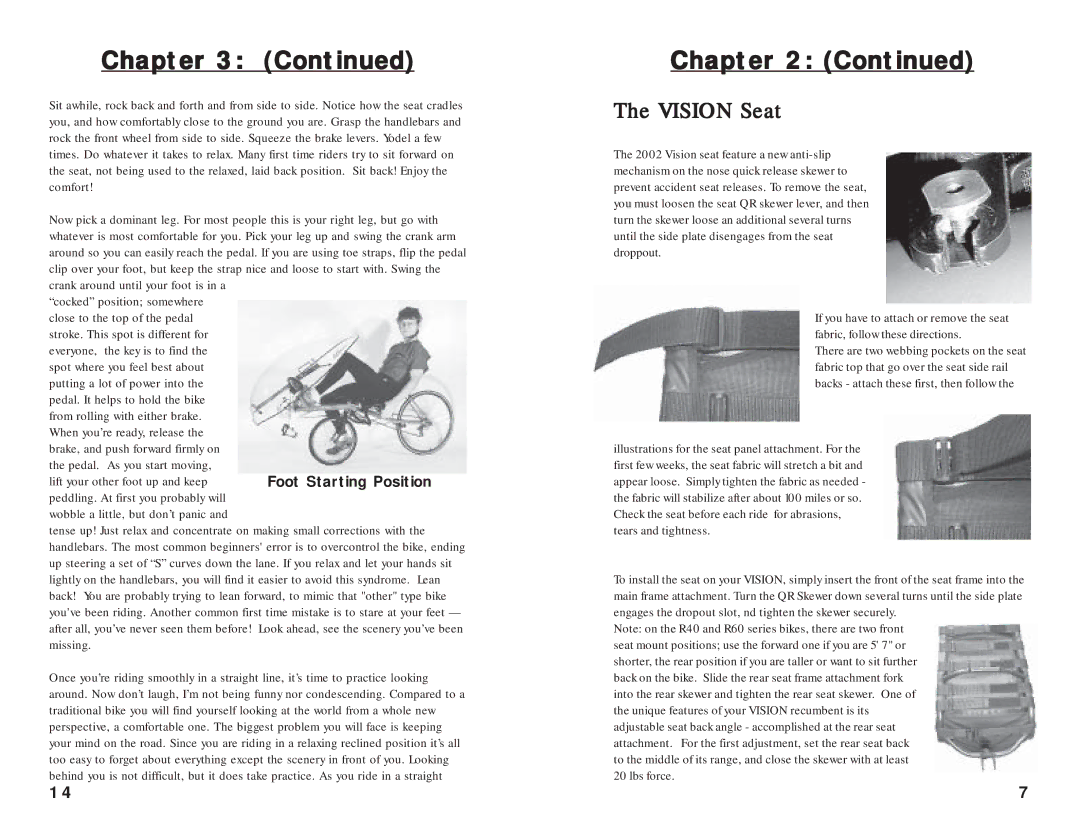
Foot Starting Position

Chapter 3: (Continued)

Sit awhile, rock back and forth and from side to side. Notice how the seat cradles you, and how comfortably close to the ground you are. Grasp the handlebars and rock the front wheel from side to side. Squeeze the brake levers. Yodel a few times. Do whatever it takes to relax. Many first time riders try to sit forward on the seat, not being used to the relaxed, laid back position. Sit back! Enjoy the comfort!

Now pick a dominant leg. For most people this is your right leg, but go with whatever is most comfortable for you. Pick your leg up and swing the crank arm around so you can easily reach the pedal. If you are using toe straps, flip the pedal clip over your foot, but keep the strap nice and loose to start with. Swing the crank around until your foot is in a

“cocked” position; somewhere close to the top of the pedal stroke. This spot is different for everyone, the key is to find the spot where you feel best about putting a lot of power into the pedal. It helps to hold the bike from rolling with either brake. When you’re ready, release the brake, and push forward firmly on the pedal. As you start moving, lift your other foot up and keep peddling. At first you probably will wobble a little, but don’t panic and

tense up! Just relax and concentrate on making small corrections with the handlebars. The most common beginners' error is to overcontrol the bike, ending up steering a set of “S” curves down the lane. If you relax and let your hands sit lightly on the handlebars, you will find it easier to avoid this syndrome. Lean back! You are probably trying to lean forward, to mimic that "other" type bike you've been riding. Another common first time mistake is to stare at your feet — after all, you’ve never seen them before! Look ahead, see the scenery you’ve been missing.

Once you’re riding smoothly in a straight line, it’s time to practice looking around. Now don’t laugh, I’m not being funny nor condescending. Compared to a traditional bike you will find yourself looking at the world from a whole new perspective, a comfortable one. The biggest problem you will face is keeping your mind on the road. Since you are riding in a relaxing reclined position it’s all too easy to forget about everything except the scenery in front of you. Looking behind you is not difficult, but it does take practice. As you ride in a straight

Chapter 2: (Continued)

The VISION Seat

The 2002 Vision seat feature a new anti-slip mechanism on the nose quick release skewer to prevent accident seat releases. To remove the seat, you must loosen the seat QR skewer lever, and then turn the skewer loose an additional several turns until the side plate disengages from the seat droppout.

If you have to attach or remove the seat fabric, follow these directions.

There are two webbing pockets on the seat fabric top that go over the seat side rail backs - attach these first, then follow the

illustrations for the seat panel attachment. For the first few weeks, the seat fabric will stretch a bit and appear loose. Simply tighten the fabric as needed - the fabric will stabilize after about 100 miles or so. Check the seat before each ride for abrasions, tears and tightness.

To install the seat on your VISION, simply insert the front of the seat frame into the main frame attachment. Turn the QR Skewer down several turns until the side plate engages the dropout slot, nd tighten the skewer securely.

Note: on the R40 and R60 series bikes, there are two front seat mount positions; use the forward one if you are 5' 7" or shorter, the rear position if you are taller or want to sit further back on the bike. Slide the rear seat frame attachment fork into the rear skewer and tighten the rear seat skewer. One of the unique features of your VISION recumbent is its adjustable seat back angle - accomplished at the rear seat attachment. For the first adjustment, set the rear seat back to the middle of its range, and close the skewer with at least 20 lbs force.

14

7

Page 7
Image 7
Vision Fitness R50, R68, R44, R45, R54, R65, R64, R55, R40 manual Vision Seat

R40, R65, R55, R54, R50 specifications

Vision Fitness has established itself as a prominent brand in the realm of fitness equipment, delivering high-quality and effective machines for avid fitness enthusiasts and casual users alike. The R44, R45, R68, R64, and R50 recumbent bikes are a testament to the brand's commitment to innovation, performance, and user comfort, making them excellent choices for home workouts.

The Vision Fitness R44 and R45 models are designed with user-friendly features that cater to a wide range of fitness levels. Both bikes come equipped with adjustable seating and handlebars, ensuring that users can find their ideal position for maximum comfort during workouts. The R44 features a durable frame that supports up to 300 pounds, while the R45 boasts a broader range of resistance levels, providing a customizable workout experience.

Transitioning to the R64 model, this recumbent bike incorporates advanced technological features such as a built-in Bluetooth connection that syncs with popular fitness apps. Additionally, its oversized LCD display provides real-time feedback on metrics such as heart rate, speed, distance, and calories burned. The R64’s compact design makes it easy to fit into spaces of various sizes, making it a practical choice for home gyms.

Meanwhile, the R68 model takes comfort to the next level with its generous padding and ergonomic design. This bike also focuses on enhancing exercise safety, featuring a step-through frame that enables easy access for individuals with mobility challenges. It includes a variety of pre-set workout programs that cater to different fitness goals, whether it's weight loss, endurance training, or rehabilitation.

The cornerstone of these models, including the R50, is their magnetic resistance system, which allows for smooth and quiet operation. This feature is essential for users who prefer to work out while watching television or listening to music without the distraction of mechanical noise. The R50 also stands out due to its customizable user profiles, allowing multiple users to track their progress individually.

In summary, the Vision Fitness R44, R45, R68, R64, and R50 recumbent bikes encompass a blend of comfort, technology, and design. Each model offers unique features tailored to diverse fitness needs, ensuring that users can find a recumbent bike that perfectly suits their lifestyle. With their robust construction and innovative features, these bikes are an excellent investment for anyone seeking to enhance their fitness journey at home.