STEP 5 BLACK BAG
2f
5b
5a
1b 5g
5f
1a
5c
5e
5d
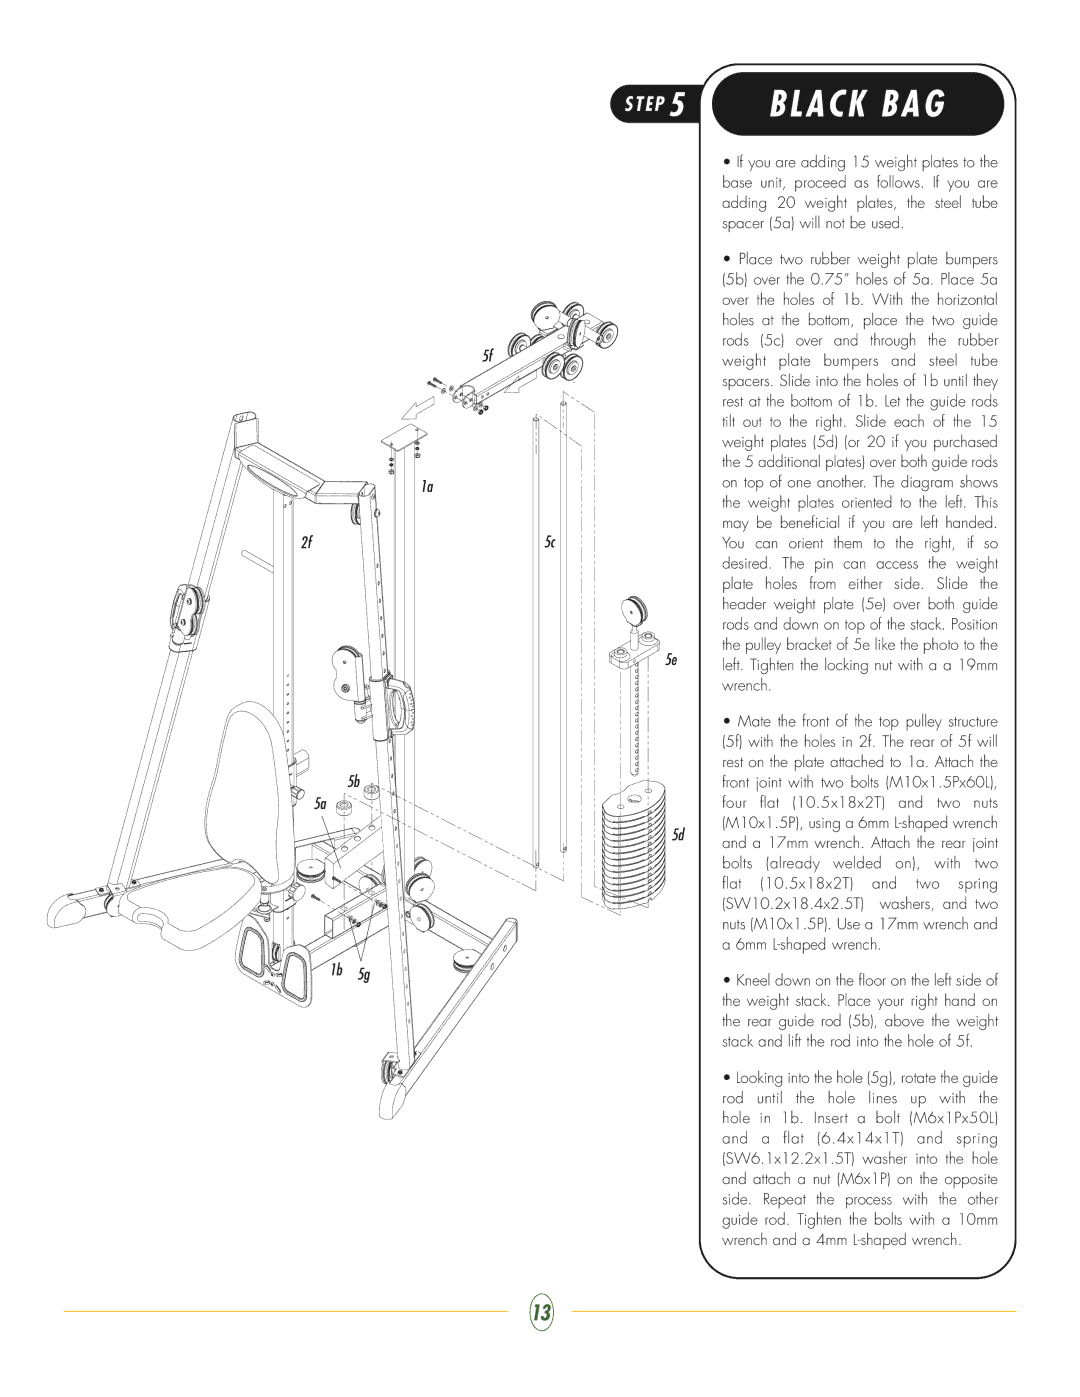
•If you are adding 15 weight plates to the base unit, proceed as follows. If you are adding 20 weight plates, the steel tube spacer (5a) will not be used.
•Place two rubber weight plate bumpers (5b) over the 0.75” holes of 5a. Place 5a over the holes of 1b. With the horizontal holes at the bottom, place the two guide rods (5c) over and through the rubber weight plate bumpers and steel tube spacers. Slide into the holes of 1b until they rest at the bottom of 1b. Let the guide rods tilt out to the right. Slide each of the 15 weight plates (5d) (or 20 if you purchased the 5 additional plates) over both guide rods on top of one another. The diagram shows the weight plates oriented to the left. This may be beneficial if you are left handed. You can orient them to the right, if so desired. The pin can access the weight plate holes from either side. Slide the header weight plate (5e) over both guide rods and down on top of the stack. Position the pulley bracket of 5e like the photo to the left. Tighten the locking nut with a a 19mm wrench.
•Mate the front of the top pulley structure (5f) with the holes in 2f. The rear of 5f will rest on the plate attached to 1a. Attach the front joint with two bolts (M10x1.5Px60L), four flat (10.5x18x2T) and two nuts (M10x1.5P), using a 6mm
•Kneel down on the floor on the left side of the weight stack. Place your right hand on the rear guide rod (5b), above the weight stack and lift the rod into the hole of 5f.
•Looking into the hole (5g), rotate the guide rod until the hole lines up with the hole in 1b. Insert a bolt (M6x1Px50L) and a flat (6.4x14x1T) and spring (SW6.1x12.2x1.5T) washer into the hole and attach a nut (M6x1P) on the opposite side. Repeat the process with the other guide rod. Tighten the bolts with a 10mm wrench and a 4mm
13
