31VISIONEER ONETOUCH 8700 SCANNER INSTALLATION GUIDE
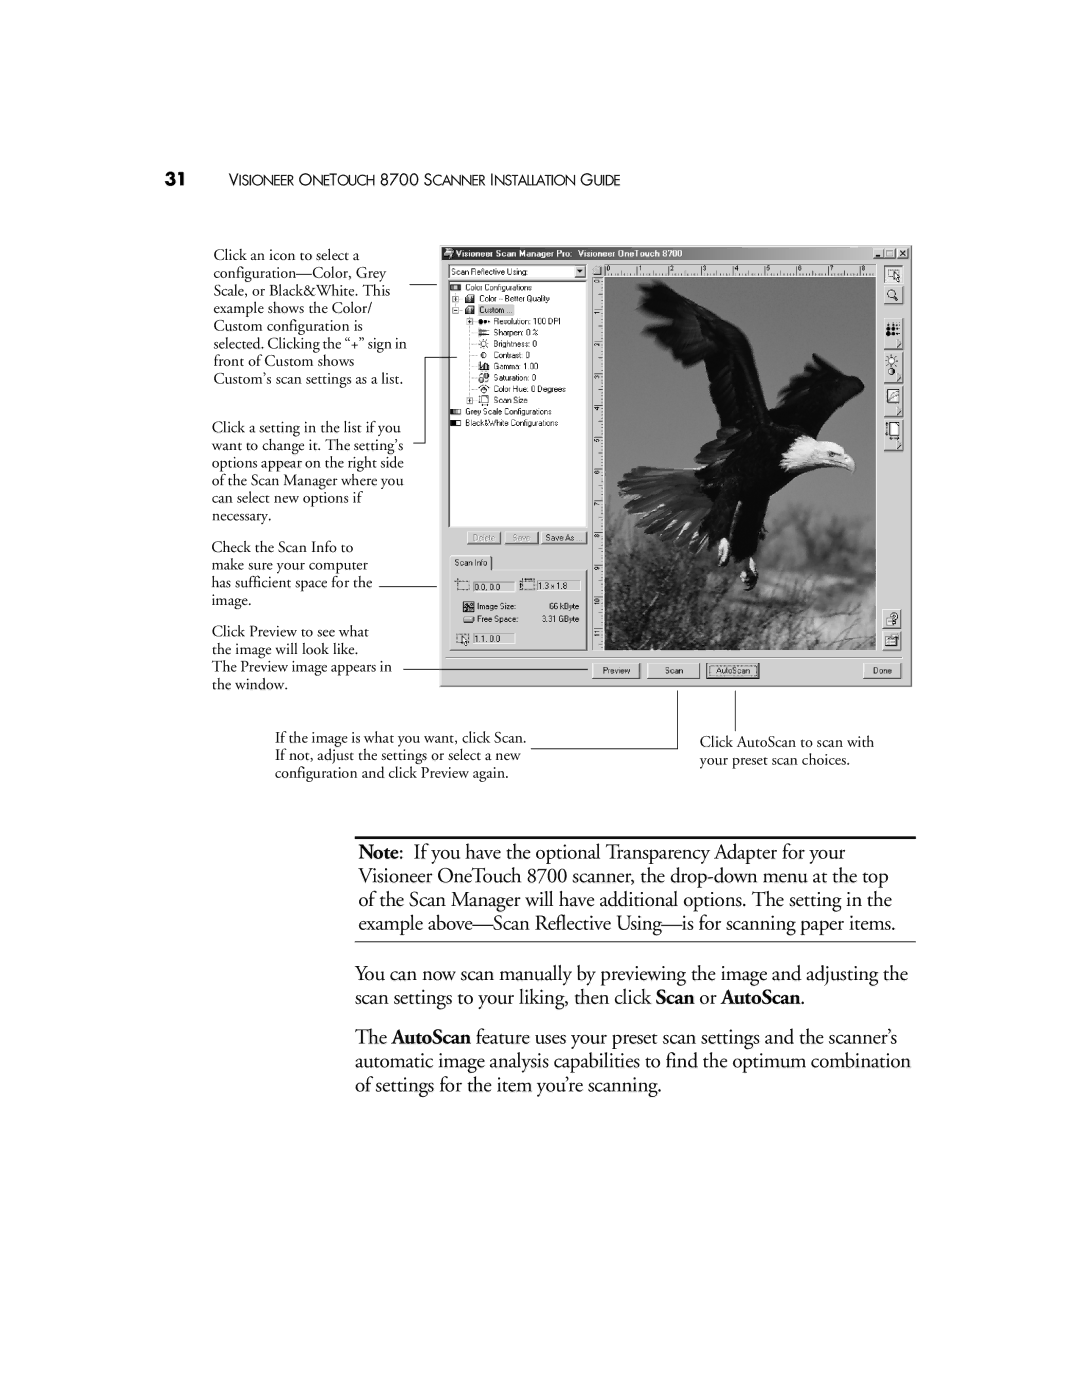
Click an icon to select a
Click a setting in the list if you want to change it. The setting’s options appear on the right side of the Scan Manager where you can select new options if necessary.
Check the Scan Info to make sure your computer has sufficient space for the image.
Click Preview to see what the image will look like.
The Preview image appears in the window.
If the image is what you want, click Scan. If not, adjust the settings or select a new configuration and click Preview again.
Click AutoScan to scan with your preset scan choices.
Note: If you have the optional Transparency Adapter for your Visioneer OneTouch 8700 scanner, the
You can now scan manually by previewing the image and adjusting the scan settings to your liking, then click Scan or AutoScan.
The AutoScan feature uses your preset scan settings and the scanner’s automatic image analysis capabilities to find the optimum combination of settings for the item you’re scanning.