
8300s specifications
The Vivitar 8300s is a compact digital camera renowned for its user-friendly design and impressive functionality. Targeted at photography enthusiasts and casual users alike, this camera has carved a niche for itself by combining simplicity with advanced features.At the heart of the Vivitar 8300s is a powerful 8.1-megapixel sensor, allowing for high-resolution images that maintain clarity and detail even when enlarged. The camera offers a variety of shooting modes, providing versatility for different photography styles. Features such as Auto, Manual, and Scene modes make it accessible to novice photographers while also catering to more experienced users seeking to exert creative control.
One of the standout features of the Vivitar 8300s is its 3-inch LCD display. This large screen allows for easy framing and reviewing of images, while also supporting intuitive menu navigation. The display is bright and clear, making it easier to shoot in various lighting conditions. Additionally, the camera's compact size makes it highly portable and ideal for travel, ensuring that users can capture memories on the go.
The Vivitar 8300s incorporates several shooting technologies that enhance its performance. It features a built-in flash for low-light conditions, ensuring that subjects remain well-lit, while the optical zoom allows for distance photography without sacrificing image quality. Users appreciate the optical image stabilization feature, which reduces motion blur, particularly beneficial for capturing sharp images in dynamic situations.
Furthermore, the camera supports video recording, allowing users to capture moments in motion. With adjustable settings, users can record at various resolutions, making it suitable for different needs, from personal memories to social media sharing.
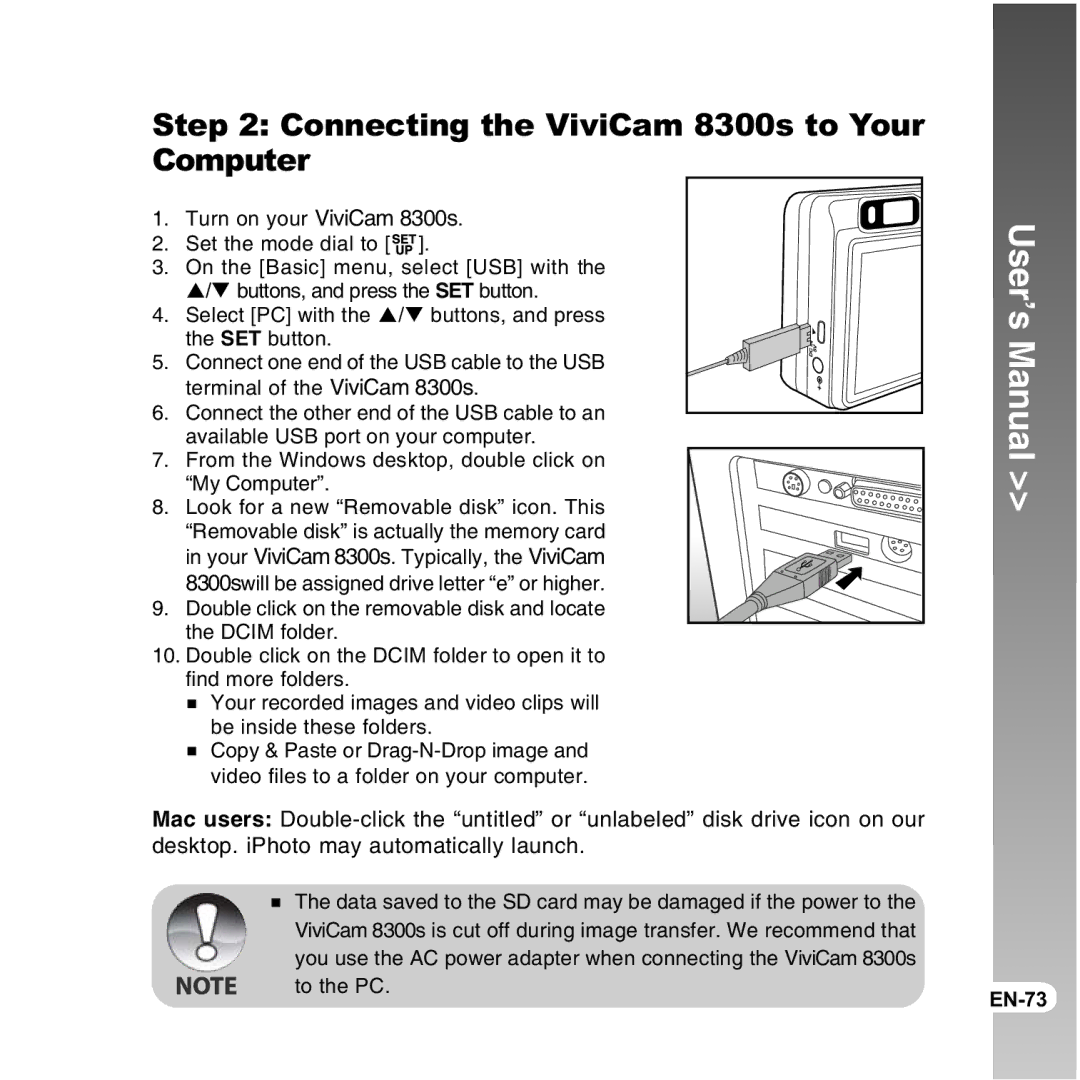
The battery life of the Vivitar 8300s is another advantage, with the camera capable of taking numerous shots on a single charge. For connectivity and sharing, it supports USB output, making it easy to transfer images to a computer or other devices for editing and sharing.
In conclusion, the Vivitar 8300s combines an impressive set of features with ease of use, making it a great choice for anyone looking to explore photography. Its compact design, versatile shooting modes, and strong performance in various conditions position it as a solid option for both budding photographers and seasoned users seeking a reliable digital camera.