English
4Hardware Installation
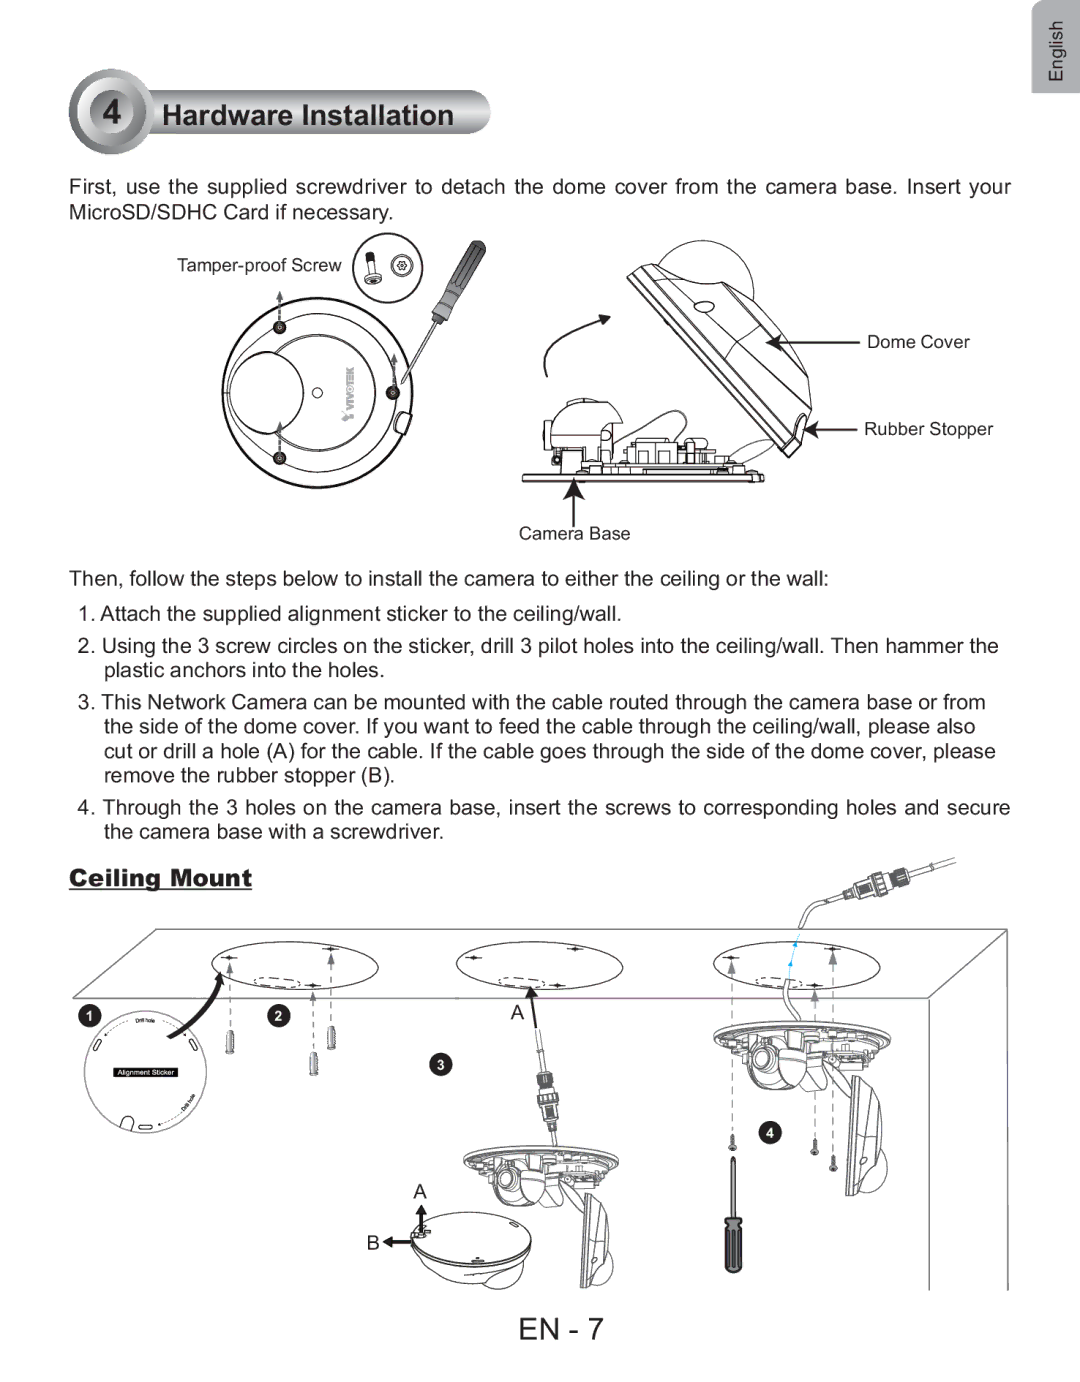
First, use the supplied screwdriver to detach the dome cover from the camera base. Insert your MicroSD/SDHC Card if necessary.
![]()
![]()
![]() Dome Cover
Dome Cover
![]()
![]() Rubber Stopper
Rubber Stopper
Camera Base
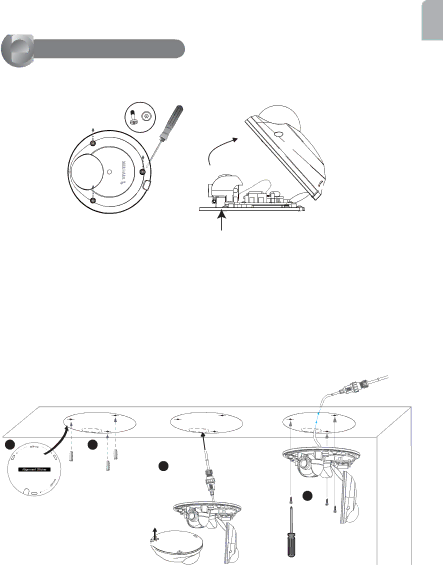
Then, follow the steps below to install the camera to either the ceiling or the wall:
1.Attach the supplied alignment sticker to the ceiling/wall.
2.Using the 3 screw circles on the sticker, drill 3 pilot holes into the ceiling/wall. Then hammer the plastic anchors into the holes.
3.This Network Camera can be mounted with the cable routed through the camera base or from the side of the dome cover. If you want to feed the cable through the ceiling/wall, please also cut or drill a hole (A) for the cable. If the cable goes through the side of the dome cover, please remove the rubber stopper (B).
4.Through the 3 holes on the camera base, insert the screws to corresponding holes and secure the camera base with a screwdriver.
Ceiling Mount
1 | 2 | A |
|
| 3 |
4
A
B ![]()
![]()
![]()
![]()
![]()
EN - 7