VIVOTEK
Applications > Motion detection
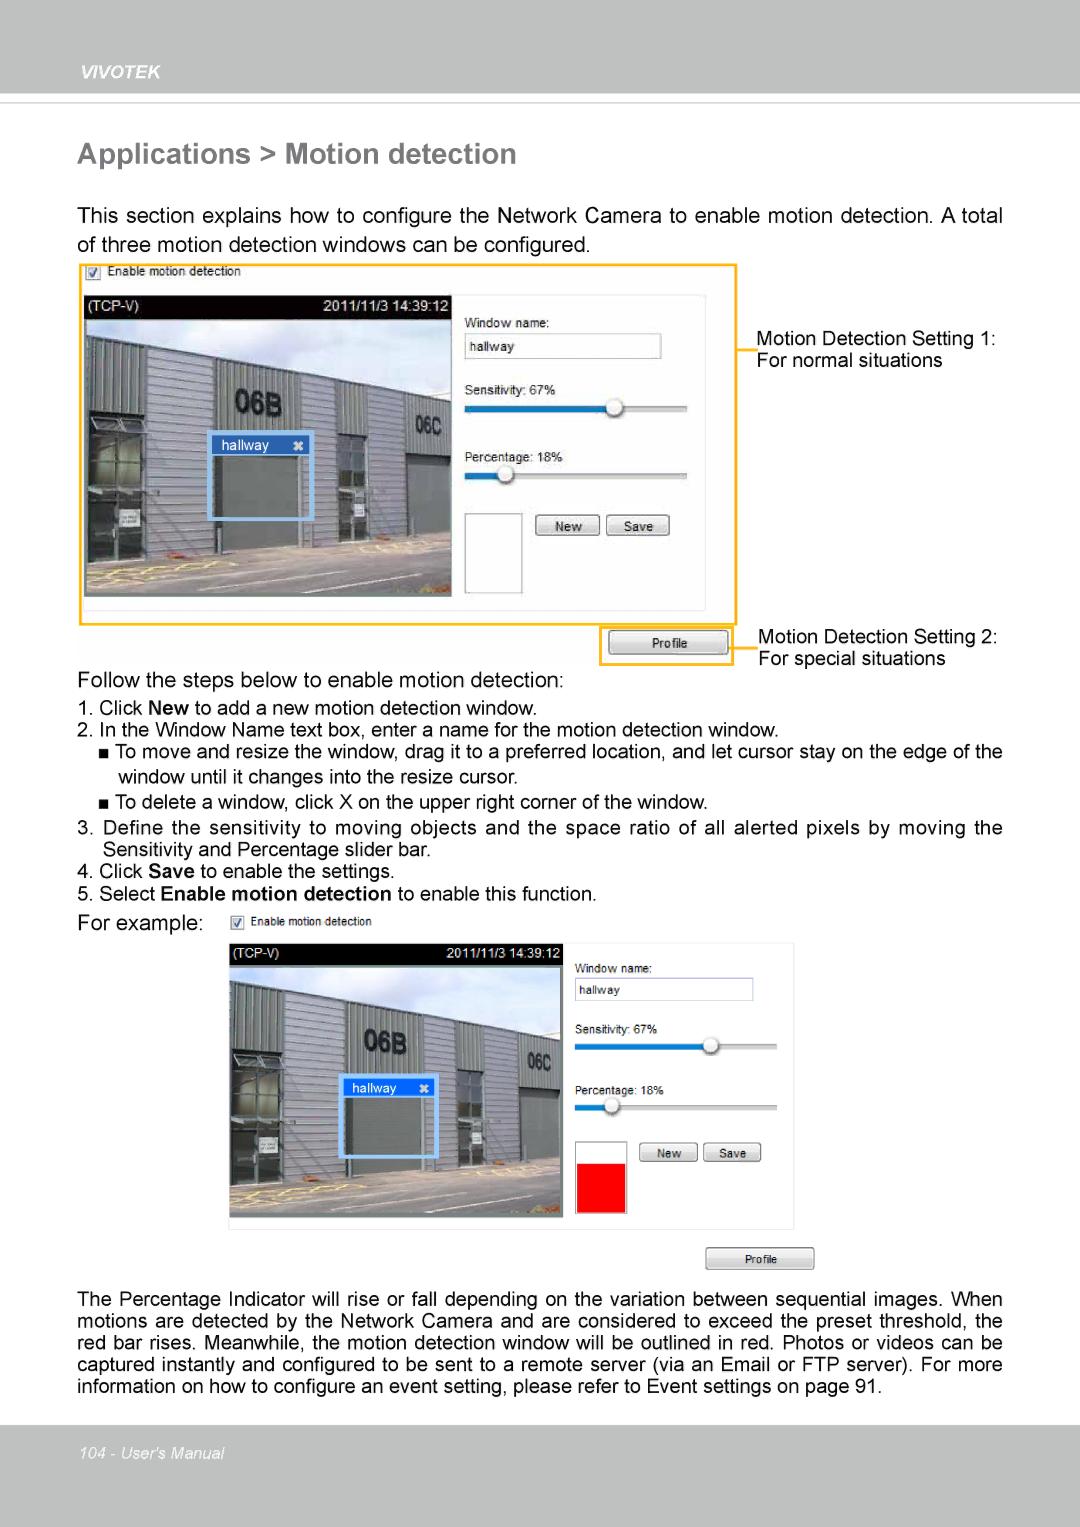
This section explains how to configure the Network Camera to enable motion detection. A total of three motion detection windows can be configured.
2010/12/10 17:08:56
hallway
Motion Detection Setting 1: For normal situations
Follow the steps below to enable motion detection: Follow the steps below to enable motion detection:
Motion Detection Setting 2:
![]() For special situations
For special situations
1.Click New to add a new motion detection window.
2.In the Window Name text box, enter a name for the motion detection window.
■To move and resize the window, drag it to a preferred location, and let cursor stay on the edge of the
window until it changes into the resize cursor.
■To delete a window, click X on the upper right corner of the window.
3.Define the sensitivity to moving objects and the space ratio of all alerted pixels by moving the Sensitivity and Percentage slider bar.
4.Click Save to enable the settings.
5.Select Enable motion detection to enable this function.
For example:
| 2010/12/10 17:08:56 |
hallway
The Percentage Indicator will rise or fall depending on the variation between sequential images. When motions are detected by the Network Camera and are considered to exceed the preset threshold, the red bar rises. Meanwhile, the motion detection window will be outlined in red. Photos or videos can be captured instantly and configured to be sent to a remote server (via an Email or FTP server). For more information on how to configure an event setting, please refer to Event settings on page 91.
104 - User's Manual
