VIZIO M220NV User Manual
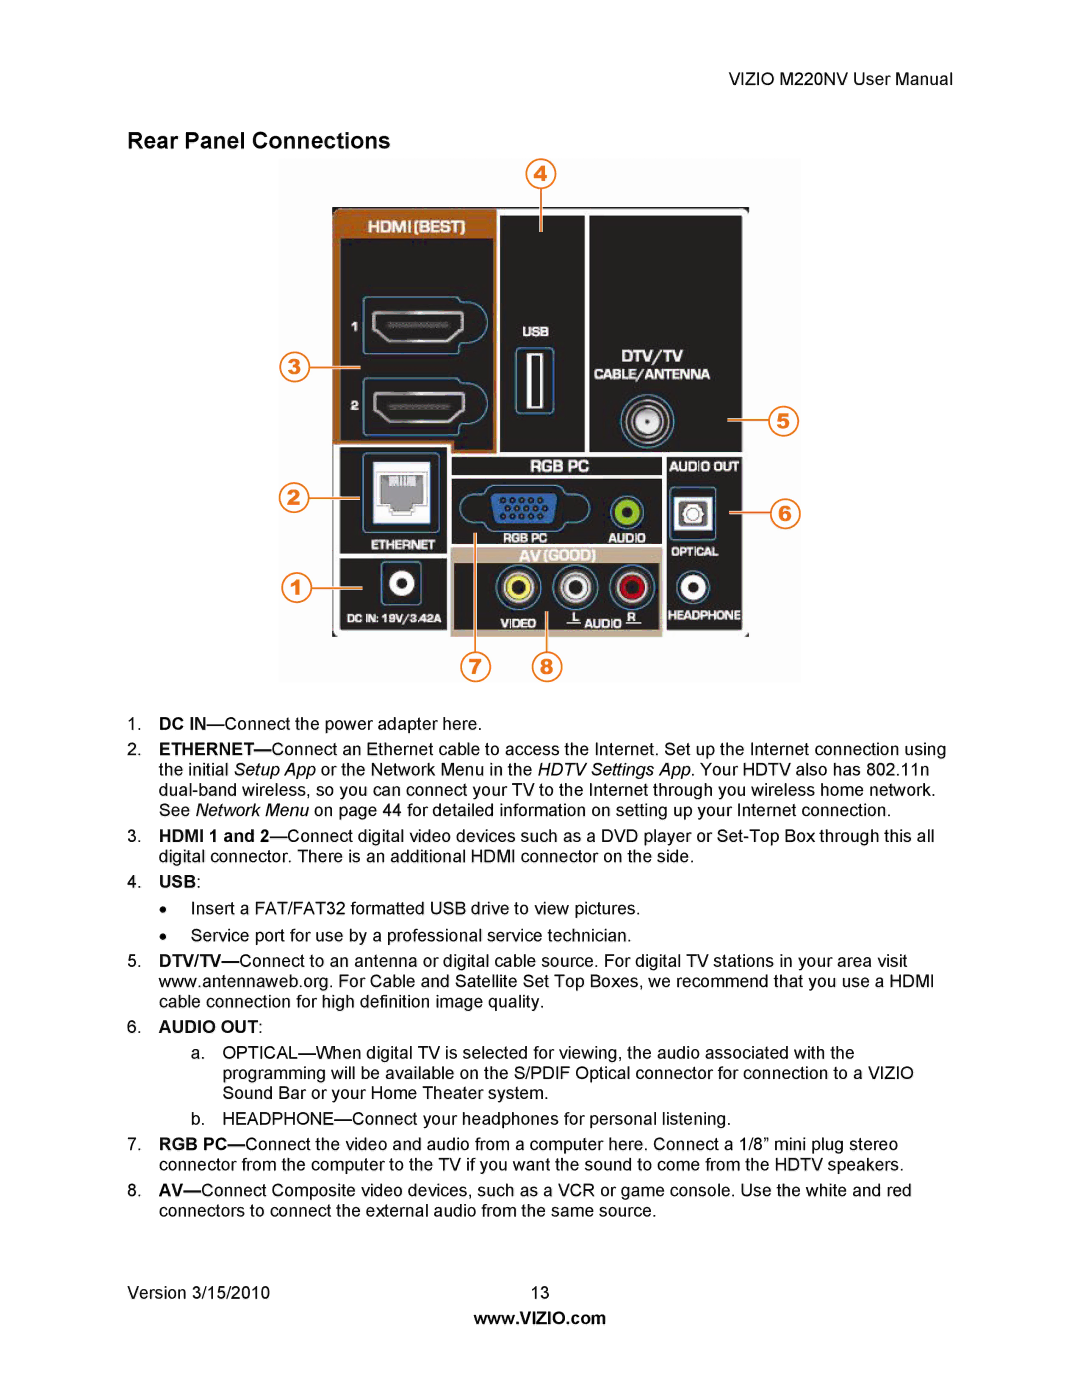
Rear Panel Connections
1.DC IN—Connect the power adapter here.
2.ETHERNET—Connect an Ethernet cable to access the Internet. Set up the Internet connection using the initial Setup App or the Network Menu in the HDTV Settings App. Your HDTV also has 802.11n dual-band wireless, so you can connect your TV to the Internet through you wireless home network. See Network Menu on page 44 for detailed information on setting up your Internet connection.
3.HDMI 1 and 2—Connect digital video devices such as a DVD player or Set-Top Box through this all digital connector. There is an additional HDMI connector on the side.
4.USB:
∙Insert a FAT/FAT32 formatted USB drive to view pictures.
∙Service port for use by a professional service technician.
5.DTV/TV—Connect to an antenna or digital cable source. For digital TV stations in your area visit www.antennaweb.org. For Cable and Satellite Set Top Boxes, we recommend that you use a HDMI cable connection for high definition image quality.
6.AUDIO OUT:
a.OPTICAL—When digital TV is selected for viewing, the audio associated with the programming will be available on the S/PDIF Optical connector for connection to a VIZIO Sound Bar or your Home Theater system.
b.HEADPHONE—Connect your headphones for personal listening.
7.RGB PC—Connect the video and audio from a computer here. Connect a 1/8” mini plug stereo connector from the computer to the TV if you want the sound to come from the HDTV speakers.
8.AV—Connect Composite video devices, such as a VCR or game console. Use the white and red connectors to connect the external audio from the same source.
Version 3/15/2010 | 13 |
| www.VIZIO.com |

