Wayne ISP40 Pump Installation, Multiple pump, systems, Battery Information, Troubleshooting Chart

Models: ISP40

1 4
Download 4 pages 45.27 Kb
Page 2
Image 2
Pump Installation

Operating Instructions And Parts Manual


Model ISP40

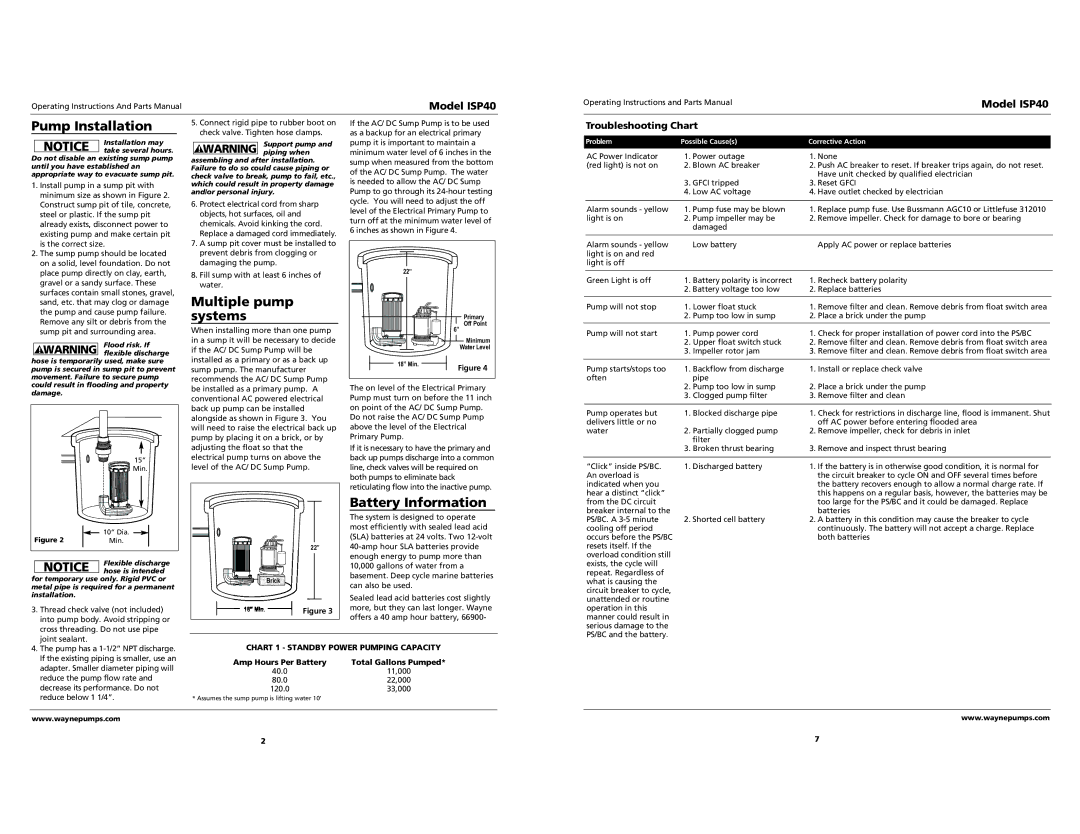
Pump Installation

5. Connect rigid pipe to rubber boot on

If the AC/ DC Sump Pump is to be used

check valve. Tighten hose clamps.

as a backup for an electrical primary


NOTICE

Installation may

Support pump and

pump it is important to maintain a

take several hours.

! WARNING piping when

minimum water level of 6 inches in the

Do not disable an existing sump pump

assembling and after installation.

sump when measured from the bottom

until you have established an

Failure to do so could cause piping or

of the AC/ DC Sump Pump. The water

appropriate way to evacuate sump pit.

check valve to break, pump to fail, etc.,

is needed to allow the AC/ DC Sump

1. Install pump in a sump pit with

which could result in property damage

Pump to go through its 24-hour testing

minimum size as shown in Figure 2.

and/or personal injury.


6. Protect electrical cord from sharp

cycle. You will need to adjust the off

Construct sump pit of tile, concrete,

level of the Electrical Primary Pump to

steel or plastic. If the sump pit

objects, hot surfaces, oil and


turn off at the minimum water level of

already exists, disconnect power to

chemicals. Avoid kinking the cord.

6 inches as shown in Figure 4.


existing pump and make certain pit

Replace a damaged cord immediately.


is the correct size.

7. A sump pit cover must be installed to


2. The sump pump should be located

prevent debris from clogging or


on a solid, level foundation. Do not

damaging the pump.


22”


place pump directly on clay, earth,

8. Fill sump with at least 6 inches of


gravel or a sandy surface. These

water.


surfaces contain small stones, gravel,

Multiple pump


sand, etc. that may clog or damage


the pump and cause pump failure.

systems


Primary

Remove any silt or debris from the


Off Point

sump pit and surrounding area.

When installing more than one pump

6”

! WARNING

Flood risk. If

in a sump it will be necessary to decide


Minimum

if the AC/ DC Sump Pump will be


Water Level

flexible discharge


hose is temporarily used, make sure

installed as a primary or as a back up

18” Min.

Figure 4

pump is secured in sump pit to prevent

sump pump. The manufacturer


movement. Failure to secure pump

recommends the AC/ DC Sump Pump


could result in flooding and property

be installed as a primary pump. A

The on level of the Electrical Primary

damage.


conventional AC powered electrical

Pump must turn on before the 11 inch


back up pump can be installed

on point of the AC/ DC Sump Pump.


alongside as shown in Figure 3. You

Do not raise the AC/ DC Sump Pump


will need to raise the electrical back up

above the level of the Electrical


pump by placing it on a brick, or by

Primary Pump.


adjusting the float so that the


If it is necessary to have the primary and


15”

electrical pump turns on above the

back up pumps discharge into a common


Min.

level of the AC/ DC Sump Pump.

line, check valves will be required on


both pumps to eliminate back


reticulating flow into the inactive pump.


Battery Information


The system is designed to operate


10” Dia.


most efficiently with sealed lead acid

Figure 2


(SLA) batteries at 24 volts. Two 12-volt

Min.


22”

40-amp hour SLA batteries provide


NOTICE

Flexible discharge


enough energy to pump more than


10,000 gallons of water from a

hose is intended


for temporary use only. Rigid PVC or

Brick


basement. Deep cycle marine batteries


can also be used.


metal pipe is required for a permanent


installation.


Sealed lead acid batteries cost slightly


3. Thread check valve (not included)

18” Min.

Figure 3

more, but they can last longer. Wayne

into pump body. Avoid stripping or


offers a 40 amp hour battery, 66900-

cross threading. Do not use pipe


joint sealant.


CHART 1 - STANDBY POWER PUMPING CAPACITY


4. The pump has a 1-1/2” NPT discharge.


If the existing piping is smaller, use an

Amp Hours Per Battery

Total Gallons Pumped*


adapter. Smaller diameter piping will


40.0


11,000


reduce the pump flow rate and


80.0


22,000


decrease its performance. Do not

120.0


33,000


reduce below 1 1/4”.

* Assumes the sump pump is lifting water 10’


www.waynepumps.com


Operating Instructions and Parts Manual


Model ISP40


Troubleshooting Chart


Problem

Possible Cause(s)

Corrective Action


AC Power Indicator

1. Power outage

1. None


(red light) is not on

2. Blown AC breaker

2. Push AC breaker to reset. If breaker trips again, do not reset.


Have unit checked by qualified electrician


3. GFCI tripped

3. Reset GFCI


4. Low AC voltage

4. Have outlet checked by electrician


Alarm sounds - yellow

1. Pump fuse may be blown

1. Replace pump fuse. Use Bussmann AGC10 or Littlefuse 312010


light is on

2. Pump impeller may be

2. Remove impeller. Check for damage to bore or bearing


damaged


Alarm sounds - yellow


Low battery


Apply AC power or replace batteries


light is on and red


light is off


Green Light is off

1.

Battery polarity is incorrect

1.

Recheck battery polarity


2. Battery voltage too low

2.

Replace batteries


Pump will not stop

1.

Lower float stuck

1.

Remove filter and clean. Remove debris from float switch area


2. Pump too low in sump

2. Place a brick under the pump


Pump will not start

1.

Pump power cord

1.

Check for proper installation of power cord into the PS/BC


2.

Upper float switch stuck

2.

Remove filter and clean. Remove debris from float switch area


3.

Impeller rotor jam

3.

Remove filter and clean. Remove debris from float switch area


Pump starts/stops too

1.

Backflow from discharge

1.

Install or replace check valve


often


pipe

2. Place a brick under the pump


2. Pump too low in sump


3.

Clogged pump filter

3.

Remove filter and clean


Pump operates but

1.

Blocked discharge pipe

1.

Check for restrictions in discharge line, flood is immanent. Shut


delivers little or no


off AC power before entering flooded area


water

2.

Partially clogged pump

2.

Remove impeller, check for debris in inlet


filter

3.

Remove and inspect thrust bearing


3.

Broken thrust bearing


“Click” inside PS/BC.

1. Discharged battery

1. If the battery is in otherwise good condition, it is normal for


An overload is


the circuit breaker to cycle ON and OFF several times before


indicated when you


the battery recovers enough to allow a normal charge rate. If


hear a distinct “click”


this happens on a regular basis, however, the batteries may be


from the DC circuit


too large for the PS/BC and it could be damaged. Replace


breaker internal to the


batteries


PS/BC. A 3-5 minute

2. Shorted cell battery

2. A battery in this condition may cause the breaker to cycle


cooling off period


continuously. The battery will not accept a charge. Replace


occurs before the PS/BC


both batteries


resets itself. If the


overload condition still


exists, the cycle will repeat. Regardless of what is causing the circuit breaker to cycle, unattended or routine operation in this manner could result in serious damage to the PS/BC and the battery.

www.waynepumps.com

2

7

Page 2
Image 2
Wayne specifications Pump Installation, Multiple pump, systems, Battery Information, Troubleshooting Chart, Model ISP40