OPERATING INSTRUCTIONS | 23 |
|
|
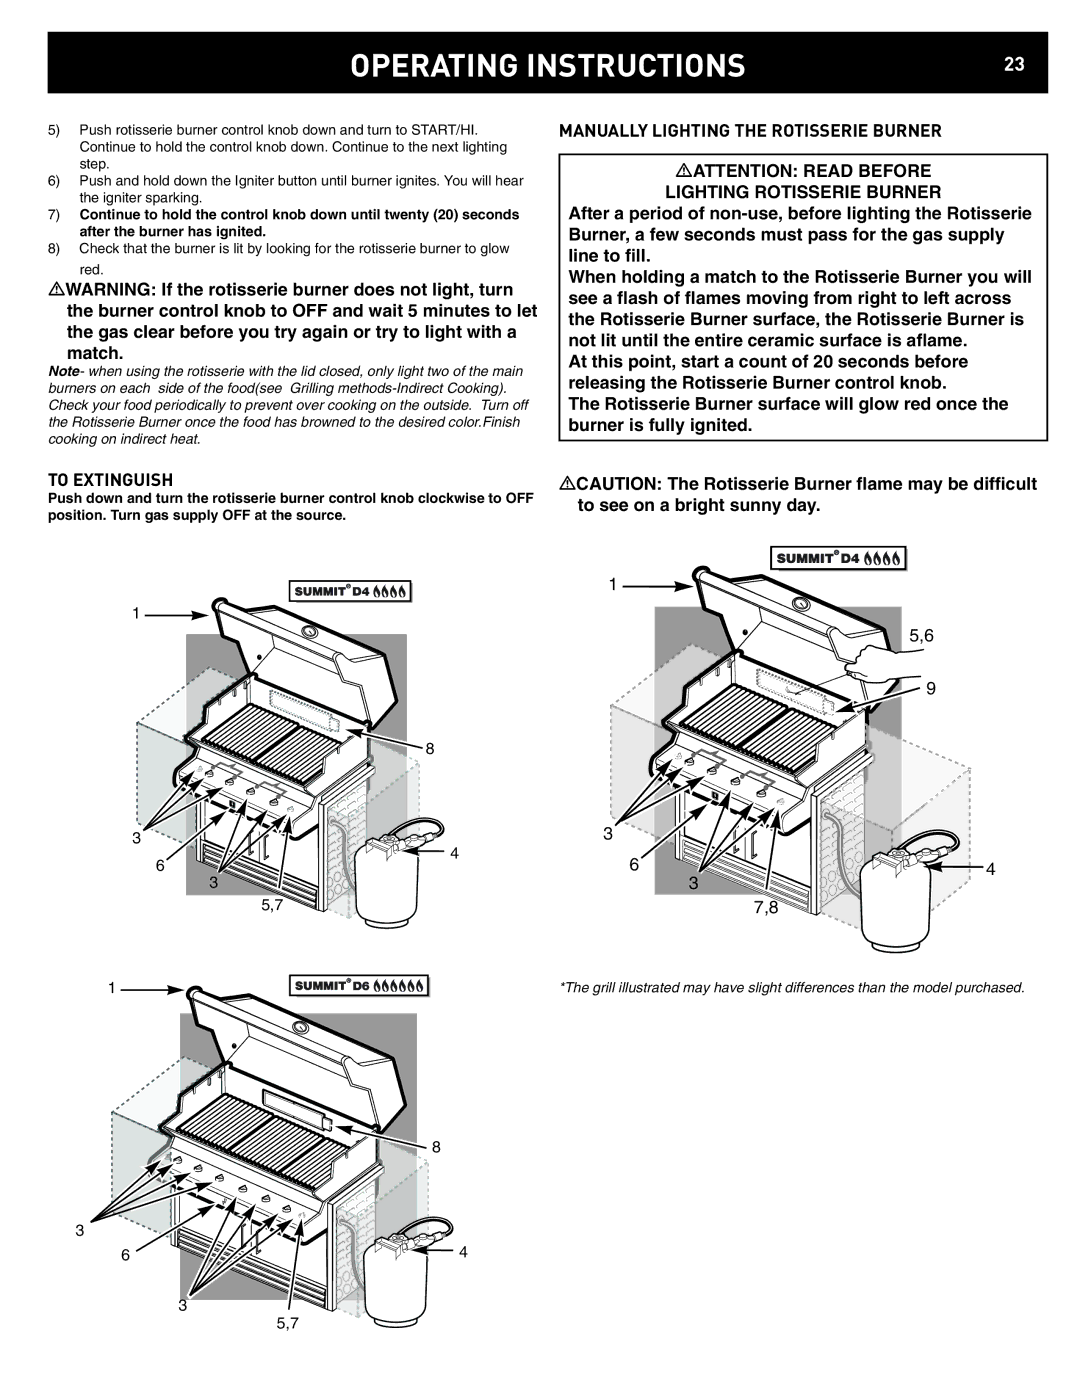
5)Push rotisserie burner control knob down and turn to START/HI. Continue to hold the control knob down. Continue to the next lighting step.
6)Push and hold down the Igniter button until burner ignites. You will hear the igniter sparking.
7)Continue to hold the control knob down until twenty (20) seconds after the burner has ignited.
8)Check that the burner is lit by looking for the rotisserie burner to glow
red.
WARNING: If the rotisserie burner does not light, turn the burner control knob to OFF and wait 5 minutes to let the gas clear before you try again or try to light with a match.
Note- when using the rotisserie with the lid closed, only light two of the main burners on each side of the food(see Grilling
TO EXTINGUISH
Push down and turn the rotisserie burner control knob clockwise to OFF position. Turn gas supply OFF at the source.
MANUALLY LIGHTING THE ROTISSERIE BURNER
ATTENTION: READ BEFORE LIGHTING ROTISSERIE BURNER
After a period of
When holding a match to the Rotisserie Burner you will see a flash of flames moving from right to left across the Rotisserie Burner surface, the Rotisserie Burner is not lit until the entire ceramic surface is aflame.
At this point, start a count of 20 seconds before releasing the Rotisserie Burner control knob.
The Rotisserie Burner surface will glow red once the burner is fully ignited.
CAUTION: The Rotisserie Burner flame may be difficult to see on a bright sunny day.
![]()
![]()
![]()
![]()
![]()
![]() D4
D4 ![]()
![]()
![]()
![]()
![]()
![]()
![]()
![]()
![]()
![]() D4
D4 ![]()
![]()
![]()
![]()
1 ![]()
![]()
![]()
![]()
![]() 8
8
| 3 |
|
|
|
|
| 4 | ||||
| 6 |
|
|
|
|
| 3 |
|
|
|
|
| 5,7 |
|
|
|
|
1 |
|
|
|
|
|
|
|
| D6 |
| |
|
|
|
| ||
|
|
|
| ||
![]()
![]()
![]() 8
8
3
6 | 4 |
1 ![]()
![]()
5,6
![]()
![]() 9
9
3
6 | 4 |
3
7,8
*The grill illustrated may have slight differences than the model purchased.
3
5,7
