Securing Whole Chicken/Fowl Meat | 6. Set the Rotisserie Shaft on the cooking box. Slide the |
squared end of the Rotisserie Shaft into the Motor.
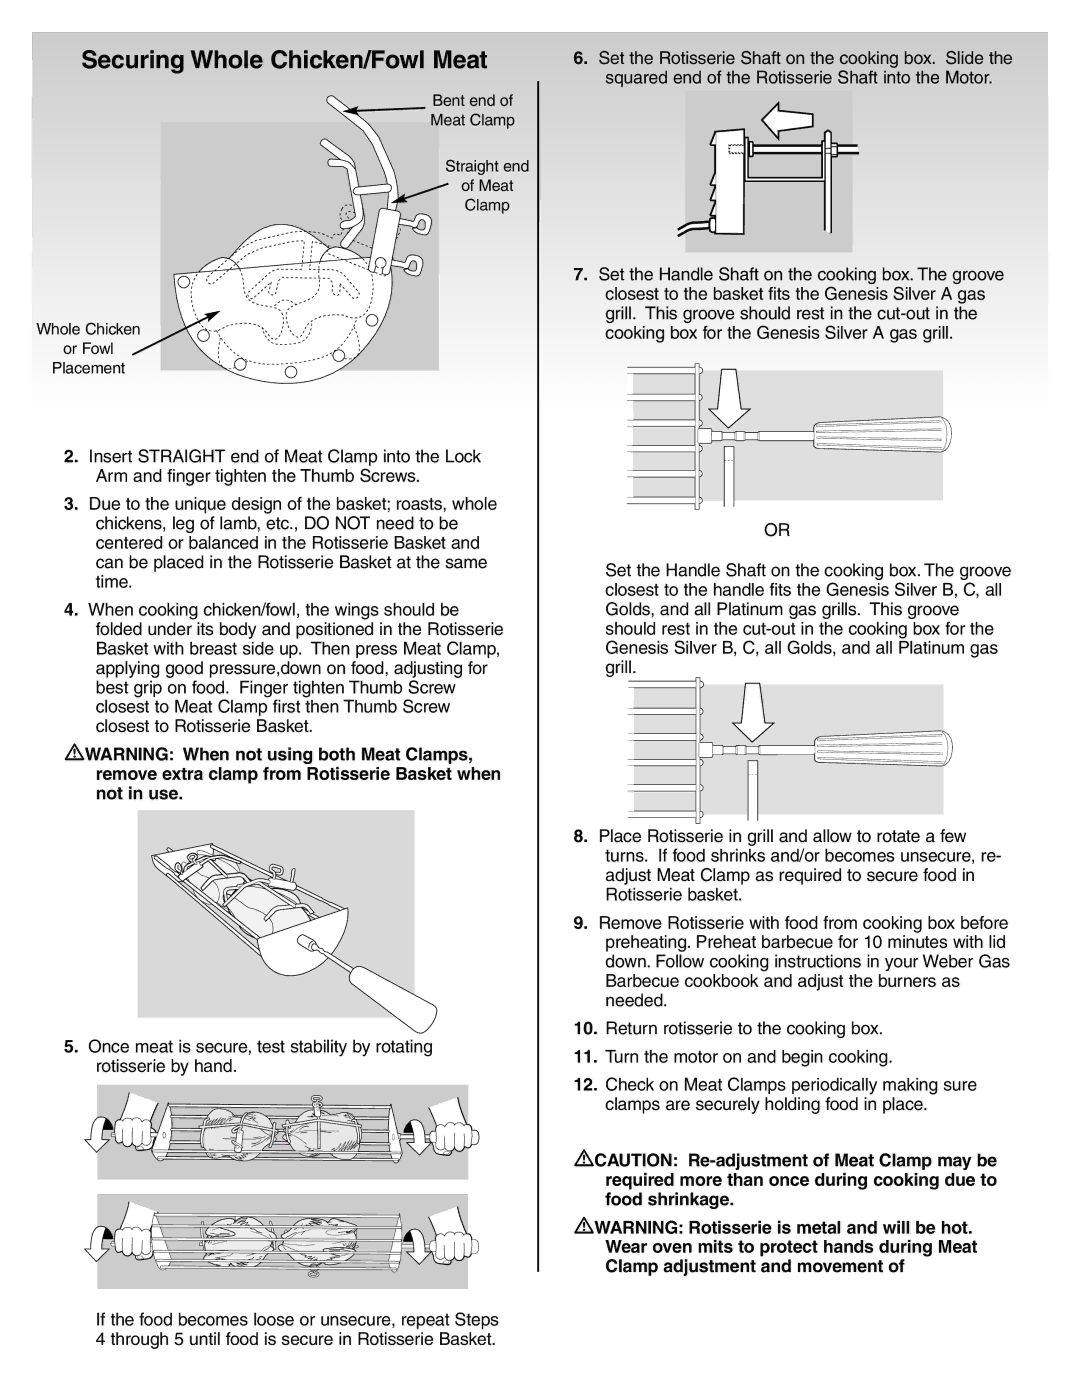
Bent end of
Meat Clamp
Straight end |
| |
of Meat |
| |
Clamp |
| |
| 7. Set the Handle Shaft on the cooking box. The groove | |
| closest to the basket fits the Genesis Silver A gas | |
Whole Chicken | grill. This groove should rest in the | |
cooking box for the Genesis Silver A gas grill. | ||
or Fowl |
| |
Placement |
| |
2. Insert STRAIGHT end of Meat Clamp into the Lock |
| |
Arm and finger tighten the Thumb Screws. |
| |
3. Due to the unique design of the basket; roasts, whole |
| |
chickens, leg of lamb, etc., DO NOT need to be | OR | |
centered or balanced in the Rotisserie Basket and | ||
| ||
can be placed in the Rotisserie Basket at the same | Set the Handle Shaft on the cooking box. The groove | |
time. | ||
closest to the handle fits the Genesis Silver B, C, all | ||
| ||
4. When cooking chicken/fowl, the wings should be | Golds, and all Platinum gas grills. This groove | |
folded under its body and positioned in the Rotisserie | should rest in the | |
Basket with breast side up. Then press Meat Clamp, | Genesis Silver B, C, all Golds, and all Platinum gas | |
applying good pressure,down on food, adjusting for | grill. | |
best grip on food. Finger tighten Thumb Screw |
| |
closest to Meat Clamp first then Thumb Screw |
| |
closest to Rotisserie Basket. |
|
WARNING: When not using both Meat Clamps, remove extra clamp from Rotisserie Basket when not in use.
| 8. Place Rotisserie in grill and allow to rotate a few | |
| turns. If food shrinks and/or becomes unsecure, re- | |
| adjust Meat Clamp as required to secure food in | |
| Rotisserie basket. | |
| 9. Remove Rotisserie with food from cooking box before | |
| preheating. Preheat barbecue for 10 minutes with lid | |
| down. Follow cooking instructions in your Weber Gas | |
| Barbecue cookbook and adjust the burners as | |
| needed. | |
5. Once meat is secure, test stability by rotating | 10. Return rotisserie to the cooking box. | |
11. Turn the motor on and begin cooking. | ||
rotisserie by hand. | ||
12. Check on Meat Clamps periodically making sure | ||
| ||
| clamps are securely holding food in place. | |
| CAUTION: | |
| required more than once during cooking due to | |
| food shrinkage. | |
| WARNING: Rotisserie is metal and will be hot. | |
| Wear oven mits to protect hands during Meat | |
| Clamp adjustment and movement of |
If the food becomes loose or unsecure, repeat Steps 4 through 5 until food is secure in Rotisserie Basket.