Step 6
Uncover CharBin lid
Remove protective plastic covering from CharBin lid. Figure 6.
CharBin lid
Figure 6
Step 7
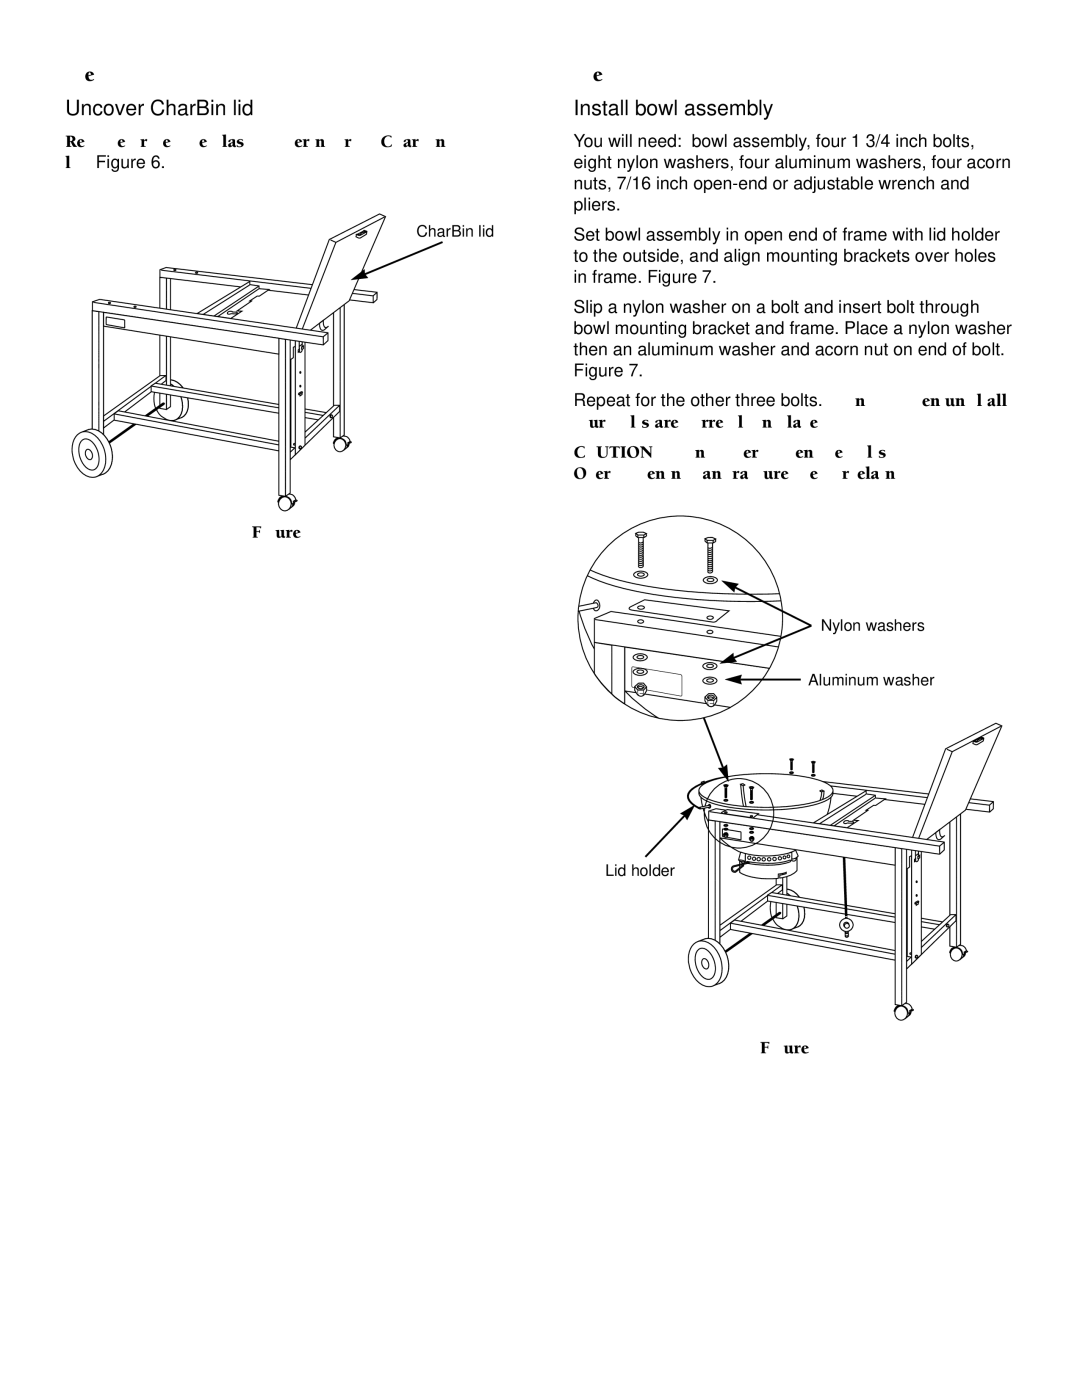
Install bowl assembly
You will need: bowl assembly, four 1 3/4 inch bolts, eight nylon washers, four aluminum washers, four acorn nuts, 7/16 inch
Set bowl assembly in open end of frame with lid holder to the outside, and align mounting brackets over holes in frame. Figure 7.
Slip a nylon washer on a bolt and insert bolt through bowl mounting bracket and frame. Place a nylon washer then an aluminum washer and acorn nut on end of bolt. Figure 7.
Repeat for the other three bolts. Do not tighten until all
four bolts are correctly in place.
CAUTION: Do not overtighten the bolts. Overtightening can fracture the porcelain.
Nylon washers
![]() Aluminum washer
Aluminum washer
Lid holder
Figure 7
12