Step 10
Install and connect filled LP tank
WARNING: Make sure that the LP tank valve is closed. Close by turning clockwise.
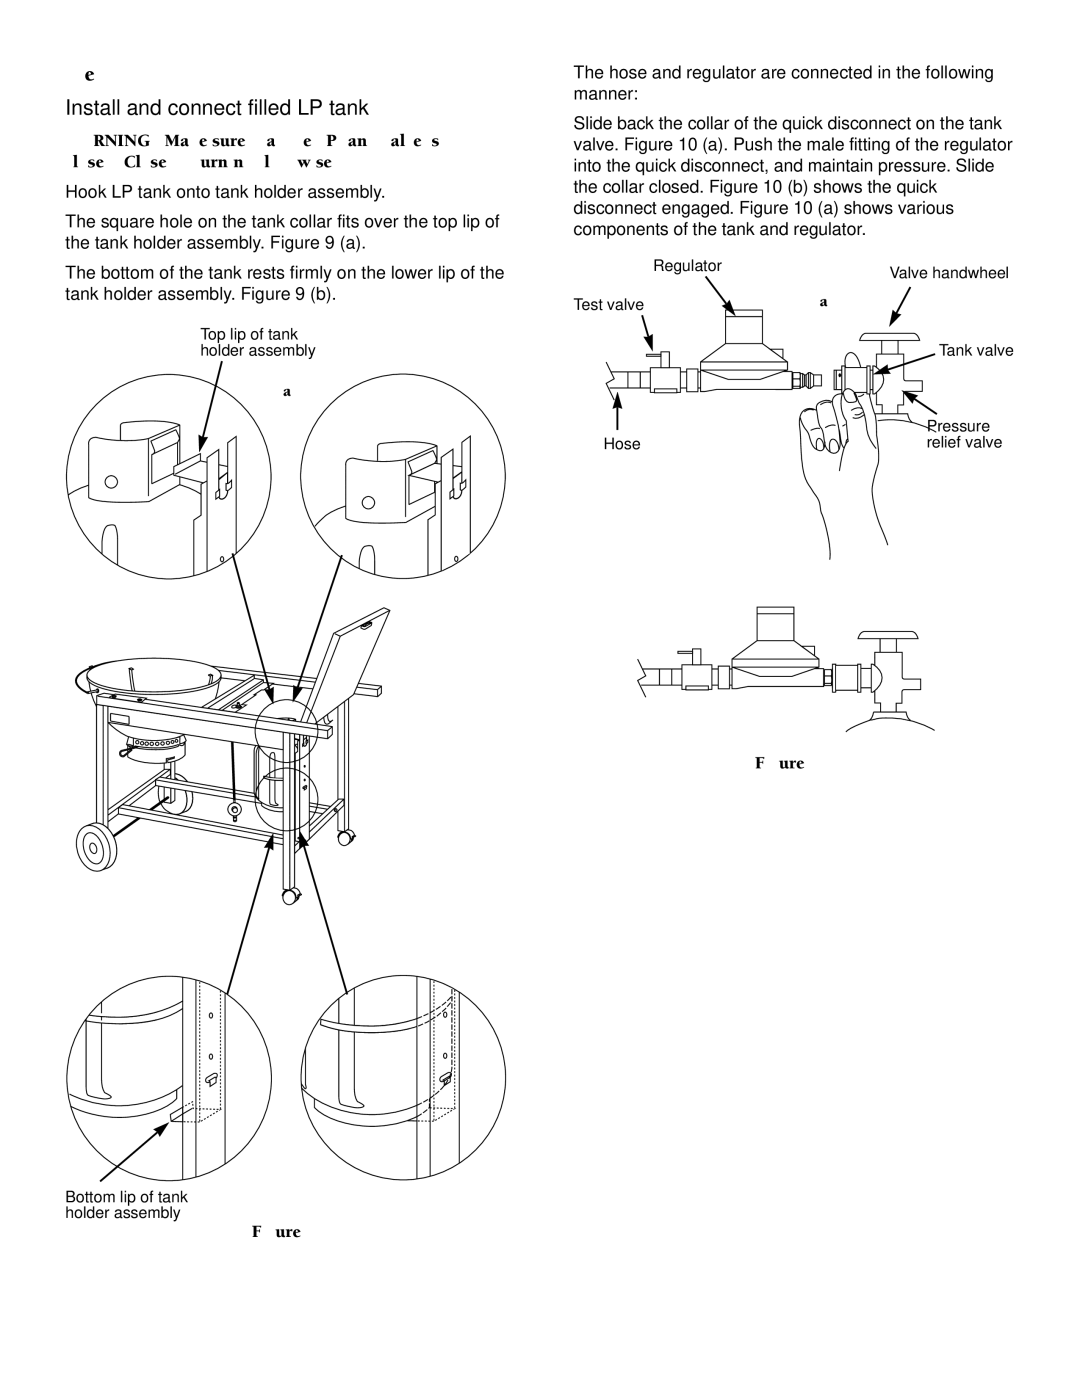
Hook LP tank onto tank holder assembly.
The square hole on the tank collar fits over the top lip of the tank holder assembly. Figure 9 (a).
The bottom of the tank rests firmly on the lower lip of the tank holder assembly. Figure 9 (b).
Top lip of tank holder assembly
(a)
The hose and regulator are connected in the following manner:
Slide back the collar of the quick disconnect on the tank valve. Figure 10 (a). Push the male fitting of the regulator into the quick disconnect, and maintain pressure. Slide the collar closed. Figure 10 (b) shows the quick disconnect engaged. Figure 10 (a) shows various components of the tank and regulator.
| Regulator | Valve handwheel |
|
| |
Test valve |
| (a) |
|
| Tank valve |
|
| Pressure |
Hose |
| relief valve |
(b)
Figure 10
(b)
Bottom lip of tank holder assembly
Figure 9
14