Step 12
Add bowl panel, tool holders and CharBin Storage Container
You will need: bowl panel, three tool holders and CharBin Storage Container.
Remove protective plastic covering from bowl panel.
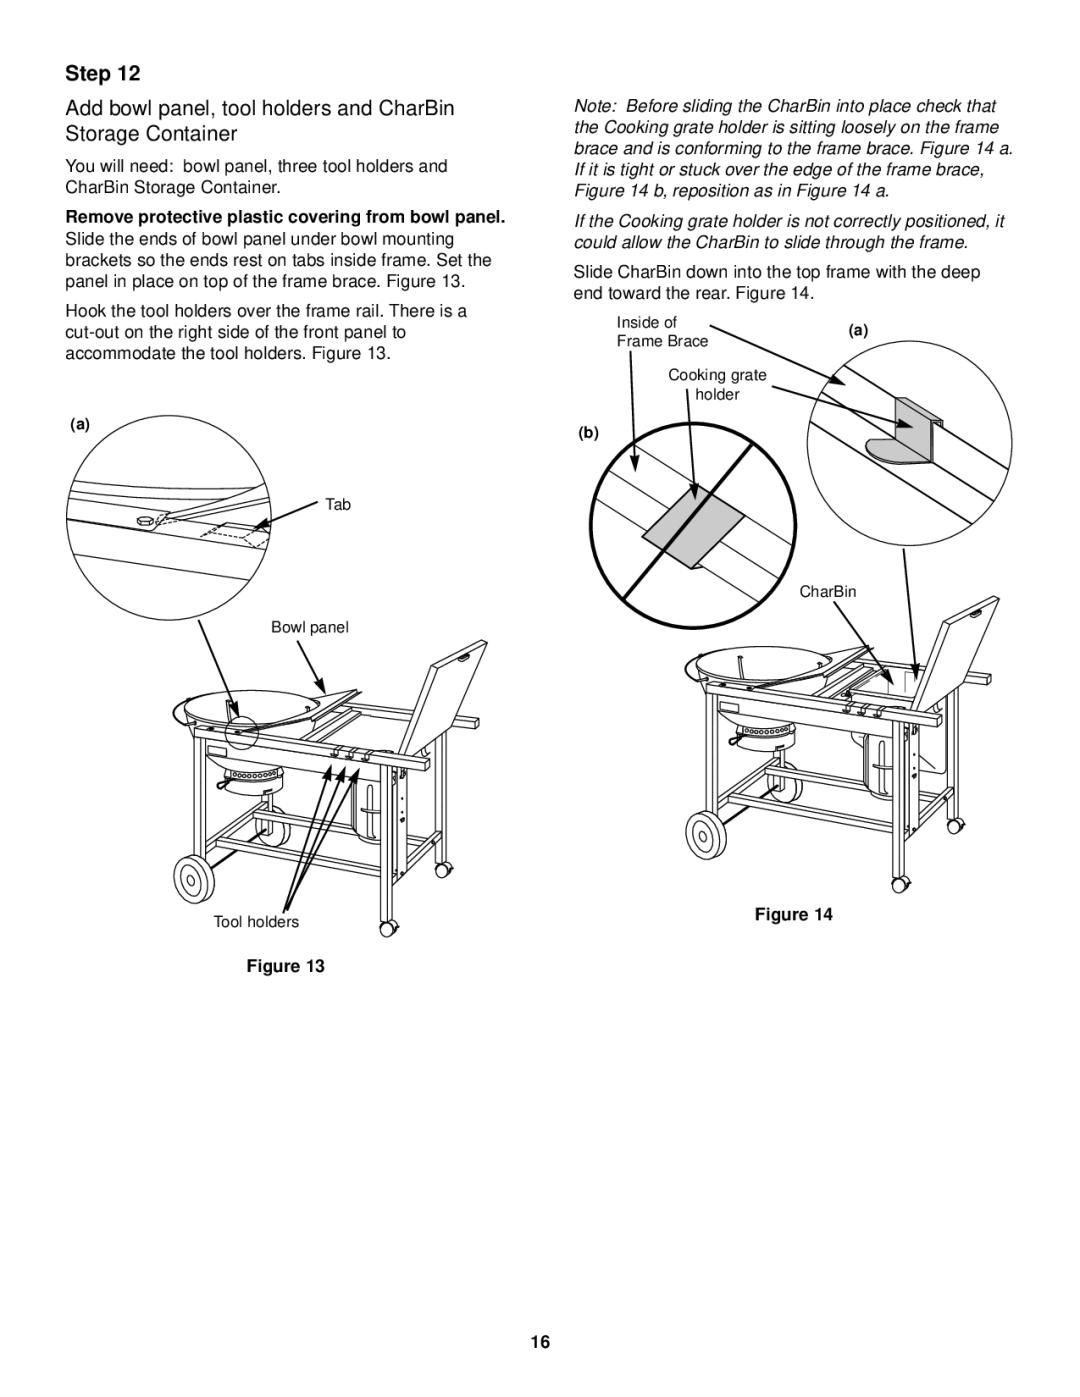
Slide the ends of bowl panel under bowl mounting brackets so the ends rest on tabs inside frame. Set the panel in place on top of the frame brace. Figure 13.
Hook the tool holders over the frame rail. There is a
(a)
![]() Tab
Tab
Bowl panel
Tool holders
Figure 13
Note: Before sliding the CharBin into place check that the Cooking grate holder is sitting loosely on the frame brace and is conforming to the frame brace. Figure 14 a. If it is tight or stuck over the edge of the frame brace, Figure 14 b, reposition as in Figure 14 a.
If the Cooking grate holder is not correctly positioned, it could allow the CharBin to slide through the frame.
Slide CharBin down into the top frame with the deep end toward the rear. Figure 14.
Inside of | (a) | |
Frame Brace | ||
| ||
Cooking grate |
| |
holder |
|
(b)
CharBin
Figure 14
16