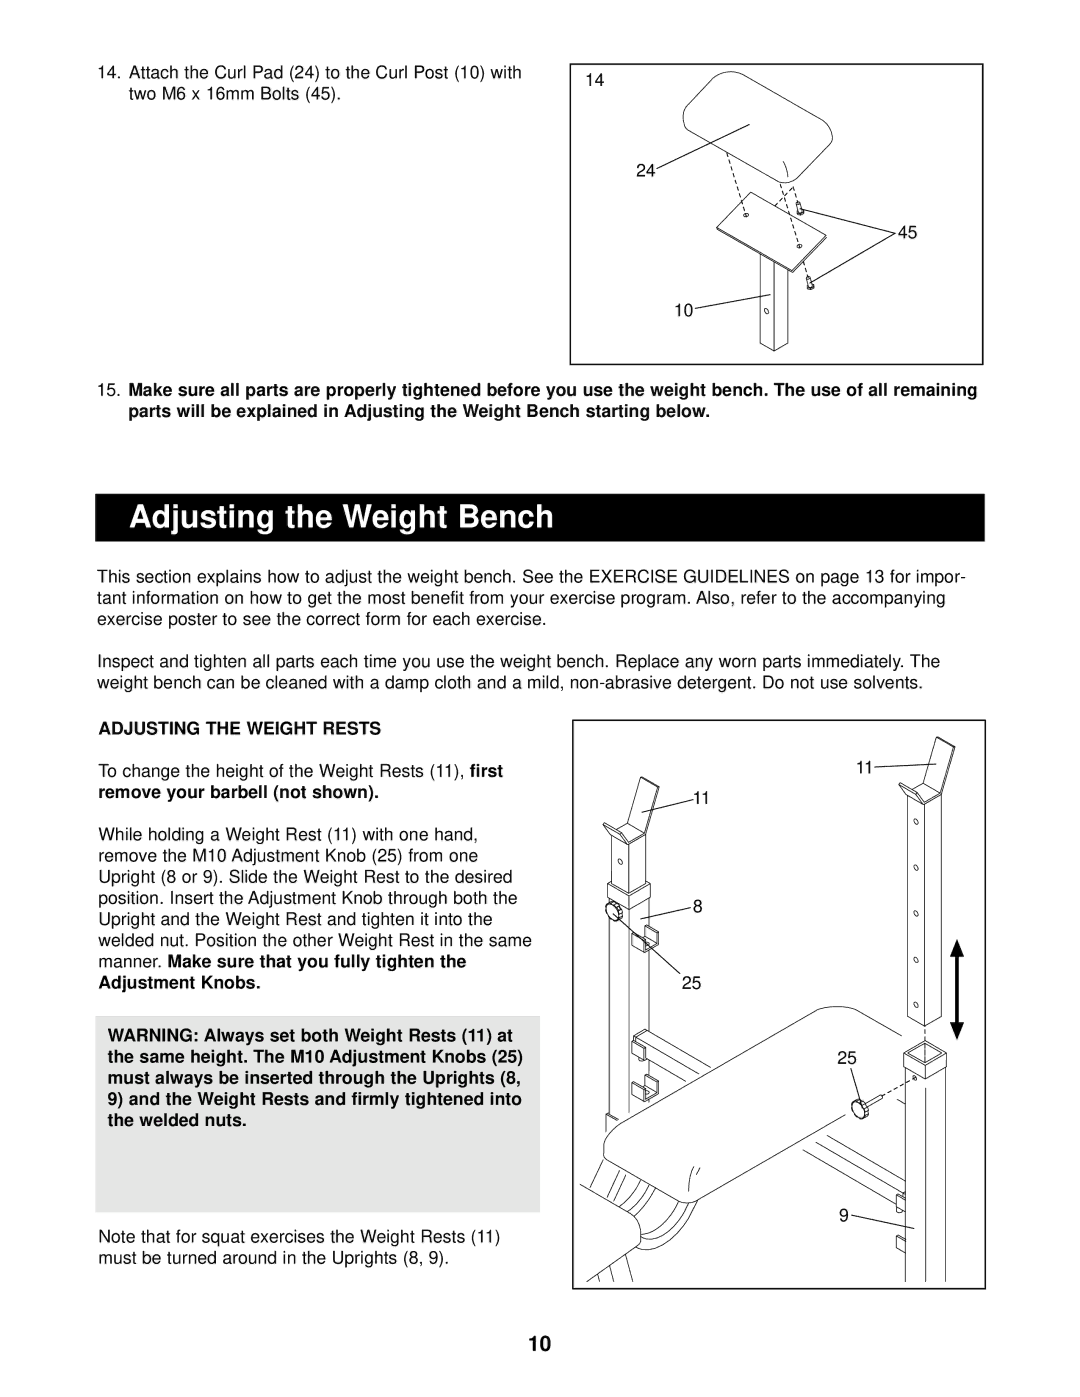
14.Attach the Curl Pad (24) to the Curl Post (10) with two M6 x 16mm Bolts (45).
14
24
45
10
15.Make sure all parts are properly tightened before you use the weight bench. The use of all remaining parts will be explained in Adjusting the Weight Bench starting below.
Adjusting the Weight Bench
This section explains how to adjust the weight bench. See the EXERCISE GUIDELINES on page 13 for impor- tant information on how to get the most benefit from your exercise program. Also, refer to the accompanying exercise poster to see the correct form for each exercise.
Inspect and tighten all parts each time you use the weight bench. Replace any worn parts immediately. The weight bench can be cleaned with a damp cloth and a mild,
ADJUSTING THE WEIGHT RESTS |
| |
To change the height of the Weight Rests (11), | first | |
remove your barbell (not shown). |
| |
While holding a Weight Rest (11) with one hand, |
| |
remove the M10 Adjustment Knob (25) from one |
| |
Upright (8 or 9). Slide the Weight Rest to the desired |
| |
position. Insert the Adjustment Knob through both the |
| |
Upright and the Weight Rest and tighten it into the |
| |
welded nut. Position the other Weight Rest in the same |
| |
manner. | Make sure that you fully tighten the |
|
Adjustment Knobs.
WARNING: Always set both Weight Rests (11) at the same height. The M10 Adjustment Knobs (25) must always be inserted through the Uprights (8, 9) and the Weight Rests and firmly tightened into
the welded nuts. | Never tighten the Adjustment | |
Knobs | into the Uprights and then set the Weight | |
Rests | in the Uprights | on top of the Adjustment |
Knobs.
Note that for squat exercises the Weight Rests (11) must be turned around in the Uprights (8, 9).
11 |
11 |
8 |
25 |
25 |
9 |
10
