1.
Frame Assembly
Before beginning assembly, make sure you understand the information in the box on page 5. Refer to the PART IDENTIFICATION CHART in the center of this manual for help identifying small parts.
1 |
|
55 | 20 |
| |
20 | 13 |
14 |
|
| 40 |
Locate and open the parts bags labeled
“FRAME ASSEMBLY.”
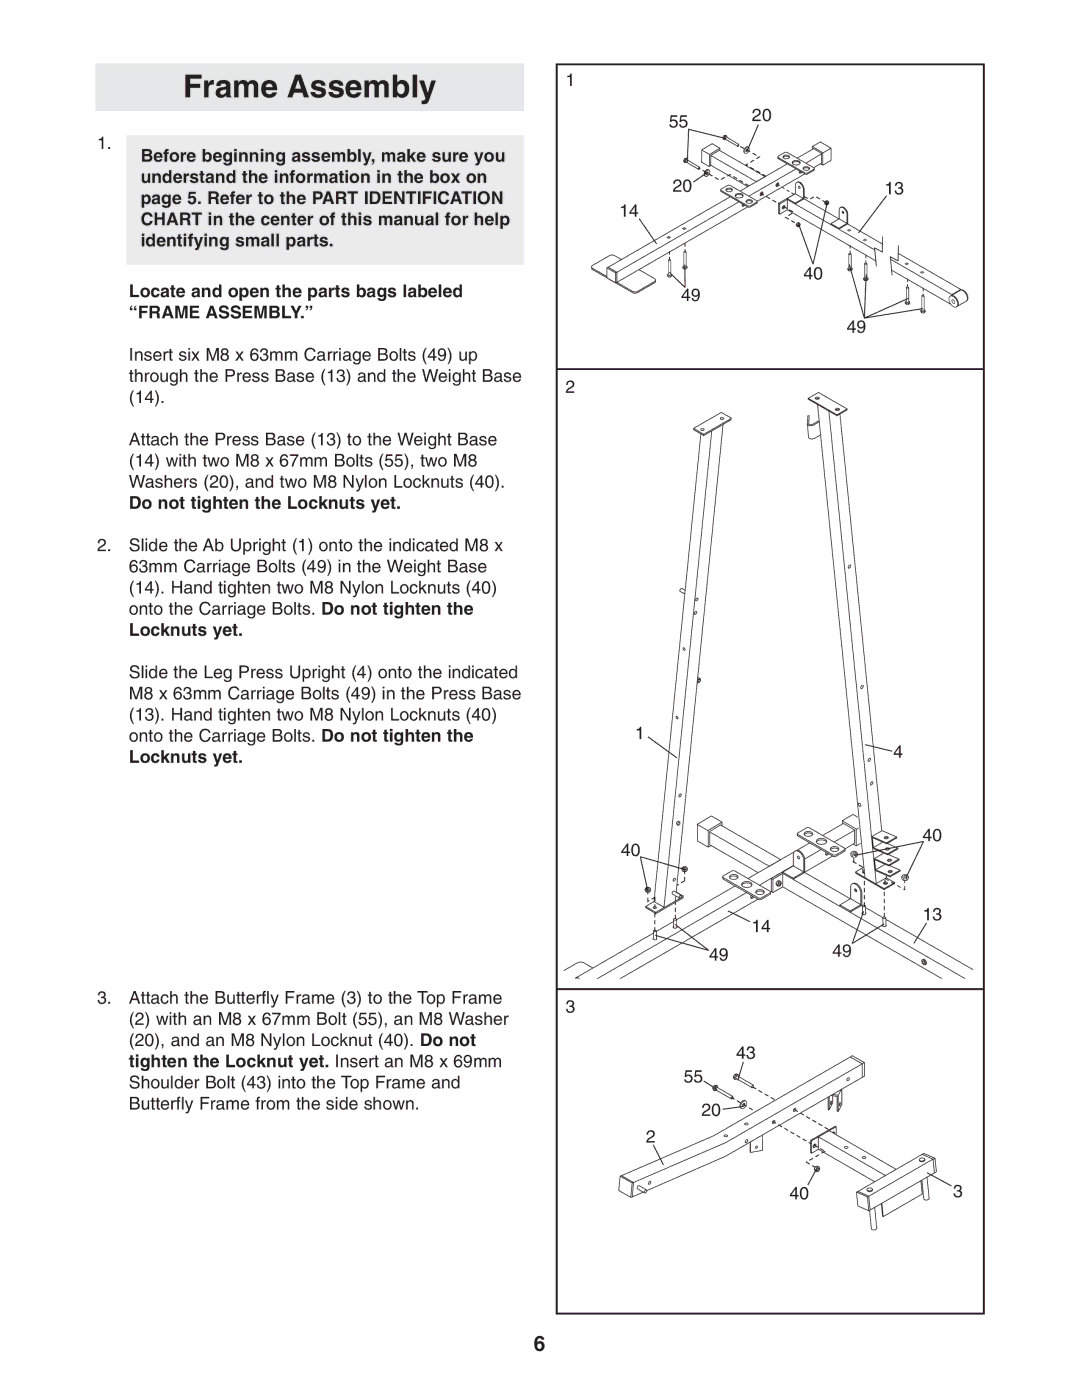
Insert six M8 x 63mm Carriage Bolts (49) up through the Press Base (13) and the Weight Base (14).
Attach the Press Base (13) to the Weight Base
(14)with two M8 x 67mm Bolts (55), two M8 Washers (20), and two M8 Nylon Locknuts (40).
Do not tighten the Locknuts yet.
2.Slide the Ab Upright (1) onto the indicated M8 x 63mm Carriage Bolts (49) in the Weight Base
(14).Hand tighten two M8 Nylon Locknuts (40) onto the Carriage Bolts. Do not tighten the
Locknuts yet.
Slide the Leg Press Upright (4) onto the indicated M8 x 63mm Carriage Bolts (49) in the Press Base
(13).Hand tighten two M8 Nylon Locknuts (40) onto the Carriage Bolts. Do not tighten the
Locknuts yet.
3.Attach the Butterfly Frame (3) to the Top Frame
(2) with an M8 x 67mm Bolt (55), an M8 Washer (20), and an M8 Nylon Locknut (40). Do not tighten the Locknut yet. Insert an M8 x 69mm Shoulder Bolt (43) into the Top Frame and Butterfly Frame from the side shown.
49 |
|
| 49 |
2 |
|
1 | 4 |
| |
40 | 40 |
| |
14 | 13 |
| |
49 | 49 |
3 |
|
43 |
|
55 |
|
20 |
|
2 |
|
40 | 3 |
6
