CABLE ASSEMBLY
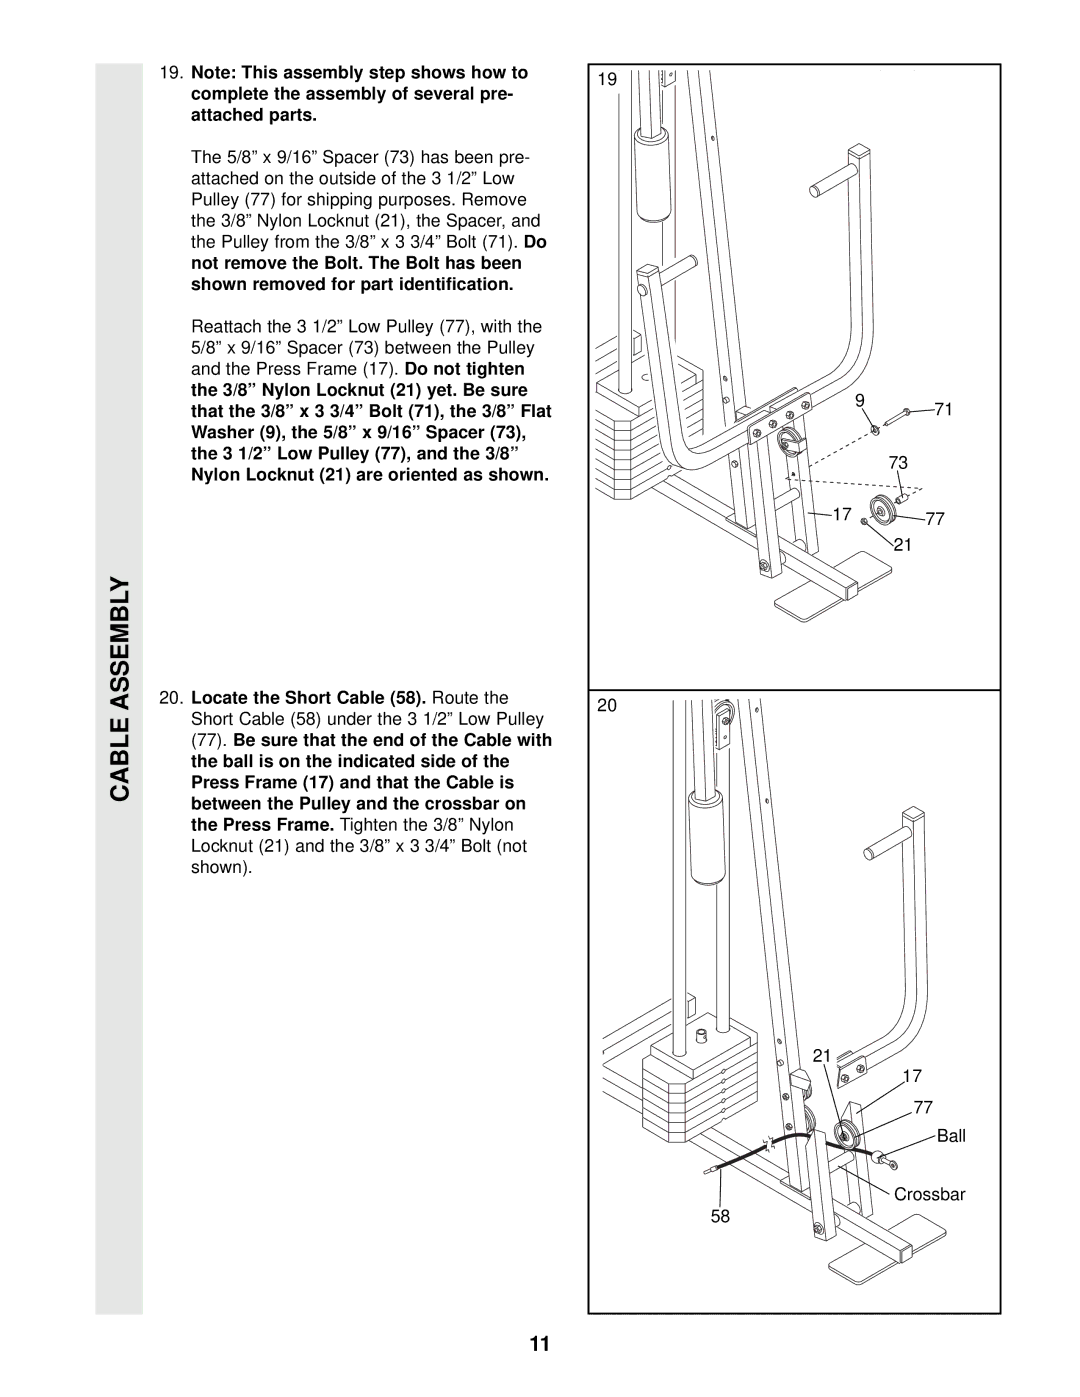
19. Note: This assembly step shows how to | 19 |
|
|
complete the assembly of several pre- |
|
| |
|
|
| |
attached parts. |
|
|
|
The 5/8” x 9/16” Spacer (73) has been pre- |
|
|
|
attached on the outside of the 3 1/2” Low |
|
|
|
Pulley (77) for shipping purposes. Remove |
|
|
|
the 3/8” Nylon Locknut (21), the Spacer, and |
|
|
|
the Pulley from the 3/8” x 3 3/4” Bolt (71).Do |
|
|
|
not remove the Bolt. The Bolt has been |
|
|
|
shown removed for part identification. |
|
|
|
Reattach the 3 1/2” Low Pulley (77), with the |
|
|
|
5/8” x 9/16” Spacer (73) between the Pulley |
|
|
|
and the Press Frame (17). Do not tighten |
|
|
|
the 3/8” Nylon Locknut (21) yet. Be sure |
| 9 | 71 |
that the 3/8” x 3 3/4” Bolt (71), the 3/8” Flat |
| ||
|
| ||
Washer (9), the 5/8” x 9/16” Spacer (73), |
|
|
|
the 3 1/2” Low Pulley (77), and the 3/8” |
|
| 73 |
Nylon Locknut (21) are oriented as shown. |
|
| |
|
|
| |
| 17 |
| 77 |
|
|
| 21 |
20. Locate the Short Cable (58). Route the | 20 |
|
|
Short Cable (58) under the 3 1/2” Low Pulley |
|
| |
|
|
| |
(77). Be sure that the end of the Cable with |
|
|
|
the ball is on the indicated side of the |
|
|
|
Press Frame (17) and that the Cable is |
|
|
|
between the Pulley and the crossbar on |
|
|
|
the Press Frame. Tighten the 3/8” Nylon |
|
|
|
Locknut (21) and the 3/8” x 3 3/4” Bolt (not |
|
|
|
shown). |
|
|
|
| 21 |
|
|
|
|
| 17 |
|
|
| 77 |
|
|
| Ball |
|
|
| Crossbar |
| 58 |
|
|
11