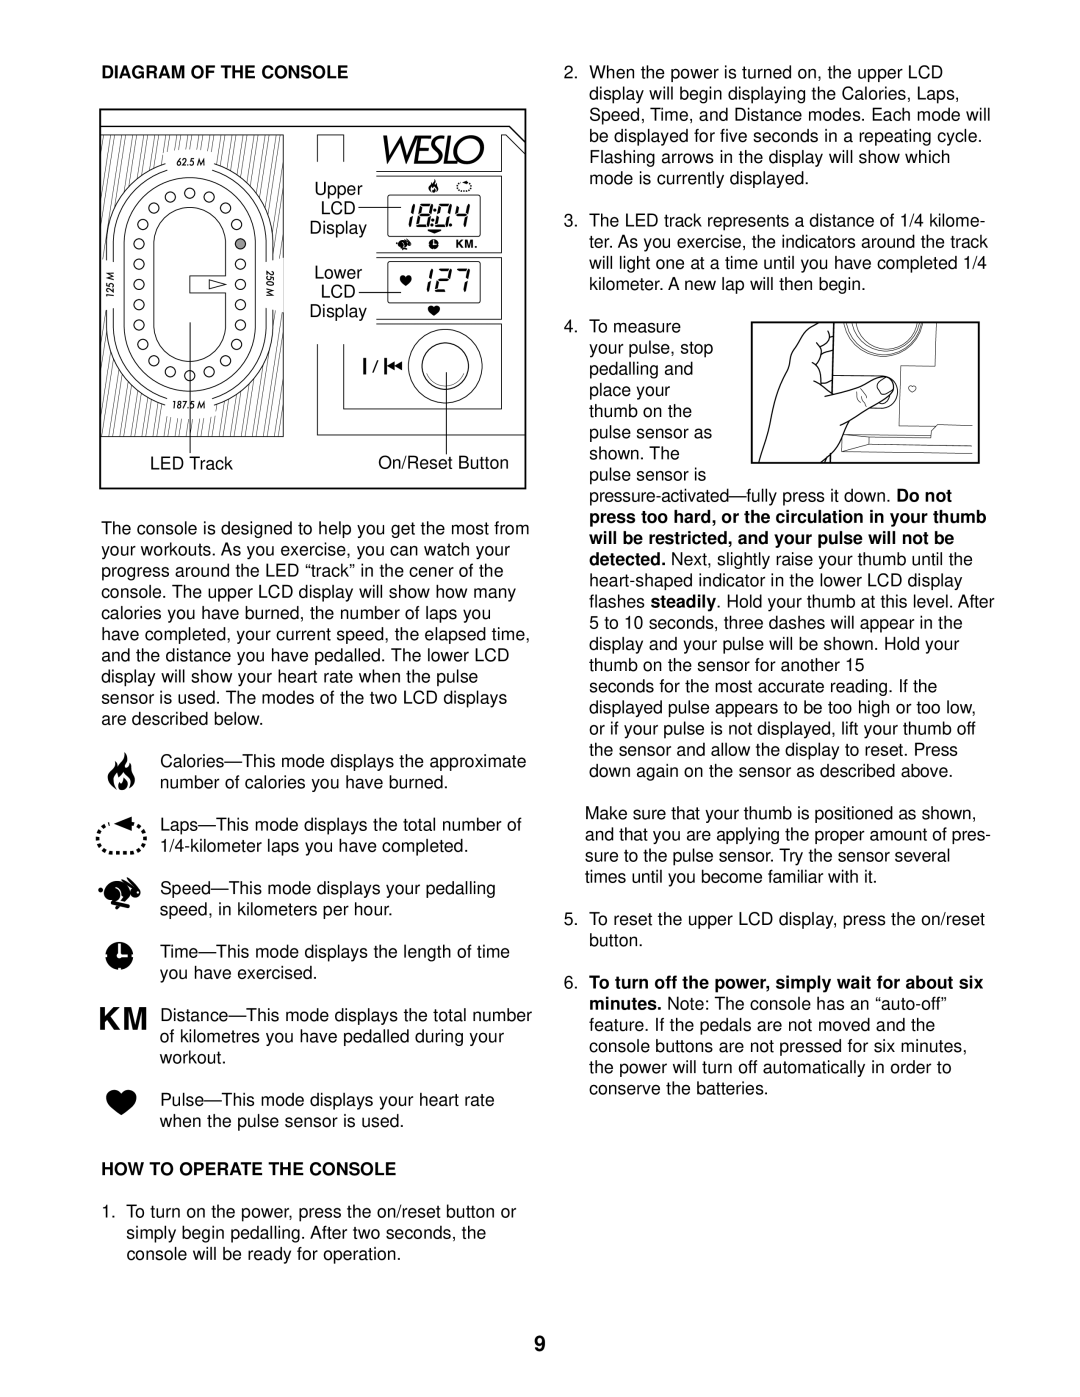
DIAGRAM OF THE CONSOLE
| Upper |
| LCD |
| Display |
| Lower |
| LCD |
| Display |
LED Track | On/Reset Button |
The console is designed to help you get the most from your workouts. As you exercise, you can watch your progress around the LED “track” in the cener of the console. The upper LCD display will show how many calories you have burned, the number of laps you have completed, your current speed, the elapsed time, and the distance you have pedalled. The lower LCD display will show your heart rate when the pulse sensor is used. The modes of the two LCD displays are described below.
HOW TO OPERATE THE CONSOLE
1.To turn on the power, press the on/reset button or simply begin pedalling. After two seconds, the console will be ready for operation.
2.When the power is turned on, the upper LCD display will begin displaying the Calories, Laps, Speed, Time, and Distance modes. Each mode will be displayed for five seconds in a repeating cycle. Flashing arrows in the display will show which mode is currently displayed.
3.The LED track represents a distance of 1/4 kilome- ter. As you exercise, the indicators around the track will light one at a time until you have completed 1/4 kilometer. A new lap will then begin.
4.To measure your pulse, stop pedalling and
place your thumb on the
pulse sensor as shown. The pulse sensor is
seconds for the most accurate reading. If the displayed pulse appears to be too high or too low, or if your pulse is not displayed, lift your thumb off the sensor and allow the display to reset. Press down again on the sensor as described above.
Make sure that your thumb is positioned as shown, and that you are applying the proper amount of pres- sure to the pulse sensor. Try the sensor several times until you become familiar with it.
5.To reset the upper LCD display, press the on/reset button.
6.To turn off the power, simply wait for about six minutes. Note: The console has an
9