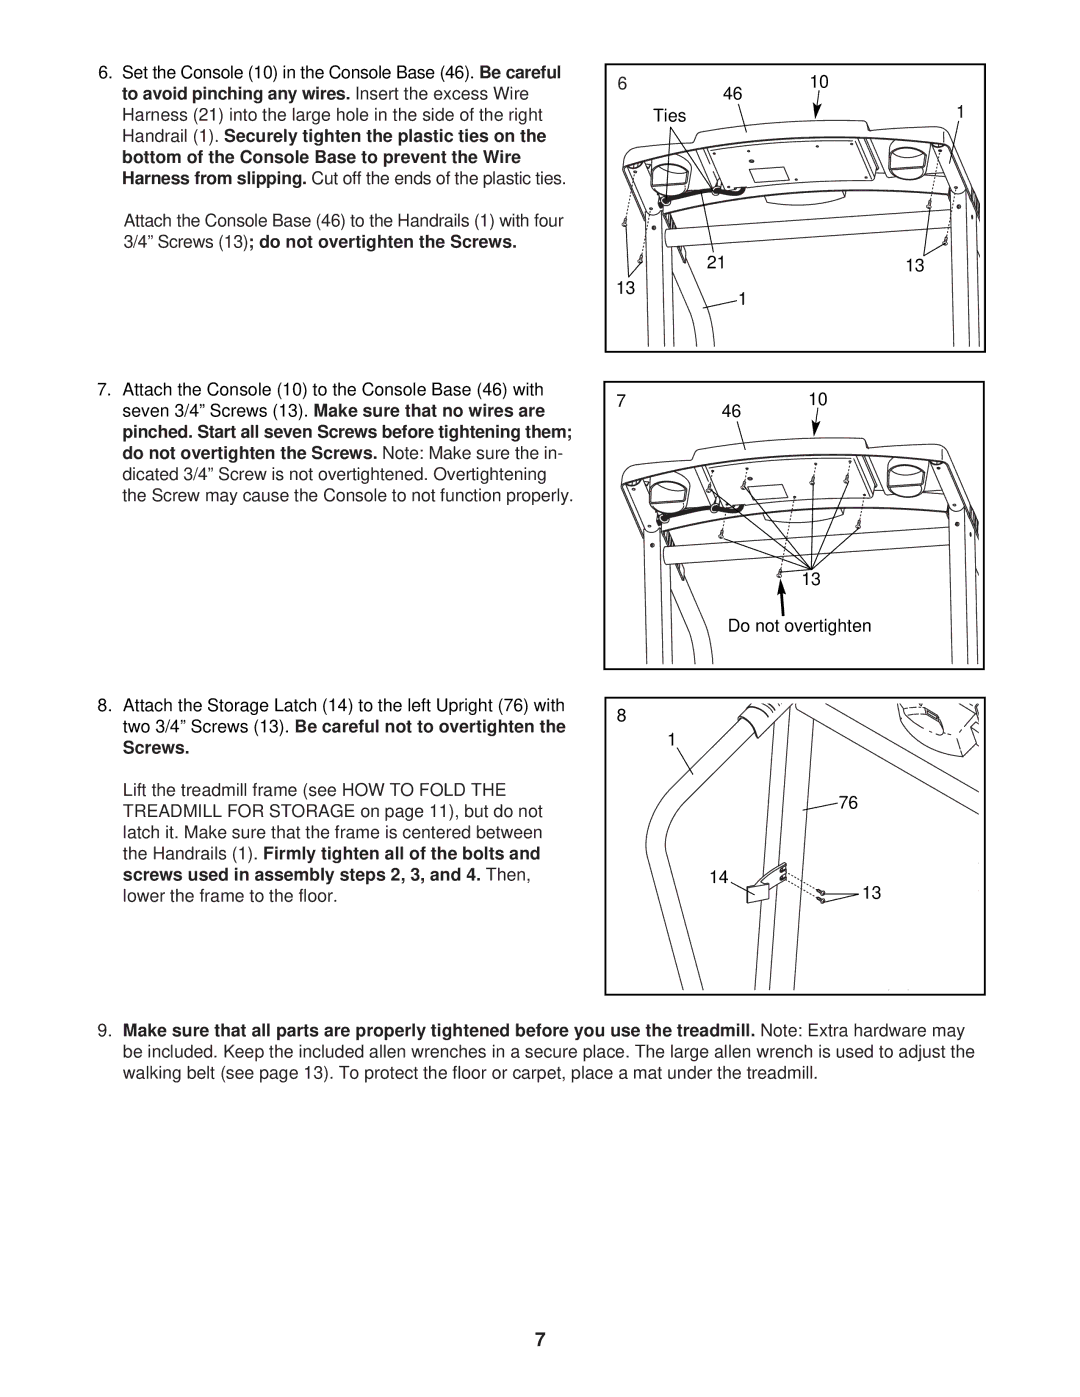
6. Set the Console (10) in the Console Base (46). | Be careful | |
to avoid pinching any wires. | Insert the excess Wire | |
Harness (21) into the large hole in the side of the right | ||
Handrail (1). Securely tighten the plastic ties on the |
| |
bottom of the Console Base to prevent the Wire |
| |
Harness from slipping. | Cut off the ends of the plastic ties. | |
Attach the Console Base (46) to the Handrails (1) with four 3/4” Screws (13); do not overtighten the Screws.
7.Attach the Console (10) to the Console Base (46) with seven 3/4” Screws (13). Make sure that no wires are pinched. Start all seven Screws before tightening them;
do not overtighten the Screws.Note: Make sure the in-
dicated 3/4” Screw is not overtightened. Overtightening the Screw may cause the Console to not function properly.
8.Attach the Storage Latch (14) to the left Upright (76) with two 3/4” Screws (13). Be careful not to overtighten the
Screws.
Lift the treadmill frame (see HOW TO FOLD THE |
|
TREADMILL FOR STORAGE on page 11), but do not |
|
latch it. Make sure that the frame is centered between |
|
the Handrails (1). Firmly tighten all of the bolts and |
|
screws used in assembly steps 2, 3, and 4. | Then, |
lower the frame to the floor. |
|
6 | 46 | 10 |
| 1 | |
| Ties | |
| 21 | 13 |
13 | 1 |
|
|
| |
7 | 46 | 10 |
|
|
13
Do not overtighten
8
1
![]() 76
76
14
![]() 13
13
9. Make sure that all parts are properly tightened before you use the treadmill. | Note: Extra hardware may |
be included. Keep the included allen wrenches in a secure place. The large allen wrench is used to adjust the |
|
walking belt (see page 13). To protect the floor or carpet, place a mat under the treadmill. |
|
7