ASSEMBLY
Assembly requires two people. Set the treadmill in a cleared area and remove all packing materials. Do not dispose of the packing materials until assembly is completed. Assembly requires the included allen wrench
and your own phillips screwdriver ![]()
![]() , two adjustable wrenches
, two adjustable wrenches ![]()
![]()
![]() and wire cut-
and wire cut-
ters ![]() .
.
Note: The underside of the treadmill walking belt is coated with
|
|
| Handrail Bolt (91)Ð2 |
|
Extension Leg |
|
|
|
|
Screw (53)Ð2 | Handrail Washer (92)Ð2 |
| ||
|
| |||
|
|
| Rack Bolt (89)Ð2 | Screw (33)Ð6 |
|
|
|
| |
|
|
| Wheel Bolt (36)Ð2 | |
Handrail Nut (93)Ð2 | Wheel Nut (17)Ð2 | Rack Washer |
| |
(41)Ð2 |
| |||
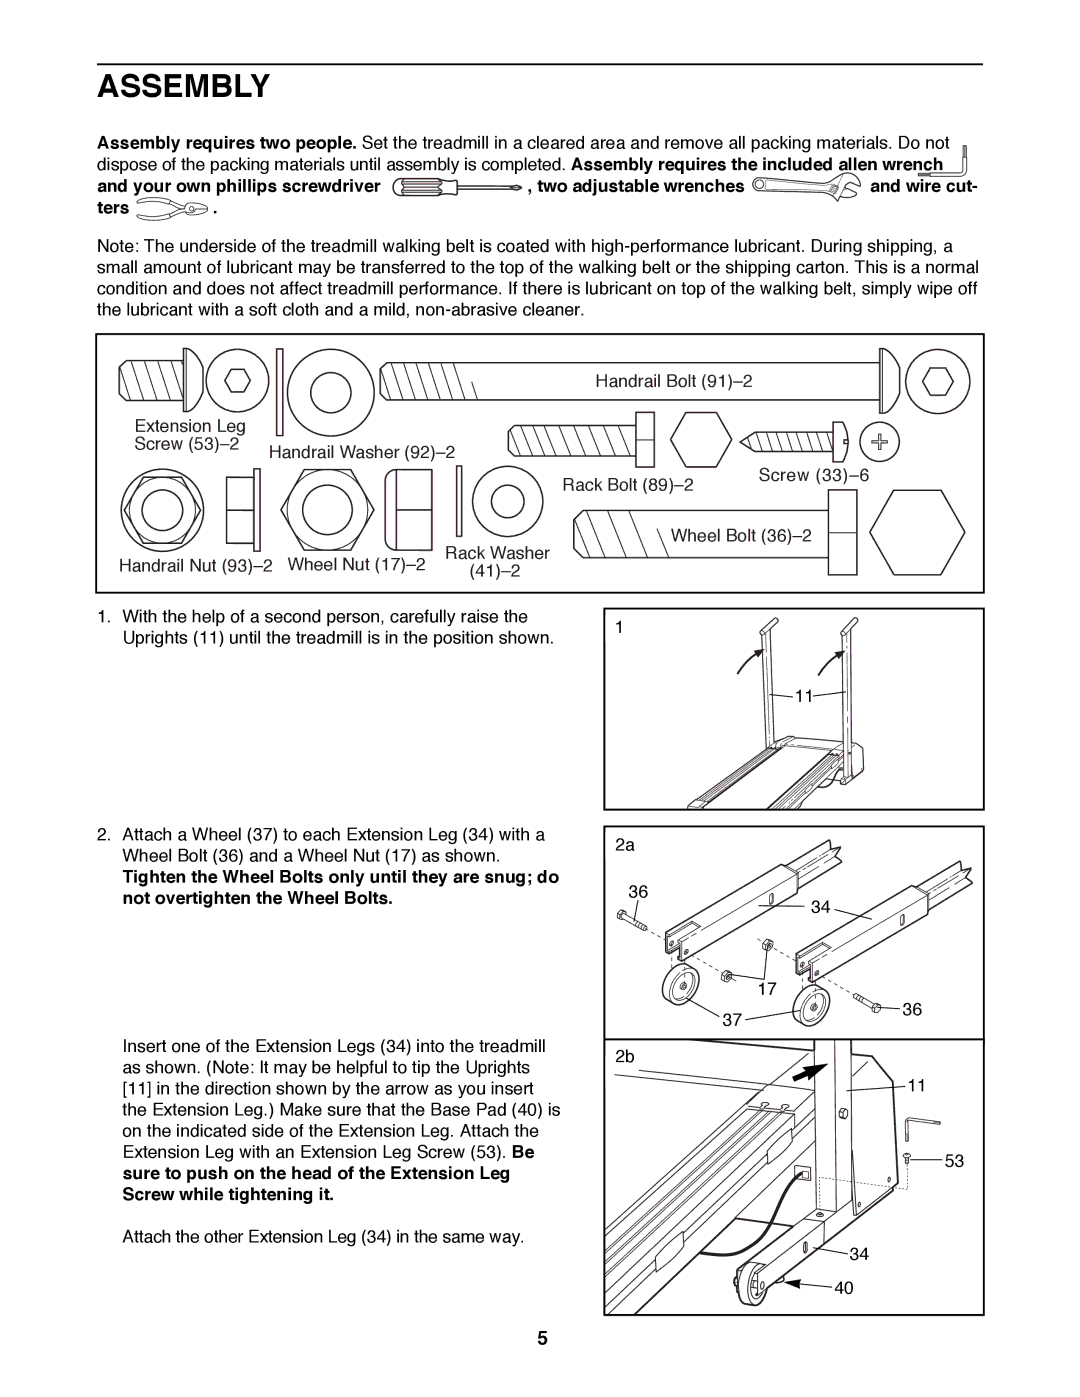
1. With the help of a second person, carefully raise the | 1 |
| |
Uprights (11) until the treadmill is in the position shown. |
| ||
|
| ||
|
| 11 | |
2. Attach a Wheel (37) to each Extension Leg (34) with a | 2a |
| |
Wheel Bolt (36) and a Wheel Nut (17) as shown. |
| ||
|
| ||
Tighten the Wheel Bolts only until they are snug; do | 36 |
| |
not overtighten the Wheel Bolts. | 34 | ||
| |||
|
| ||
|
| 17 | |
| 37 | 36 | |
|
| ||
Insert one of the Extension Legs (34) into the treadmill | 2b |
| |
as shown. (Note: It may be helpful to tip the Uprights |
| ||
| 11 | ||
[11] in the direction shown by the arrow as you insert |
| ||
the Extension Leg.) Make sure that the Base Pad (40) is |
|
| |
on the indicated side of the Extension Leg. Attach the |
|
| |
Extension Leg with an Extension Leg Screw (53). Be |
| 53 | |
sure to push on the head of the Extension Leg |
| ||
|
| ||
Screw while tightening it. |
|
| |
Attach the other Extension Leg (34) in the same way. |
| 34 | |
|
| ||
|
| 40 |
5