1.Follow steps
You are ready to start the machine at 9:30 and want the bread done at 6:00. The number of hours and minutes between 9:30 and 6:00 is 8½ hours or 8:30. 8:30 is the time you enter into the timer. Press and hold the (up) ![]() timer button to scroll the time up in 10 minute increments until 8:30 appears in display. If you go past 8:30,
timer button to scroll the time up in 10 minute increments until 8:30 appears in display. If you go past 8:30,
use the (down) ![]() timer button to scroll down in 10 minute increments until you reach 8:30. The maximum time for timer is 13 hours (13:00). The bread or dough process time is automatically figured into the delay time as this is the time from which you begin to count up.
timer button to scroll down in 10 minute increments until you reach 8:30. The maximum time for timer is 13 hours (13:00). The bread or dough process time is automatically figured into the delay time as this is the time from which you begin to count up.
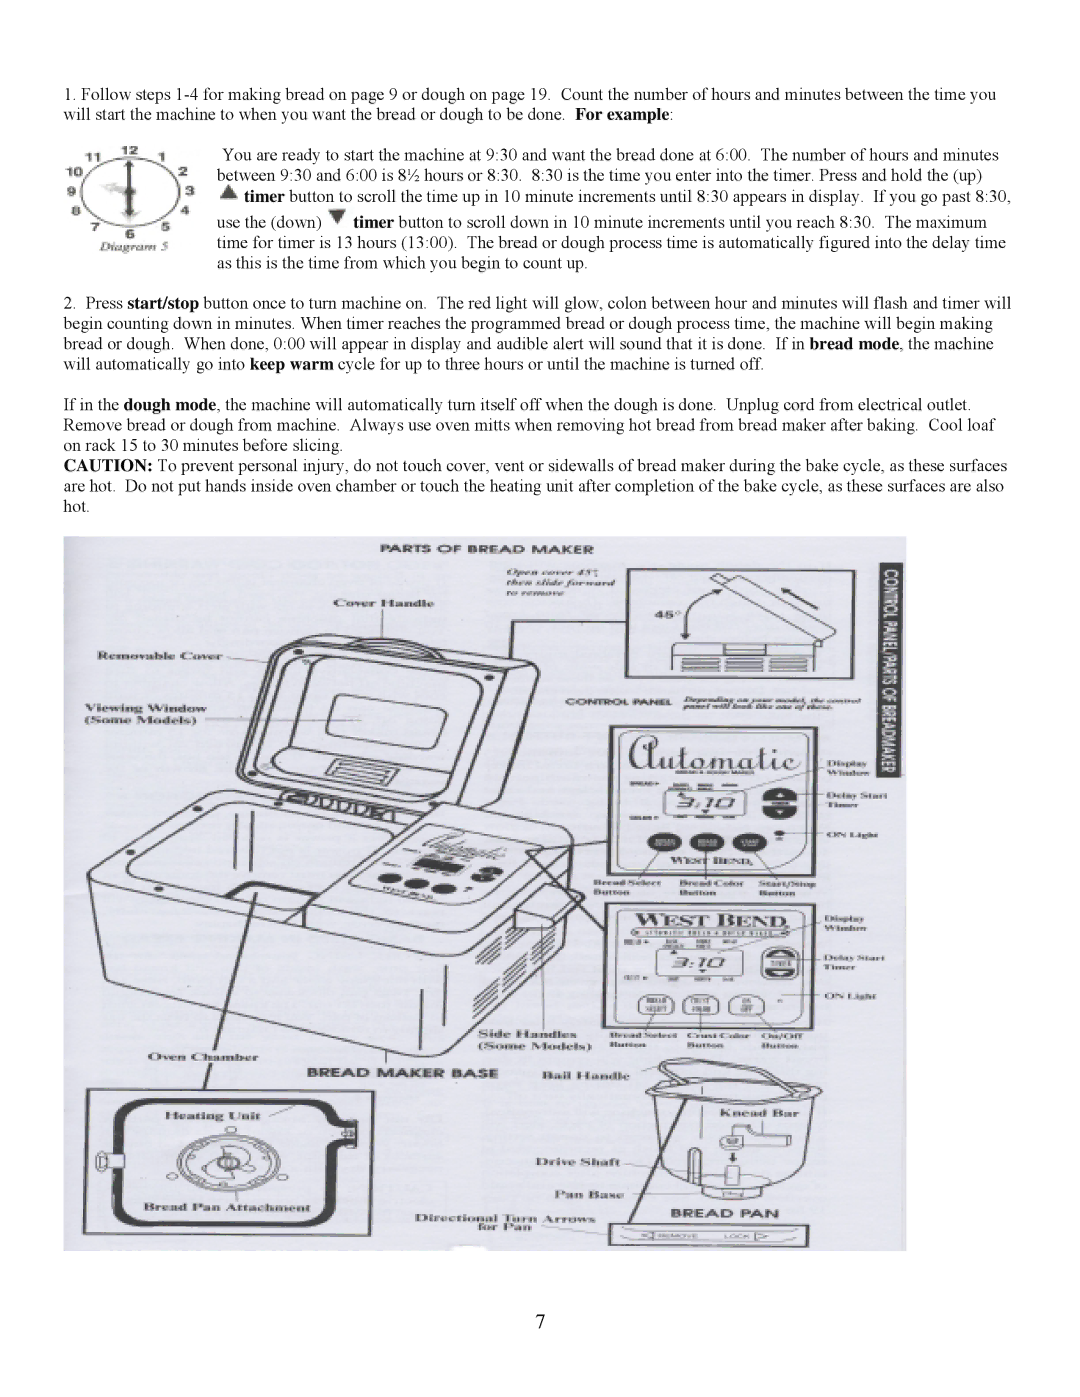
2.Press start/stop button once to turn machine on. The red light will glow, colon between hour and minutes will flash and timer will begin counting down in minutes. When timer reaches the programmed bread or dough process time, the machine will begin making bread or dough. When done, 0:00 will appear in display and audible alert will sound that it is done. If in bread mode, the machine will automatically go into keep warm cycle for up to three hours or until the machine is turned off.
If in the dough mode, the machine will automatically turn itself off when the dough is done. Unplug cord from electrical outlet. Remove bread or dough from machine. Always use oven mitts when removing hot bread from bread maker after baking. Cool loaf on rack 15 to 30 minutes before slicing.
CAUTION: To prevent personal injury, do not touch cover, vent or sidewalls of bread maker during the bake cycle, as these surfaces are hot. Do not put hands inside oven chamber or touch the heating unit after completion of the bake cycle, as these surfaces are also hot.
7
