START/STOP OR ON/OFF BUTTON - (Wording for this button varies with model.) Use the start/stop button to turn bread maker on and off. Before starting the machine, you must first program the bread select and crust color, plus the timer if being used. Press start/stop button once to turn machine on. When on, red signal light by button will glow and remain lit until bread maker is turned off. To turn off, press and hold start/stop button down for about four (4) seconds or until light goes out.
When the machine is on, the colon between hours and minutes will flash and minutes will begin to count down the time remaining until bread is done. When process time elapses, 0:00 will appear in display and audible alert will sound. Turn off by pressing start/stop button until red light goes out. Remove bread pan using oven mitts and shake loaf out of pan onto cooling rack. Cool before slicing.
If pan is not removed immediately after baking, machine will automatically go into keep warm mode for up to three (3) hours to keep bread warm. The red light will remain lit during this time and 0:00 will appear in display. If machine is not turned off during keep warm period, machine will automatically turn off. If using dough setting, machine will automatically turn off upon completion of cycle, alert will sound and display will reset to dough setting. Remove dough and finish as recommended in recipe being prepared. Do not leave
TOO HOT/TOO COLD WARNING- If inside of oven chamber is too hot or too cold for bread making, the word “hot” or “col” will appear in display along with alert sounding to indicate that machine cannot be turned on. You will need to remove pan and allow chamber to cool or warm accordingly.
Typically “hot” will appear in display when you make consecutive loaves and forget to turn machine off between loaves. Allow chamber to cool with cover open 10 to 15 minutes or until machine can be turned on without warning going off. If “col” appears in display, move bread maker to a warmer area for 15 minutes or until machine can be turned on without warning going off. If oven is too hot, the yeast can be killed; if too cold, the growth of the yeast will be retarded.
POWER OUTAGE PROTECTION - In the event of a power outage, the bread maker will turn off and automatically resume the cycle in progress if power is restored within 5 to 10 seconds, If power is not restored in 5 to 10 seconds it will remain off when power is restored. In this case, you must remove the contents from pan and start over with fresh ingredients. The red on light will remain off and the display will reset to the default setting; basic/specialty, medium crust, with 3:10 in display.
BASIC STEPS IN MAKING BREAD - BEFORE USING your bread maker for the first time, wash inside of pan and knead bar with hot soapy water and a soft cloth, rinse and dry. Twist pan clockwise to unlock from bread
maker, then lift out. The knead bar lifts off shaft in bottom of pan. You may need to twist the bar slightly to remove.
Place knead bar onto shaft in pan, matching hub shape with shaft shape. Push bar down all the way.
Do not use any abrasive scouring pads or cleansers on pan or knead bar as damage can occur. Wipe the inside of chamber and outside surfaces of machine with a soft damp cloth if necessary, dry with a soft cloth. CAUTION: To prevent personal injury or electric shock, do not immerse bread maker base, its cord or plug in water or other liquid.
SPECIAL NOTE: Bread pan is not immersible and should never be washed in an automatic dishwasher. Immersing pan in water can cause damage to the bearing that turns the knead bar. Dishwasher cleaning can reduce the
1.Position knead bar onto shaft in bottom of pan, matching hub shape to shaft shape. See Diagram 6. Make sure knead bar is pushed onto shaft all the way. You may need to twist bar slightly to drop into place.
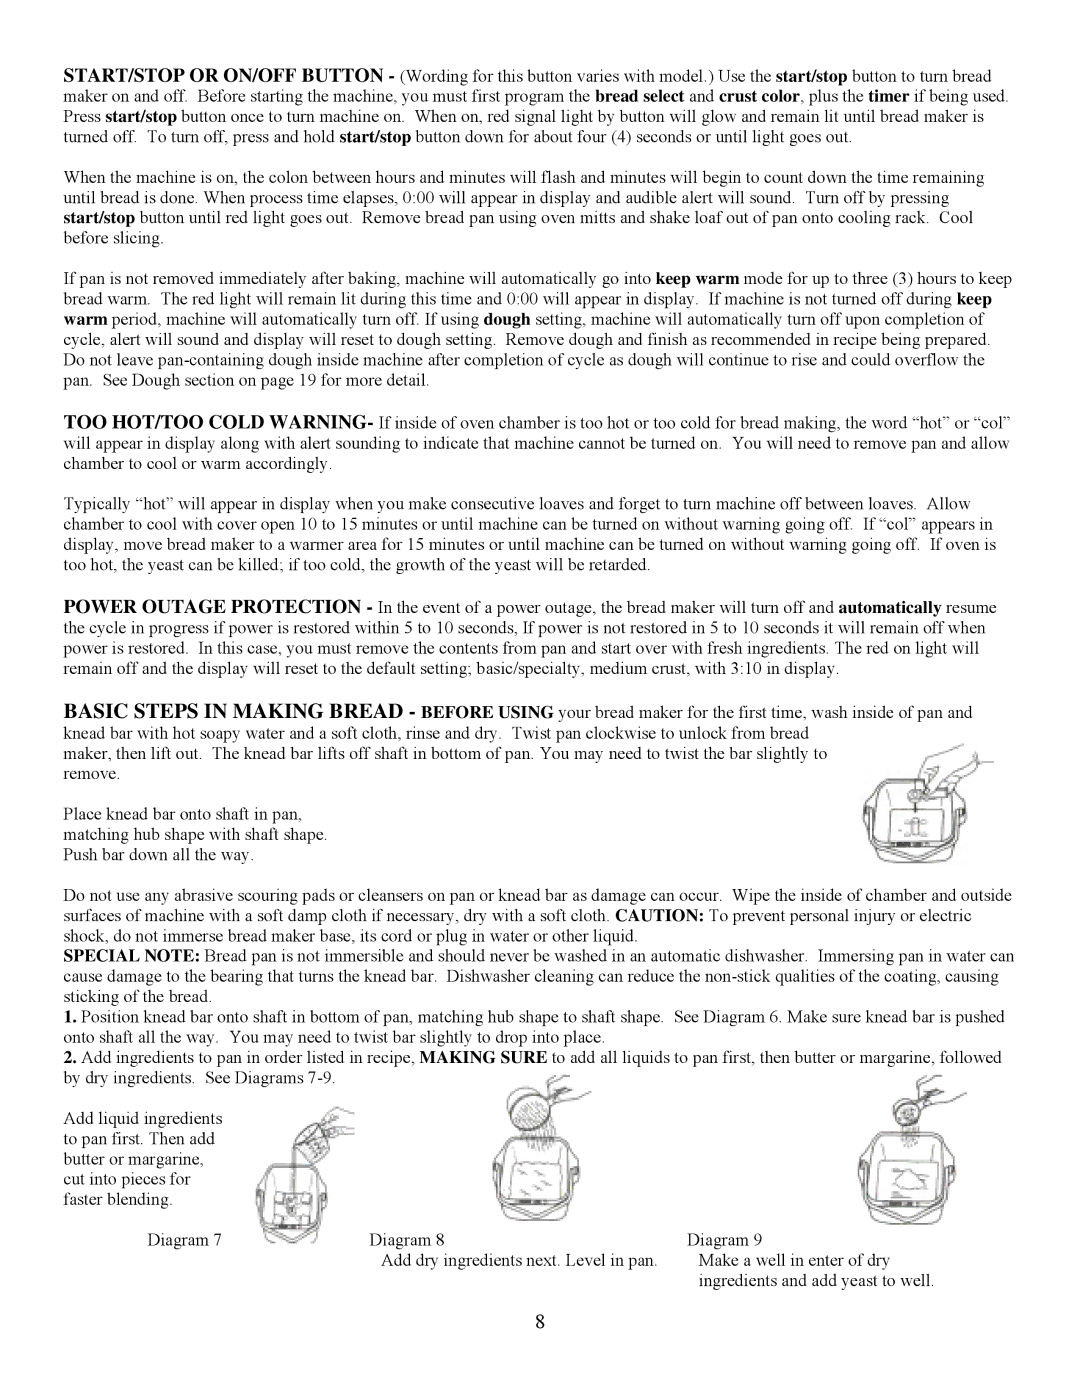
2.Add ingredients to pan in order listed in recipe, MAKING SURE to add all liquids to pan first, then butter or margarine, followed by dry ingredients. See Diagrams
Add liquid ingredients to pan first. Then add butter or margarine, cut into pieces for faster blending.
Diagram 7 | Diagram 8 | Diagram 9 |
| Add dry ingredients next. Level in pan. | Make a well in enter of dry |
|
| ingredients and add yeast to well. |
8