OSD Menu Functions
All the function settings for the LCD monitor are controlled via the control keys located on the bottom part of the front panel. To display the OSD main menu, press the “Menu” keypad button on the control keys. (Note: The OSD menu display will disappear automatically after approximately 10 seconds, if no action is taken.)
The LCD monitor has been adjusted to optimal settings before shipment. Adjustments to the monitor settings can be made using the OSD menu.
• | Press the “Menu” button to display the OSD. |
| |
• | Press the ▲ or ▼ button to select the function to be adjusted. |
| |
• | Press the X button to access the function to be adjusted. |
| |
• | Press the ▲ or ▼ button to select the |
| |
• | Press the W or X buttons to change the current setting of the |
| |
• | To go back to the previous menu, press the button. Changes are saved |
| |
| automatically. |
| |
• | To exit the OSD menu press "Menu" again. It automatically will save any changes | ||
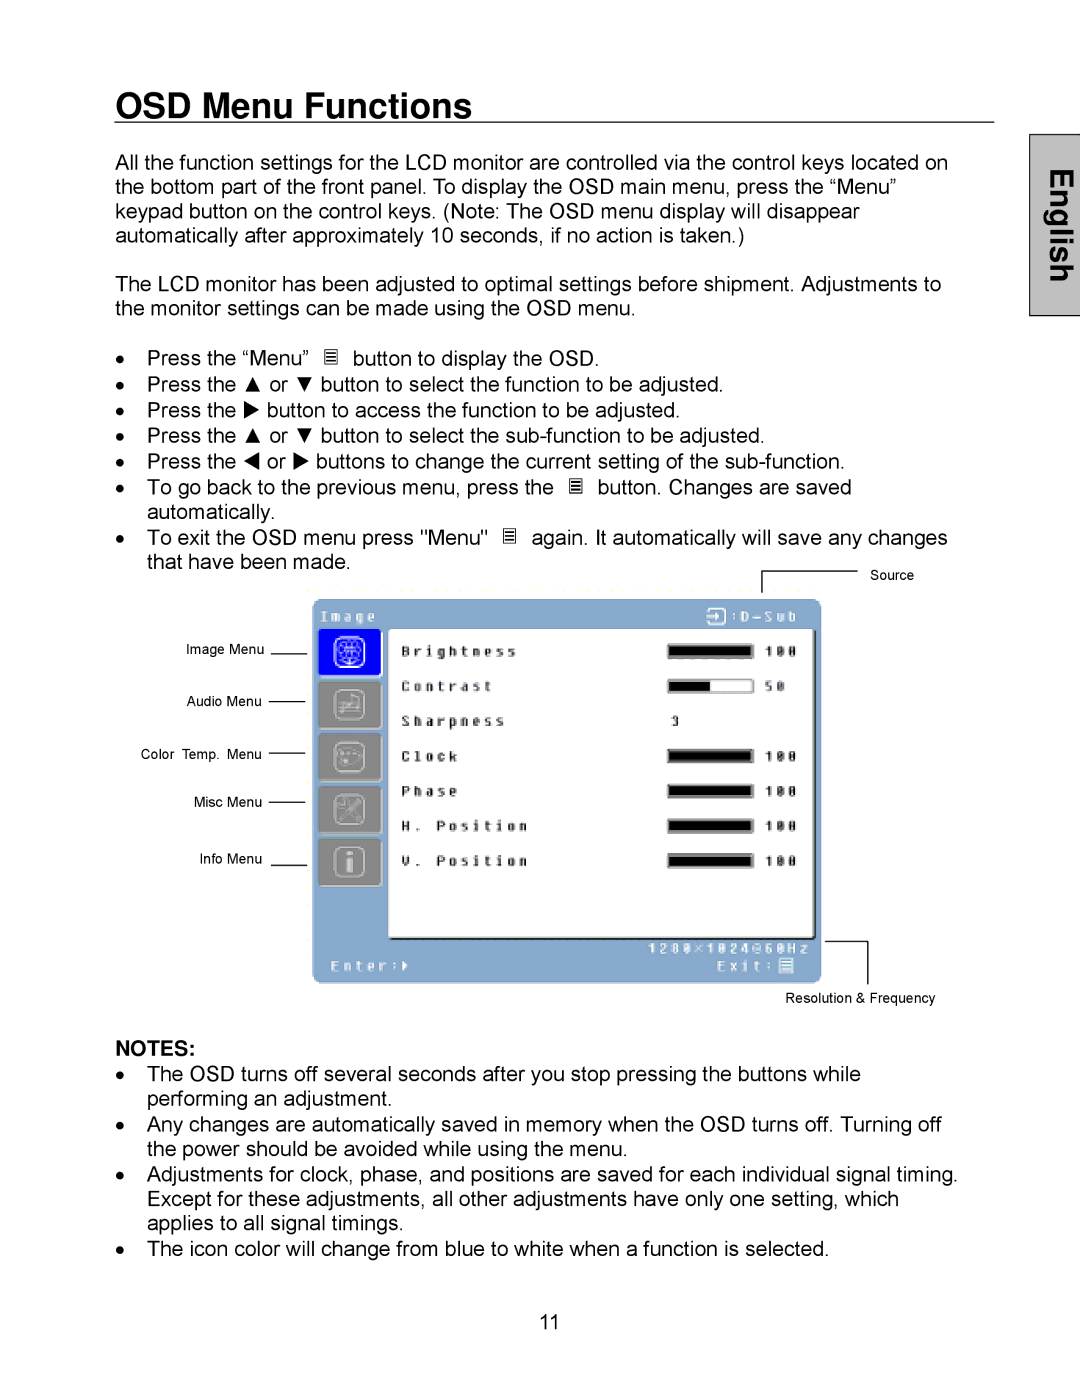
| that have been made. | Source | |
|
|
| |
|
|
|
|
Image Menu
Audio Menu
Color Temp. Menu
Misc Menu
Info Menu
Resolution & Frequency
NOTES:
•The OSD turns off several seconds after you stop pressing the buttons while performing an adjustment.
•Any changes are automatically saved in memory when the OSD turns off. Turning off the power should be avoided while using the menu.
•Adjustments for clock, phase, and positions are saved for each individual signal timing. Except for these adjustments, all other adjustments have only one setting, which applies to all signal timings.
•The icon color will change from blue to white when a function is selected.
11
English