
UL-ES-Parkway-WH10 specifications
The Westinghouse UL-ES-Parkway-WH10 is an innovative and modern fan that combines aesthetic appeal with cutting-edge technology. Designed for both style and functionality, this model is ideal for enhancing the ambiance of any indoor space, whether in a living room, bedroom, or office.One of the standout features of the UL-ES-Parkway-WH10 is its sleek, contemporary design. The fan is available in a clean white finish, allowing it to blend seamlessly into various decor styles. Its minimalist look doesn't compromise its performance, making it an attractive addition to any room.
The UL-ES-Parkway-WH10 is equipped with a powerful motor that delivers efficient airflow while maintaining low noise levels. This means users can enjoy a comfortable environment without the distractions typically associated with traditional fans. Additionally, the fan is designed to operate quietly, making it perfect for use in bedrooms or workspaces where concentration is key.
This model also features an energy-efficient LED light kit, providing excellent illumination while reducing energy consumption. The integrated LED lights allow users to brighten their space while benefiting from longer life spans and lower energy costs compared to traditional bulbs. This thoughtful addition enhances the fan's versatility, making it more than just a source of airflow.
Another remarkable characteristic of the UL-ES-Parkway-WH10 is its multiple speed settings. With the ability to choose from various speed options, users can customize their comfort level based on their specific needs and preferences. Whether it's a gentle breeze or a more robust airflow required on warmer days, this fan adapts efficiently to individual preferences.
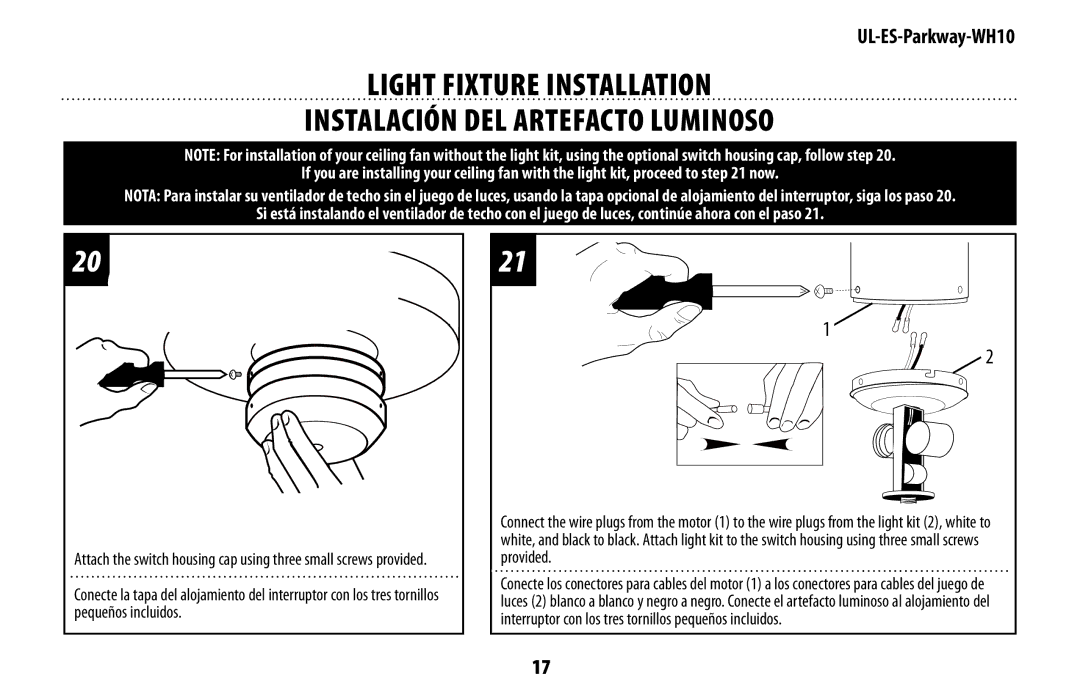
Installation is straightforward, as the fan comes with clear instructions and all necessary hardware. The UL-ES-Parkway-WH10's compatibility with standard ceiling mount installations makes it accessible for most homeowners looking to upgrade their indoor climate control without the hassle of complicated setups.
In conclusion, the Westinghouse UL-ES-Parkway-WH10 is a modern ceiling fan that excels in both design and performance. With its efficient motor, energy-saving LED lighting, customizable speed settings, and ease of installation, it stands out as an exceptional choice for anyone seeking to enhance their indoor spaces. This fan represents a perfect fusion of style and technology, making it a valuable addition to any home or office setting.