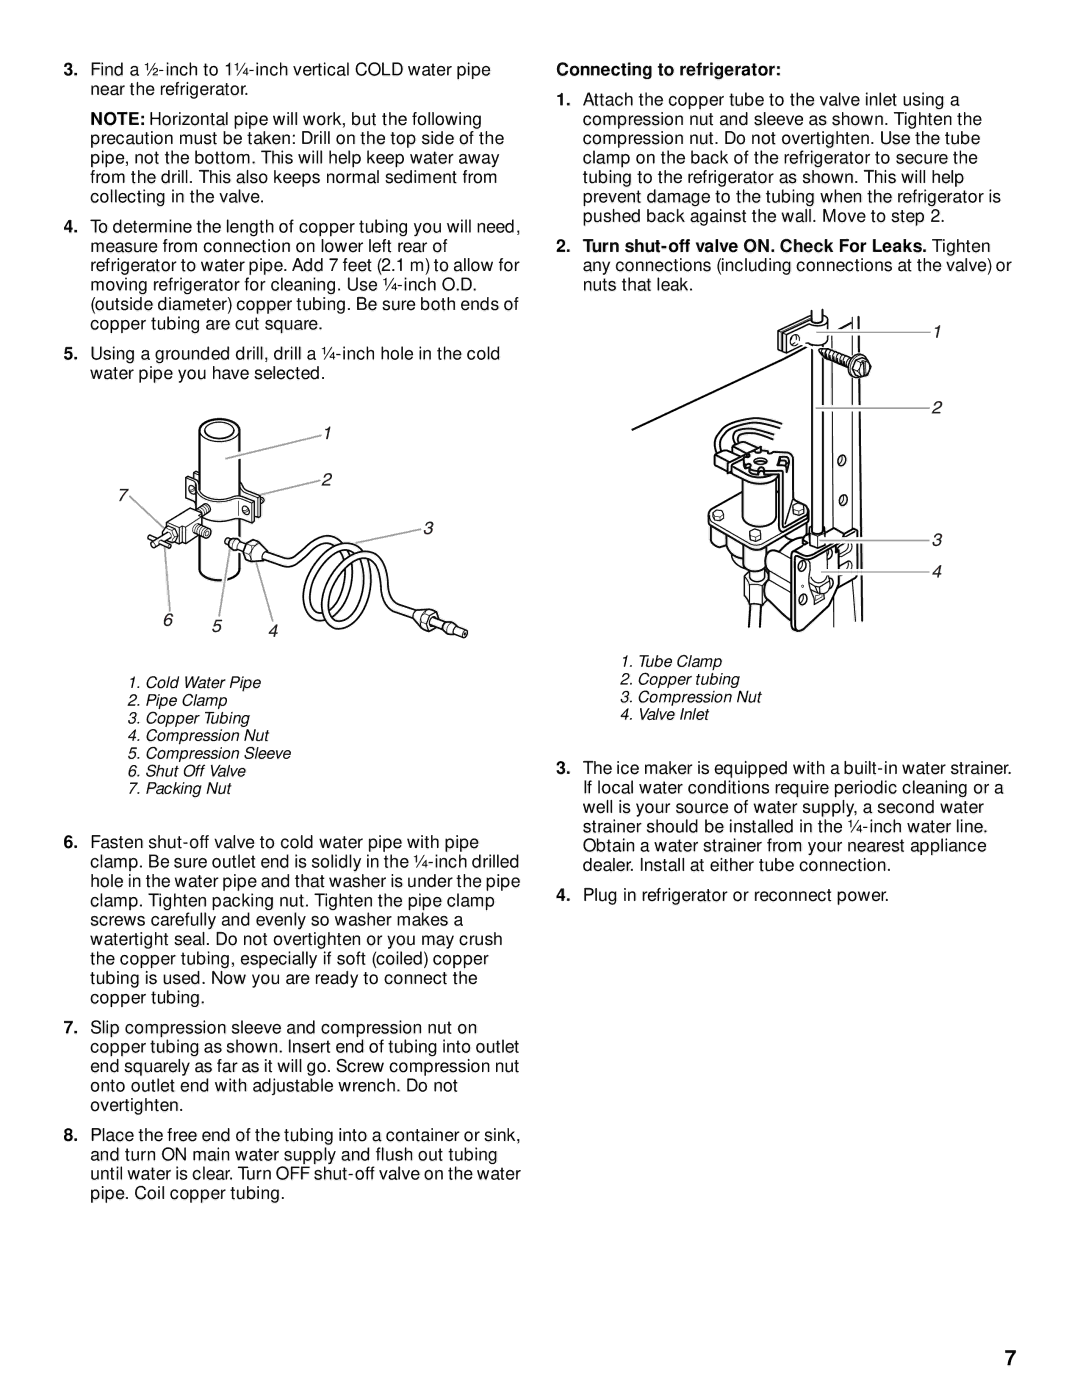
3.Find a
NOTE: Horizontal pipe will work, but the following
precaution must be taken: Drill on the top side of the pipe, not the bottom. This will help keep water away from the drill. This also keeps normal sediment from collecting in the valve.
4.To determine the length of copper tubing you will need, measure from connection on lower left rear of refrigerator to water pipe. Add 7 feet (2.1 m) to allow for moving refrigerator for cleaning. Use
5.Using a grounded drill, drill a
Connecting to refrigerator:
1.Attach the copper tube to the valve inlet using a compression nut and sleeve as shown. Tighten the compression nut. Do not overtighten. Use the tube clamp on the back of the refrigerator to secure the tubing to the refrigerator as shown. This will help prevent damage to the tubing when the refrigerator is pushed back against the wall. Move to step 2.
2.Turn
1.Cold Water Pipe
2.Pipe Clamp
3.Copper Tubing
4.Compression Nut
5.Compression Sleeve
6.Shut Off Valve
7.Packing Nut
6.Fasten
7.Slip compression sleeve and compression nut on copper tubing as shown. Insert end of tubing into outlet end squarely as far as it will go. Screw compression nut onto outlet end with adjustable wrench. Do not overtighten.
8.Place the free end of the tubing into a container or sink, and turn ON main water supply and flush out tubing until water is clear. Turn OFF
1.Tube Clamp
2.Copper tubing
3.Compression Nut
4.Valve Inlet
3.The ice maker is equipped with a
4.Plug in refrigerator or reconnect power.
7
