Reversing the Door Swing
TOOLS NEEDED:
⁵⁄₁₆ inch Hex Head Hinge Screw
Door Stop Screw
Sealing Screw (use on top of doors)
SUGGESTION: Reversing the door swing should be performed by a qualified person.
IMPORTANT: Before you begin, turn the refrigerator OFF and unplug it. Move food from the refrigerator, freezer and both doors to another refrigerator or cooler. On some models, you will need to remove the adjustable door bins.
To remove doors from hinges:
1.Open the refrigerator door and remove the base grille from the bottom front of the refrigerator. (See “Base Grille” section.)
2.Close the refrigerator door and keep both doors closed until you are ready to lift them free from the cabinet.
NOTE: Do not depend on the door magnets to hold the doors in place while you are working. Provide additional support for the doors while the hinges are being moved.
3.Remove the screws and components for the top hinge as shown.
4.Lift the freezer door free from the cabinet.
5.Remove the freezer door stop from the bottom of the freezer door as shown in the Center Hinge illustration. Replace the door stop on the opposite side of the freezer door.
NOTE: Be sure to place the door stop in the correct position, using the hole nearest the front of the door.
6.Remove the screws and components for the center hinge as shown.
7.Lift the refrigerator door free from the cabinet.
8.Remove the refrigerator door stop from the bottom of the refrigerator door as shown in the Bottom Hinge illustration. Replace the refrigerator door stop on the opposite side of the refrigerator door.
NOTE: Be sure to place the door stop in the correct position, using the hole nearest the front of the door.
9.Remove the screws and components for the bottom hinge as shown.
NOTE: If you are reversing the door swing, you should move the handles while the doors are off of the refrigerator. Follow the instructions in the “Reversing the Door Handles” section before replacing the doors.
To replace doors on hinges:
1.Using a flat putty knife, remove the hole plugs from the top of the refrigerator cabinet that cover the screw holes on the opposite side of the refrigerator.
2.Replace the components and screws for the bottom hinge. Tighten screws with a wrench.
3.Replace the refrigerator door.
NOTE: Do not depend on the door magnets to hold the doors in place while you are working. Provide additional support for the doors while the hinges are being moved.
4.Replace the components and screws for the center hinge as shown. Do not tighten completely.
5.Remove the top hinge hole plug from the top of the freezer door and replace it on the other side.
6.Replace the freezer door.
7.Replace the components and screws for the top hinge as shown. Do not tighten completely.
8.Line up doors so they are centered between the sides of the cabinet and parallel with each other. Adjust the center and top hinges if necessary. Tighten all screws.
NOTE: If the doors are not closing on their own, see the “Door Closing and Alignment” section.
9.Be sure to fill all openings with either the proper screws or hole plugs. Moisture will enter any unfilled opening.
10.Replace the door bins and base grille. (See the “Base Grille” section.)
11.Plug in the refrigerator and reset the controls. (See “Setting the Controls” section.) When the refrigerator cools down, return the food to the refrigerator.
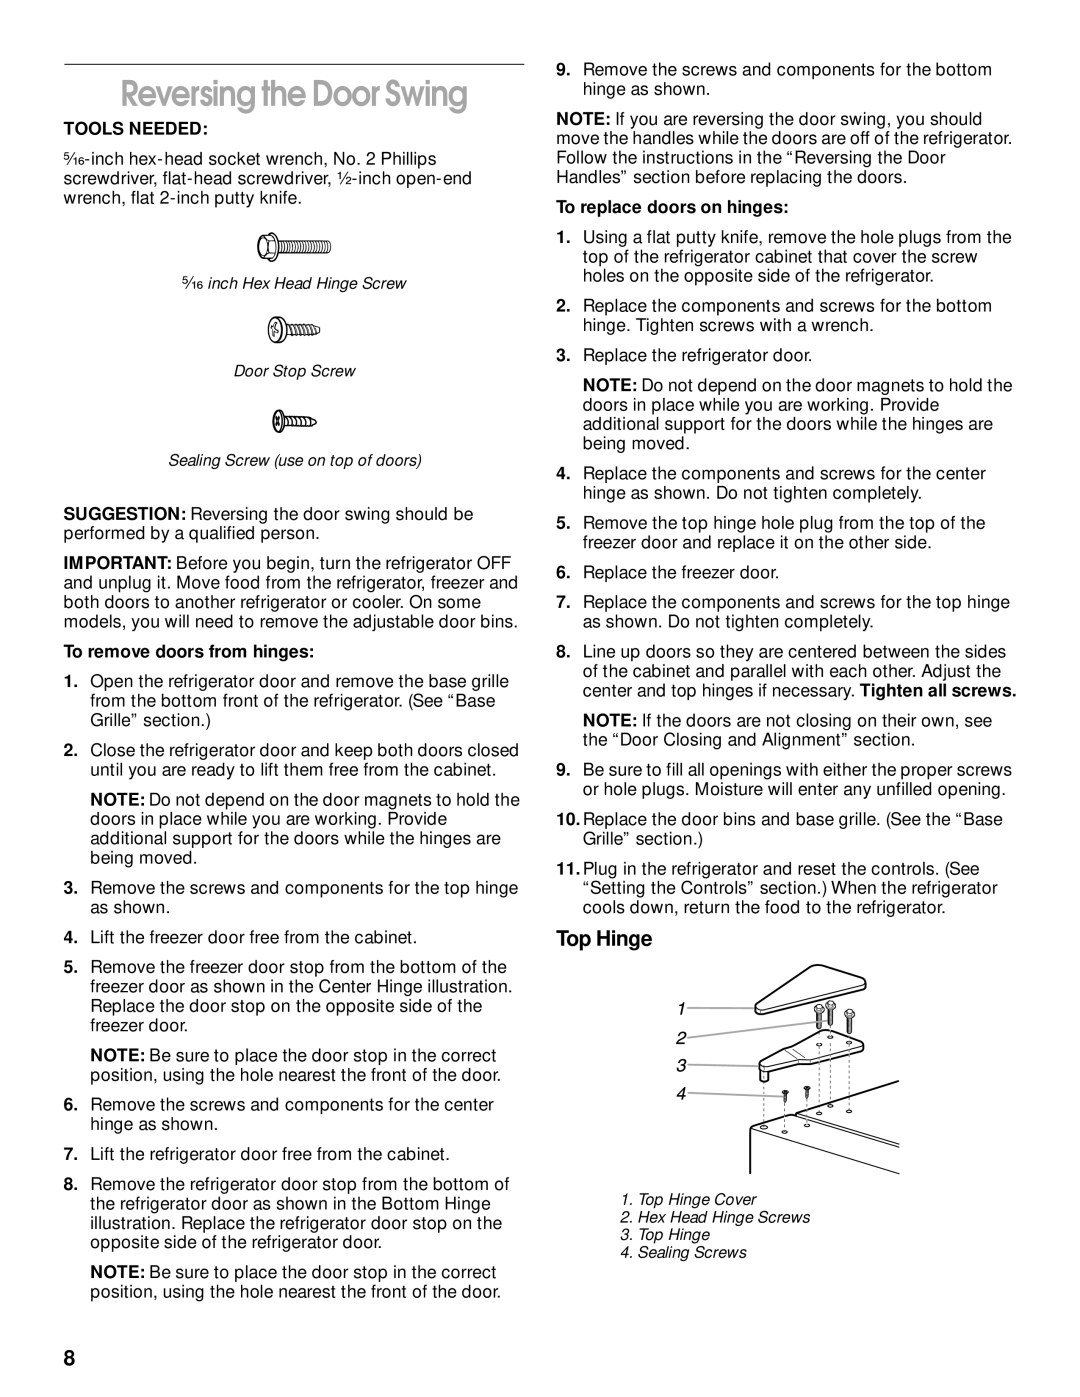
Top Hinge
1.Top Hinge Cover
2.Hex Head Hinge Screws
3.Top Hinge
4.Sealing Screws
8