Now start...
with washer/dryer in laundry area
Personal Injury Hazard More than one person is required to lift, tilt or move the washer/dryer
because of its weight and size. Failure to follow these instruchons
may result in personal inlury.
Truck only from the rear to prevent
product damage.
1 Open washer Ird Take hoses
n and parts packages out of
basket. Close lid
Pull the yellow shlpping strap
completely out of the washer/dryer,
3 Remove the label that
n covers the Yellow Shipping
strap. Pull to completely remove the shrpping strap from the inside of the washer/dryer
Use new hoses and washers that came with your washer/dryer.
6.
Slide nozzle end of dram hose
through the small “loop” in the wire form Wrap the hook end of the wrre form around the drain hose to form a ‘hook” shape
Do Not force excess length of drain
hose down the standpipe. This could cause siphoning.
l1 hose clamp
l | I | wire | form |
|
| |
l | 4 | flat. | washers |
| ||
. | 1 grounding | wire | assembly |
| ||
2 n | Remove | parts from |
| |||
package. | Check | that all | ||||
parts | were | included. |
|
| ||
4 n |
|
|
|
| coupling |
| washer |
|
|
|
|
|
|
|
|
|
| |||
Insert | a | flat | washer |
| into |
|
|
|
|
|
|
|
|
|
| |||||
each |
| end | of the | Inlet hoses |
|
|
|
|
|
|
|
|
|
| ||||||
Check | that | washers | are | firmly | seated |
|
|
|
|
|
|
|
|
|
| |||||
rn | couplings |
|
| vu |
|
|
|
|
|
|
|
|
|
|
|
|
|
|
| |
|
|
|
|
|
|
|
|
| / |
| 7 H |
|
|
|
|
|
|
| ||
Inlet | VdWS |
| 1 |
|
|
|
|
| Put | “hook” | end of | drain | ||||||||
are | plarlic. |
|
| i |
|
|
|
|
|
| ||||||||||
DO Nor srrrp o, |
|
|
|
|
|
|
| hose |
| into | laundry | tub | or | |||||||
|
|
|
|
|
|
|
|
|
|
|
|
| ||||||||
|
|
|
|
|
|
|
|
|
|
|
| standpipe. | Estimate | length | of dram | |||||
|
|
|
|
|
|
|
|
|
|
|
| hose | needed |
| when | washer/dryer | is | |||
|
|
|
|
|
|
|
|
|
|
|
| in final | position |
| If | the | drain | hose is | ||
|
|
|
|
| I |
|
|
|
|
|
| too |
|
| clamp | and | ||||
Attach | one | hose |
|
|
|
| coupling: | cut | flexible | end | of | hose | ||||||||
to | the | bottom |
| inlet |
|
|
| - | (Do | Not | cut |
| end | of | ||||||
valve | Then | attach |
|
|
| k- | drown | hose.) | Push | and | twist | coupling | ||||||||
|
|
|
|
| ||||||||||||||||
the | second | hose | to | the | top | inlet |
| securely | onto |
| drain | nose. | (You | |||||||
valve. | Tighten |
| couplrngs |
| by | hand, |
| should | feel top | of | dram | hose | through | |||||||
then | use | pliers | to | make | an | additional |
| coupling.) | Slide clama | over |
| |||||||||
turn |
|
|
|
|
|
|
| couplrng | and |
| hose |
|
|
|
| |||||
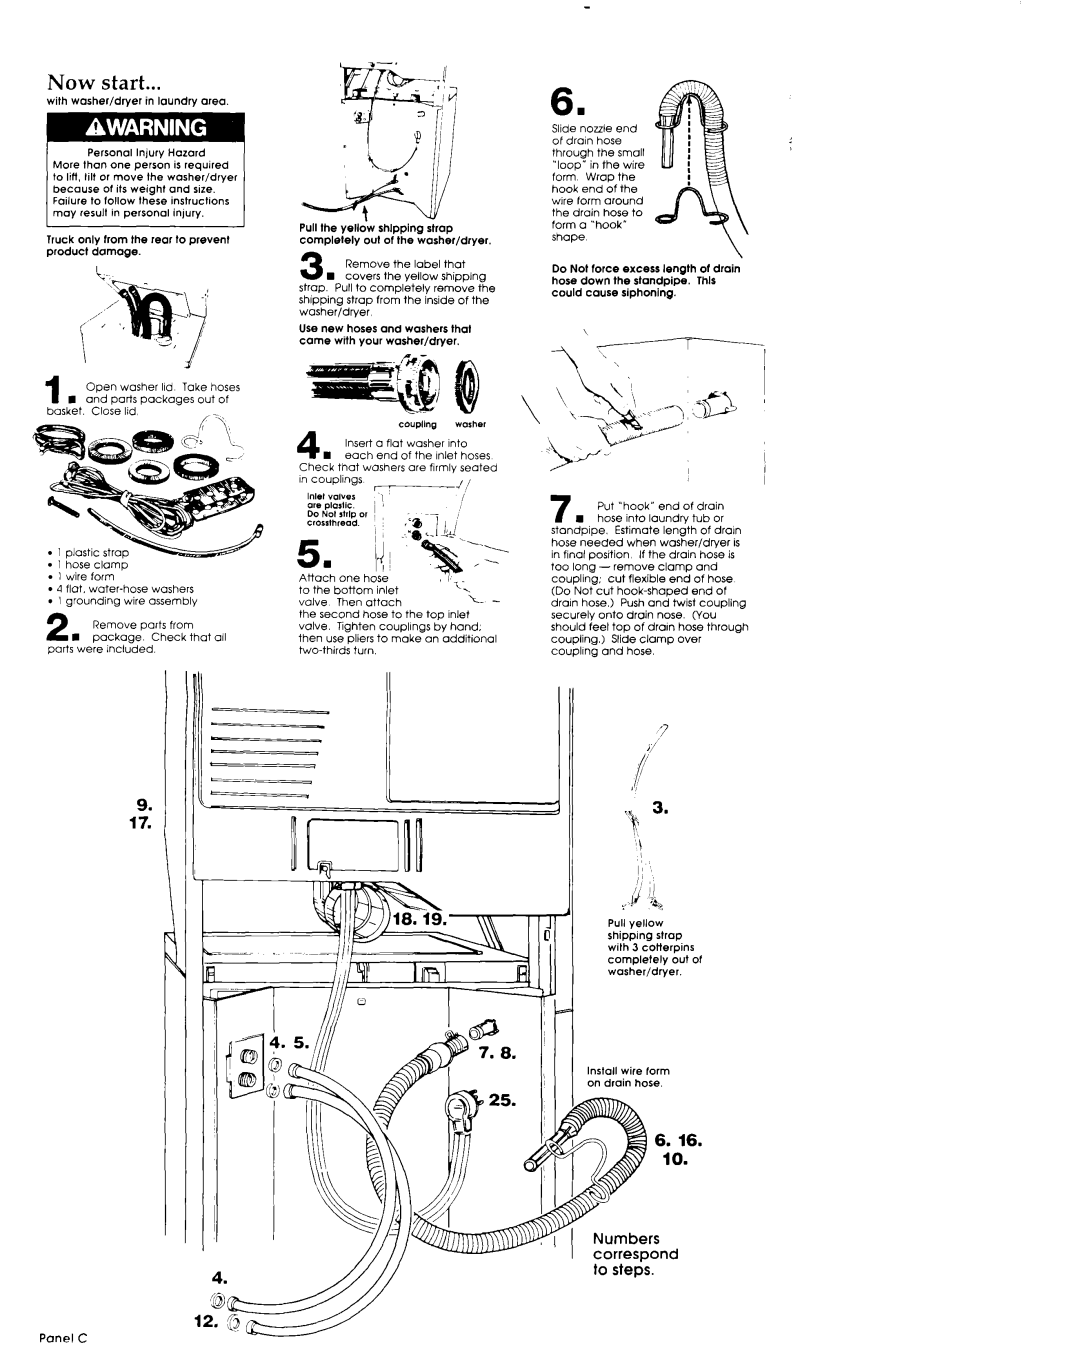
9.
17.
Pull yellow shipprng strop with 3 cotterpins
completely out of washer/dryer.
Install wire form on drain hose.
6. 16.
10.
Numbers correspond to steps.
Panel C