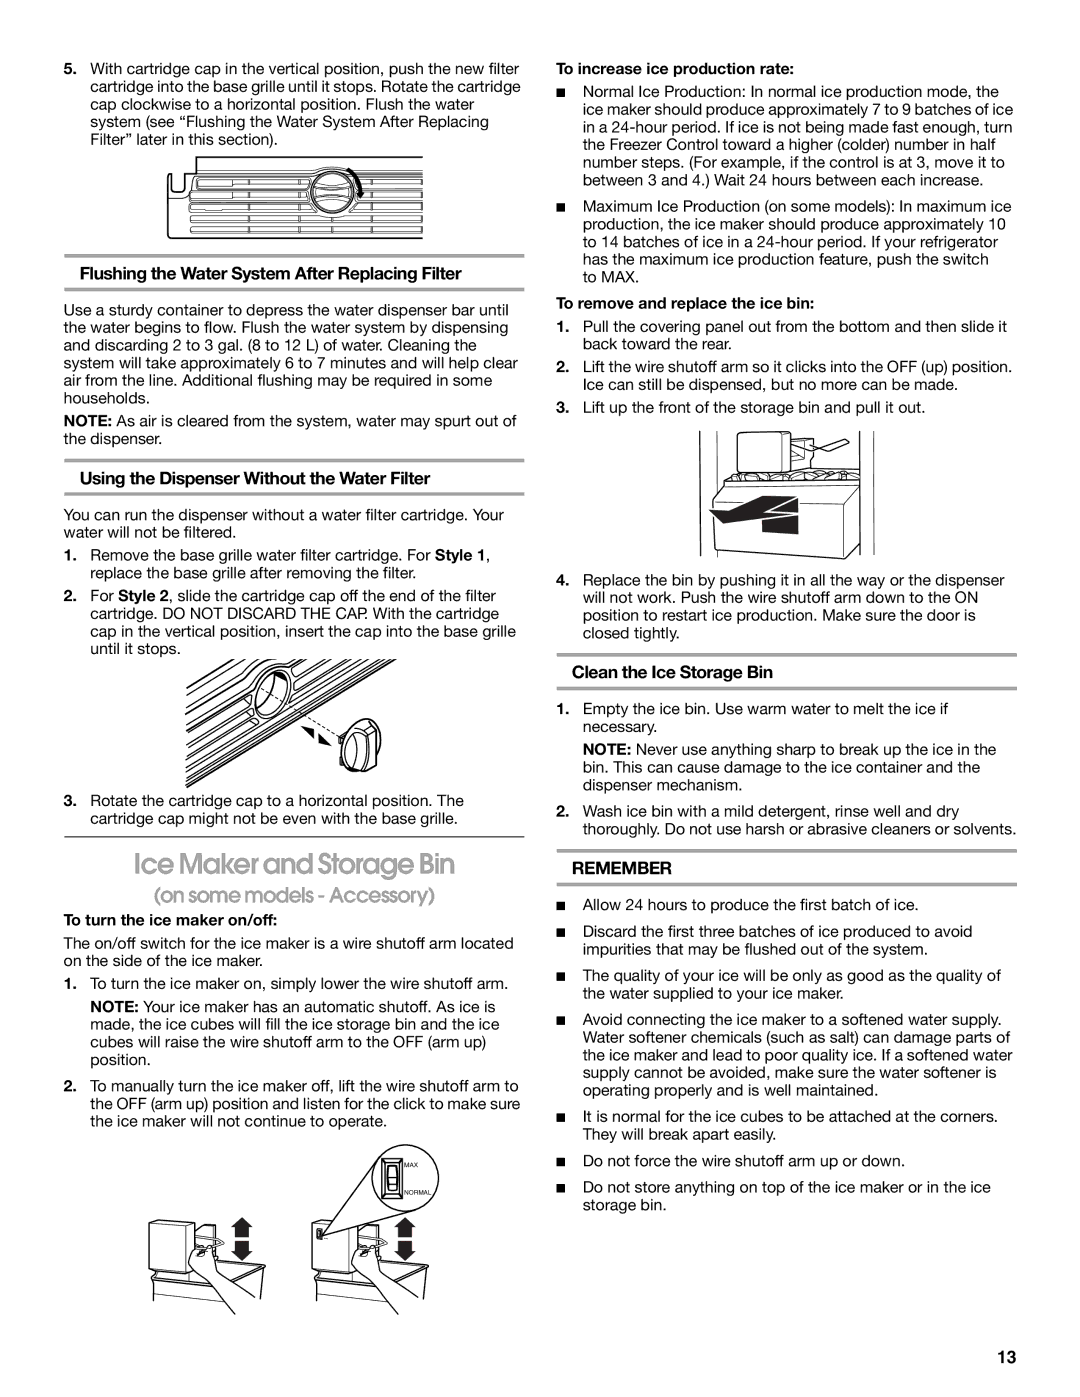
5.With cartridge cap in the vertical position, push the new filter cartridge into the base grille until it stops. Rotate the cartridge cap clockwise to a horizontal position. Flush the water system (see “Flushing the Water System After Replacing Filter” later in this section).

Flushing the Water System After Replacing Filter

Use a sturdy container to depress the water dispenser bar until the water begins to flow. Flush the water system by dispensing and discarding 2 to 3 gal. (8 to 12 L) of water. Cleaning the system will take approximately 6 to 7 minutes and will help clear air from the line. Additional flushing may be required in some households.

NOTE: As air is cleared from the system, water may spurt out of the dispenser.

Using the Dispenser Without the Water Filter

You can run the dispenser without a water filter cartridge. Your water will not be filtered.

1.Remove the base grille water filter cartridge. For Style 1, replace the base grille after removing the filter.

2.For Style 2, slide the cartridge cap off the end of the filter cartridge. DO NOT DISCARD THE CAP. With the cartridge cap in the vertical position, insert the cap into the base grille until it stops.

3.Rotate the cartridge cap to a horizontal position. The cartridge cap might not be even with the base grille.

Ice Maker and Storage Bin

(on some models - Accessory)

To turn the ice maker on/off:

The on/off switch for the ice maker is a wire shutoff arm located on the side of the ice maker.

1.To turn the ice maker on, simply lower the wire shutoff arm.

NOTE: Your ice maker has an automatic shutoff. As ice is made, the ice cubes will fill the ice storage bin and the ice cubes will raise the wire shutoff arm to the OFF (arm up) position.

2.To manually turn the ice maker off, lift the wire shutoff arm to the OFF (arm up) position and listen for the click to make sure the ice maker will not continue to operate.

MAX

NORMAL

To increase ice production rate:

Normal Ice Production: In normal ice production mode, the ice maker should produce approximately 7 to 9 batches of ice in a 24-hour period. If ice is not being made fast enough, turn the Freezer Control toward a higher (colder) number in half number steps. (For example, if the control is at 3, move it to between 3 and 4.) Wait 24 hours between each increase.

Maximum Ice Production (on some models): In maximum ice production, the ice maker should produce approximately 10 to 14 batches of ice in a 24-hour period. If your refrigerator has the maximum ice production feature, push the switch to MAX.

To remove and replace the ice bin:

1.Pull the covering panel out from the bottom and then slide it back toward the rear.

2.Lift the wire shutoff arm so it clicks into the OFF (up) position. Ice can still be dispensed, but no more can be made.

3.Lift up the front of the storage bin and pull it out.

4.Replace the bin by pushing it in all the way or the dispenser will not work. Push the wire shutoff arm down to the ON position to restart ice production. Make sure the door is closed tightly.

Clean the Ice Storage Bin

1.Empty the ice bin. Use warm water to melt the ice if necessary.

NOTE: Never use anything sharp to break up the ice in the bin. This can cause damage to the ice container and the dispenser mechanism.

2.Wash ice bin with a mild detergent, rinse well and dry thoroughly. Do not use harsh or abrasive cleaners or solvents.

REMEMBER

Allow 24 hours to produce the first batch of ice.

Discard the first three batches of ice produced to avoid impurities that may be flushed out of the system.

The quality of your ice will be only as good as the quality of the water supplied to your ice maker.

Avoid connecting the ice maker to a softened water supply. Water softener chemicals (such as salt) can damage parts of the ice maker and lead to poor quality ice. If a softened water supply cannot be avoided, make sure the water softener is operating properly and is well maintained.

It is normal for the ice cubes to be attached at the corners. They will break apart easily.

Do not force the wire shutoff arm up or down.

Do not store anything on top of the ice maker or in the ice storage bin.

13

Page 13
Image 13
Whirlpool 7ED5FTGXKT01, 7GS6SHAXKQ01 manual Ice Maker and Storage Bin, Flushing the Water System After Replacing Filter

CS25AFXKT04, CS25AFXKT03, 7SS25AFXLQ00, 7GS6SHAXKT02, CS22AFXKB05 specifications

The Whirlpool 7GS6SHAXKQ01, 7ED7FHGXKQ01, 7GS6SHAXKB01, 7GS6SHAXKT00, and 7GS6SHAXKB02 are advanced kitchen appliances designed to meet the needs of modern households. With a focus on efficiency, capacity, and innovative technologies, these models offer a range of features that make cooking and food storage more convenient.

The Whirlpool 7GS series refrigerator models focus on maximizing storage space while maintaining energy efficiency. They come equipped with advanced cooling technologies that ensure even distribution of cold air, preserving the freshness of foods for a longer period. The adaptive cooling feature intelligently modifies temperature settings based on the contents of the refrigerator, helping to minimize energy consumption without sacrificing performance.

In terms of organization, these refrigerators include customizable shelving and adjustable bins, allowing users to rearrange their storage space according to their needs. This flexibility is particularly beneficial for accommodating larger items or when reorganizing after grocery trips. Additionally, the humidity-controlled crisper drawers help keep fruits and vegetables fresh by preserving moisture and controlling airflow.

The Whirlpool 7ED7FHGXKQ01 model stands out with its smart technology integration, offering Wi-Fi connectivity that allows users to control the refrigerator remotely through a mobile app. This means you can monitor temperatures, receive alerts for temperature fluctuations, and even create shopping lists based on what’s inside your fridge—all from your smartphone.

Another highlight is the advanced filtration system present in these models, which ensures that the water and ice produced are free from impurities. This feature not only guarantees better taste but also improves the overall health aspects of the water consumed by families.

Energy Star certified, these appliances are designed to reduce energy consumption, making them an eco-friendly choice for environmentally conscious consumers. The efficient compressors and insulation enhance their energy-saving capabilities, leading to lower utility bills.

With their sleek design, these models blend seamlessly into any kitchen decor, enhancing both aesthetics and functionality. The exterior features easy-to-clean surfaces and fingerprint-resistant materials, ensuring that your refrigerator remains spotless and appealing even with everyday use.

In conclusion, the Whirlpool 7GS6SHAXKQ01, 7ED7FHGXKQ01, 7GS6SHAXKB01, 7GS6SHAXKT00, and 7GS6SHAXKB02 models represent a significant advancement in home appliances. Their combination of innovative technology, efficient energy usage, and thoughtful design makes them an excellent choice for anyone looking to upgrade their kitchen with reliable and stylish solutions.