Manuals
/
Whirlpool
/
Kitchen Appliance
/
Cooktop
Whirlpool
ACG902IX
manual
Gas Connection, Installing the Gas Cooker
Models:
ACG902IX
1
1
2
3
4
5
6
7
8
9
10
11
12
13
14
15
16
16
Download
16 pages
43.03 Kb
1
2
3
4
5
6
7
8
9
Install
Clock/Timer Does Not Work
Dimension
Maintenance
Gas Conversion And Adjustment
Thermostat setting C
Cleaning
How to
Safety
Page 4
Image 4
Page 3
Page 5
Page 4
Image 4
Page 3
Page 5
Contents
Users Guide
Installation Servicing
Model ACG
WHEN YOU CALL FOR SERVICE
OVERALL DIMENSIONS
Getting to know your new cooker
GENERAL INFORMATION
INSTALLATION
POSITIONING
If the range is placed on a base, ensure measures are taken
to prevent the product slipping off the base
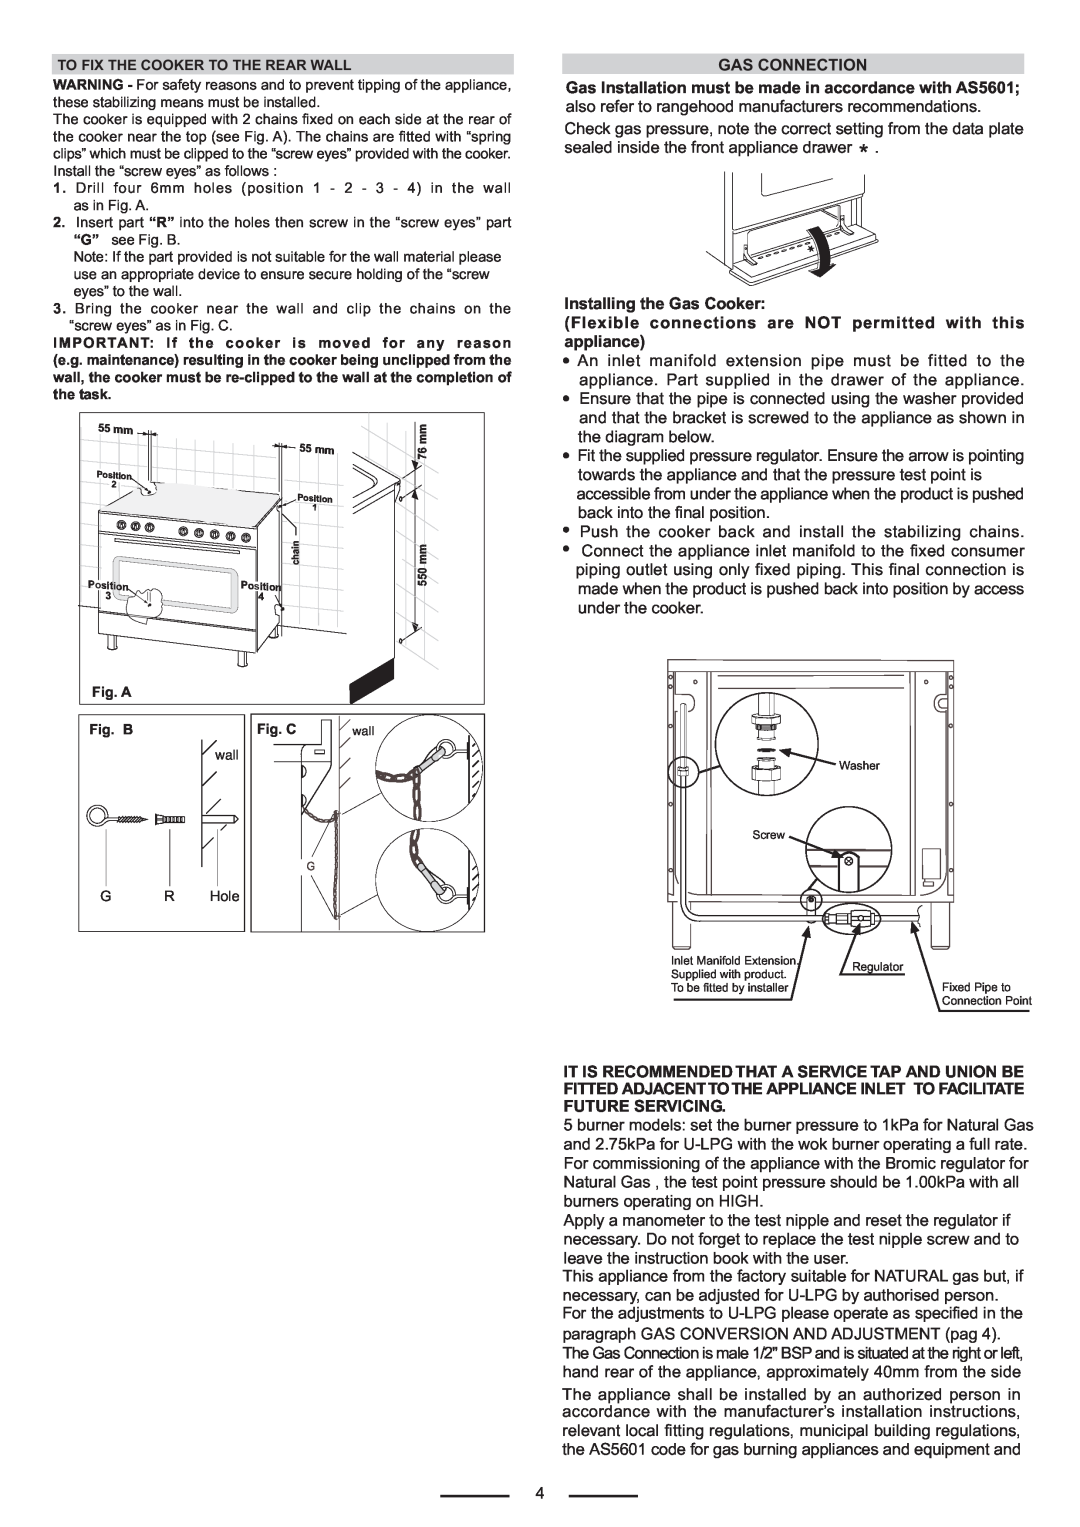
GAS CONNECTION
Installing the Gas Cooker
Flexible connections are NOT permitted with this appliance
VERY IMPORTANT FOR THE INSTALLER
GAS CONVERSION AND ADJUSTMENT
GAS ADJUSTEMENTS
REPLACEMENT OF THE INJECTORS
ELECTRICAL CONNECTION ELECTRICAL CONNECTION
WARNING THIS APPLIANCE MUST BE EARTHED
2nd SECTION FOR THE USER
PROGRAMMER WITH COOKING END TIME
1 Minute Tour
Be safe
Gas and Electricity on
Automatic electric ignition
HOW TO USE YOUR ELECTRIC OVEN
MULTIFUNCTIONAL OVEN The oven is fitted with
Oven thermostat knob
Oven commutator knob
GUIDE FOR CONVENTIONAL COOKING
G E N E R A L I N S T R U C T I O N
PLATE WARMING
Cooking Time
Thermostat setting C
Fruit cake 8/205mm
Oven Shelves
USE OF THE ELECTRIC GRILL USlNG THE GRILL
Sliding runners
Pan supports and burners
CLEANING
Daily
The interior glass of the oven
Removal of oven door
SOME SAFETY POINT
If in difficulty call emergency services
For your safety and that of your children
WARNINGS
PROBLEM SOLVER
Checking the power supply
Power Failure
CLOCK/TIMER DOES NOT WORK
Maintenance schedule
538628 - 10/10
Top
Page
Image
Contents