4.Replace the 2 handle screws for the door handle of the door assembly.

5.Use a small flat-blade screwdriver to remove plug strip in the door opening. Slide the head of the screwdriver under the top portion of the plug strip, being certain not to scratch the dryer surface. Lift up. Repeat in the middle and at the bottom.

Remove the plug stripe in the door opening and insert in the opposite side.

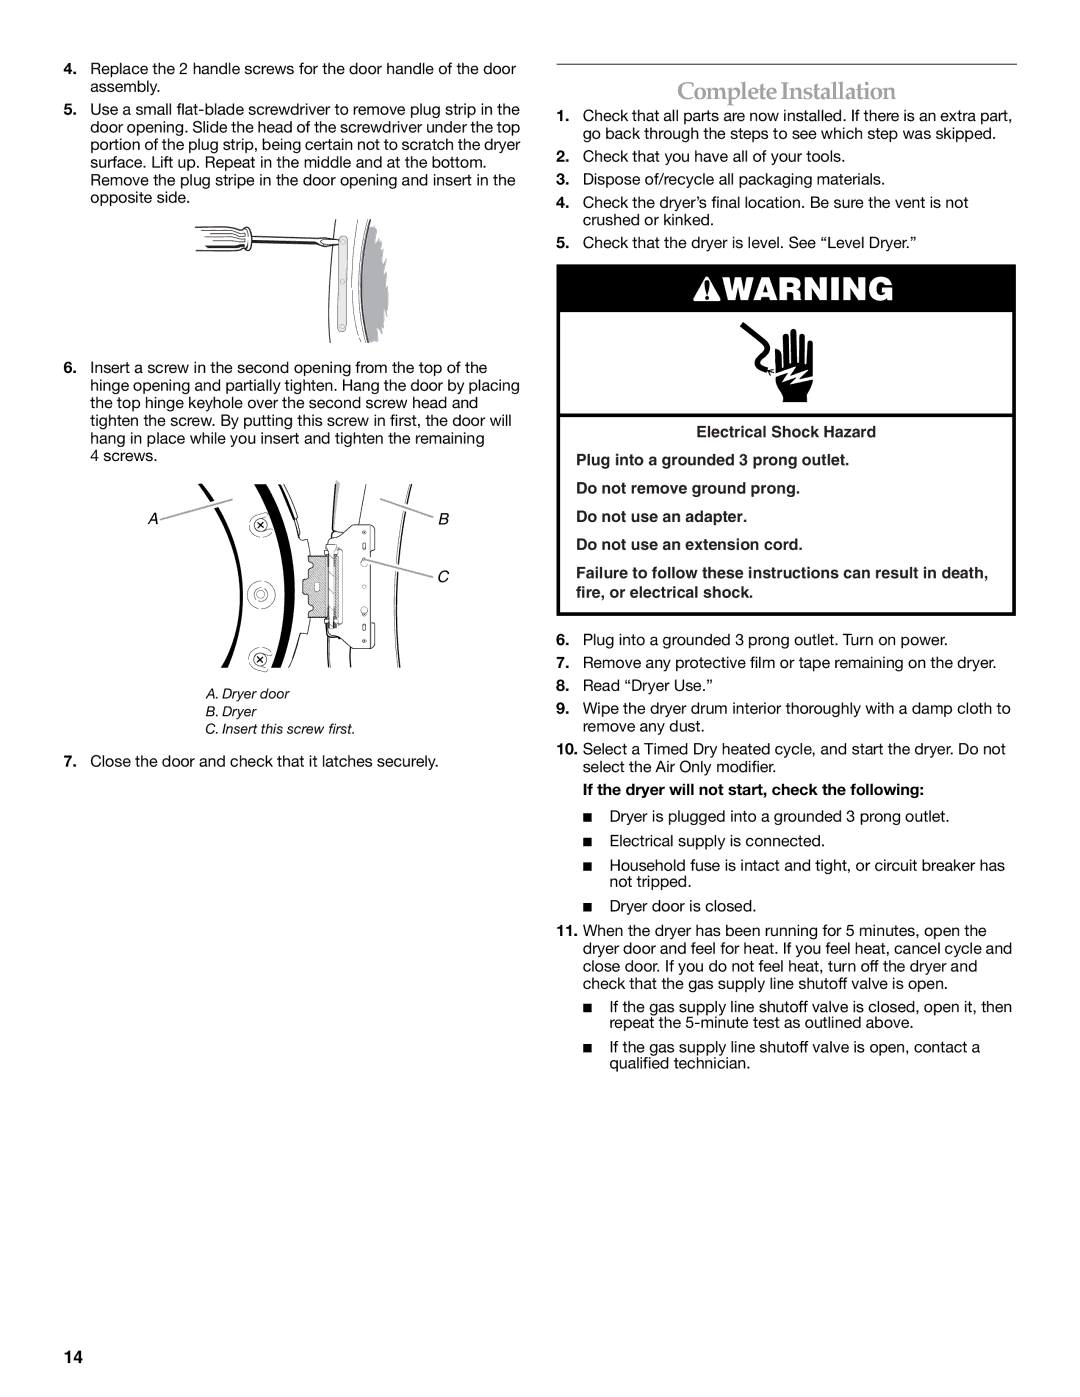
6.Insert a screw in the second opening from the top of the hinge opening and partially tighten. Hang the door by placing the top hinge keyhole over the second screw head and tighten the screw. By putting this screw in first, the door will hang in place while you insert and tighten the remaining

4 screws.

A B

C

A. Dryer door

B.Dryer

C.Insert this screw first.

7.Close the door and check that it latches securely.

Complete Installation

1.Check that all parts are now installed. If there is an extra part, go back through the steps to see which step was skipped.

2.Check that you have all of your tools.

3.Dispose of/recycle all packaging materials.

4.Check the dryer’s final location. Be sure the vent is not crushed or kinked.

5.Check that the dryer is level. See “Level Dryer.”

WARNING

Electrical Shock Hazard

Plug into a grounded 3 prong outlet.

Do not remove ground prong.

Do not use an adapter.

Do not use an extension cord.

Failure to follow these instructions can result in death, fire, or electrical shock.

6.Plug into a grounded 3 prong outlet. Turn on power.

7.Remove any protective film or tape remaining on the dryer.

8.Read “Dryer Use.”

9.Wipe the dryer drum interior thoroughly with a damp cloth to remove any dust.

10.Select a Timed Dry heated cycle, and start the dryer. Do not select the Air Only modifier.

If the dryer will not start, check the following:

Dryer is plugged into a grounded 3 prong outlet.

Electrical supply is connected.

Household fuse is intact and tight, or circuit breaker has not tripped.

Dryer door is closed.

11.When the dryer has been running for 5 minutes, open the dryer door and feel for heat. If you feel heat, cancel cycle and close door. If you do not feel heat, turn off the dryer and check that the gas supply line shutoff valve is open.

If the gas supply line shutoff valve is closed, open it, then repeat the 5-minute test as outlined above.

If the gas supply line shutoff valve is open, contact a qualified technician.

14

Page 14
Image 14
Whirlpool FRONT-LOADING GAS DRYER manual Complete Installation, Close the door and check that it latches securely

FRONT-LOADING GAS DRYER specifications

The Whirlpool front-loading gas dryer is a pinnacle of modern laundry technology, combining efficiency, performance, and convenience. Designed to meet the demands of busy households, it offers a range of features that simplify the drying process while ensuring optimal results for all types of fabrics.

One of the standout features of this gas dryer is its advanced moisture sensing technology. The sensor detects when clothes are dry and automatically stops the cycle, preventing over-drying and saving energy. This not only protects garments from damage but also reduces energy consumption, making it an environmentally friendly choice.

In terms of capacity, the Whirlpool front-loading gas dryer boasts a generous drum size that accommodates large loads, allowing users to spend less time doing laundry. The smooth surface of the drum prevents snagging, which is especially important for delicate items. The dryer also features multiple drying cycles, including options for heavy-duty and delicate fabrics, ensuring tailored care for each load.

Moreover, the dryer is equipped with the EcoBoost option, which utilizes a lower heat setting and extended drying time to save energy without compromising drying quality. This makes it an ideal choice for the eco-conscious consumer seeking to reduce their carbon footprint.

Another remarkable characteristic of this gas dryer is its steam-enhanced cycles. The steam feature helps to reduce wrinkles and odors, providing a fresh finish to garments straight from the dryer. This is particularly beneficial for busy individuals who need to look sharp without the hassle of ironing.

The control panel of the Whirlpool front-loading gas dryer is designed for user-friendliness, featuring a clear display and intuitive controls that allow for easy selection of drying settings. The Wrinkle Shield option is also included, which periodically tumbles the load after the cycle ends to keep wrinkles at bay.

Safety is a key consideration in the design, and this dryer includes a lint screen that is easy to clean, ensuring that the appliance operates efficiently and safely.

In conclusion, the Whirlpool front-loading gas dryer is an excellent addition to any laundry room, providing a blend of advanced technologies, thoughtful features, and superior drying performance. Whether tackling everyday laundry or special care items, this dryer delivers on the promise of quality, efficiency, and convenience.