■Give your convertible refrigerator/freezer time to cool down completely before adding food. It is best to wait 24 hours before you put food into the convertible refrigerator/freezer.
■If you add food before the convertible refrigerator/freezer has cooled completely, your food may spoil. Adjusting the Lower and Upper Compartment Controls to a colder than recommended setting will not cool the compartments any faster.
Adjusting Controls
The settings indicated in the previous section should be correct for normal household usage. The controls are set correctly when milk or juice is as cold as you like and when ice cream is firm.
If the temperature is too warm or too cold in the lower or upper compartment, first check the air vents to be sure they are not blocked.
If you need to adjust temperatures, use the settings listed in the chart below as a guide. Wait at least 24 hours between adjustments and then recheck the temperatures.
CONDITION/REASON: | ADJUSTMENT: |
|
|
LOWER COMPARTMENT section | Adjust LOWER |
too warm | COMPARTMENT Control |
- Door opened often, large amount | toward coldest. |
of food added or room temperature |
|
very warm |
|
|
|
UPPER COMPARTMENT section | If in Refrigerator Mode, |
too warm | adjust UPPER |
- Door opened often, or large | COMPARTMENT Control |
amount of food added or very cold | toward coldest. |
room temperature (can’t cycle often | If in Freeze mode, adjust |
enough) | LOWER COMPARTMENT |
| Control toward coldest. |
|
|
LOWER COMPARTMENT section | Adjust UPPER |
too cold | COMPARTMENT Control |
- Controls not set correctly for your | toward cold. |
conditions |
|
|
|
UPPER COMPARTMENT section too | If in REFRIGERATOR |
cold | Mode adjust UPPER |
- Controls not set correctly for your | COMPARTMENT Control |
conditions | toward cold. |
| If in Freeze mode, adjust |
| LOWER COMPARTMENT |
| Control toward cold. |
UPPER COMPARTMENT
FEATURES
Your model may have some or all of these features. Features that can be purchased separately as product accessories are labeled with the word “Accessory.” Not all accessories will fit all models. If you are interested in purchasing one of the accessories, please call the toll- free number on the cover or in the “Assistance or Service” section.
Upper Compartment Shelf
To remove and replace the shelf:
1.Remove the shelf by lifting the entire shelf slightly and move it all the way to one side. Tilt the other side up and out of the shelf supports.
2.Replace the shelf by inserting one end all the way into the center of the shelf supports. Then, lower the other end of the shelf and insert it into the shelf supports.
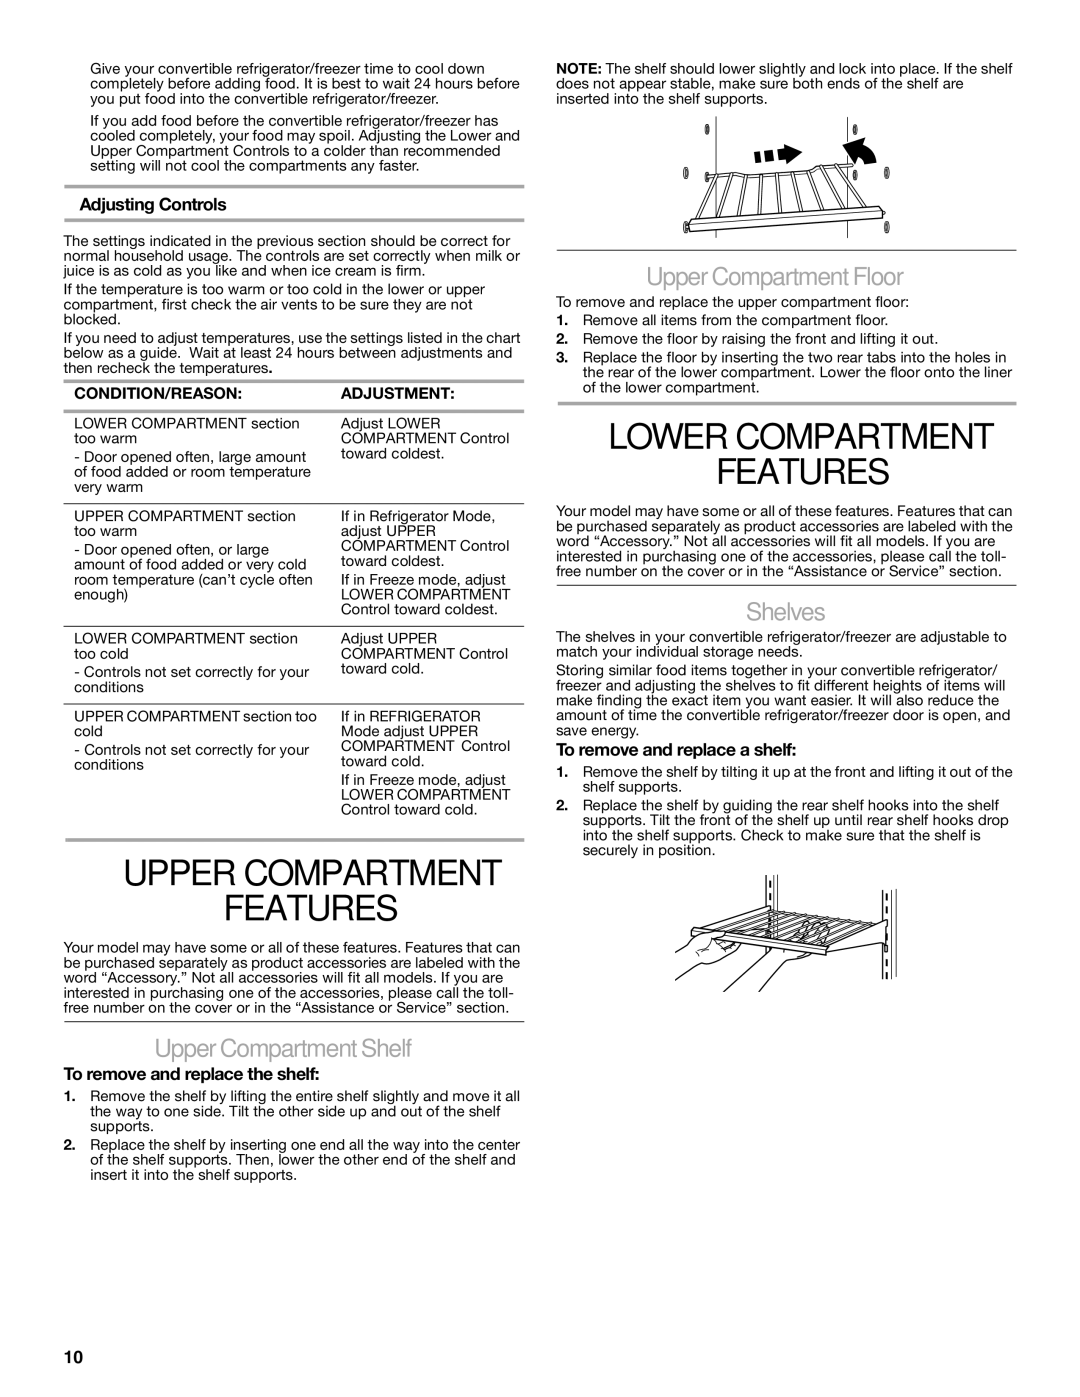
NOTE: The shelf should lower slightly and lock into place. If the shelf does not appear stable, make sure both ends of the shelf are inserted into the shelf supports.
Upper Compartment Floor
To remove and replace the upper compartment floor:
1.Remove all items from the compartment floor.
2.Remove the floor by raising the front and lifting it out.
3.Replace the floor by inserting the two rear tabs into the holes in the rear of the lower compartment. Lower the floor onto the liner of the lower compartment.
LOWER COMPARTMENT
FEATURES
Your model may have some or all of these features. Features that can be purchased separately as product accessories are labeled with the word “Accessory.” Not all accessories will fit all models. If you are interested in purchasing one of the accessories, please call the toll- free number on the cover or in the “Assistance or Service” section.
Shelves
The shelves in your convertible refrigerator/freezer are adjustable to match your individual storage needs.
Storing similar food items together in your convertible refrigerator/ freezer and adjusting the shelves to fit different heights of items will make finding the exact item you want easier. It will also reduce the amount of time the convertible refrigerator/freezer door is open, and save energy.
To remove and replace a shelf:
1.Remove the shelf by tilting it up at the front and lifting it out of the shelf supports.
2.Replace the shelf by guiding the rear shelf hooks into the shelf supports. Tilt the front of the shelf up until rear shelf hooks drop into the shelf supports. Check to make sure that the shelf is securely in position.
10