4.There is no need for routine condenser cleaning in normal home operating environments. If the environment is particularly greasy or dusty, or there is significant pet traffic in the home, the condenser should be cleaned every 2 to
3 months to ensure maximum efficiency. If you need to clean the condenser:
■Remove the base grille.
■Use a vacuum cleaner with a soft brush to clean the grille, the open areas behind the grille and the front surface area of the condenser.
■Replace the base grille when finished.
5.Plug in refrigerator or reconnect power.
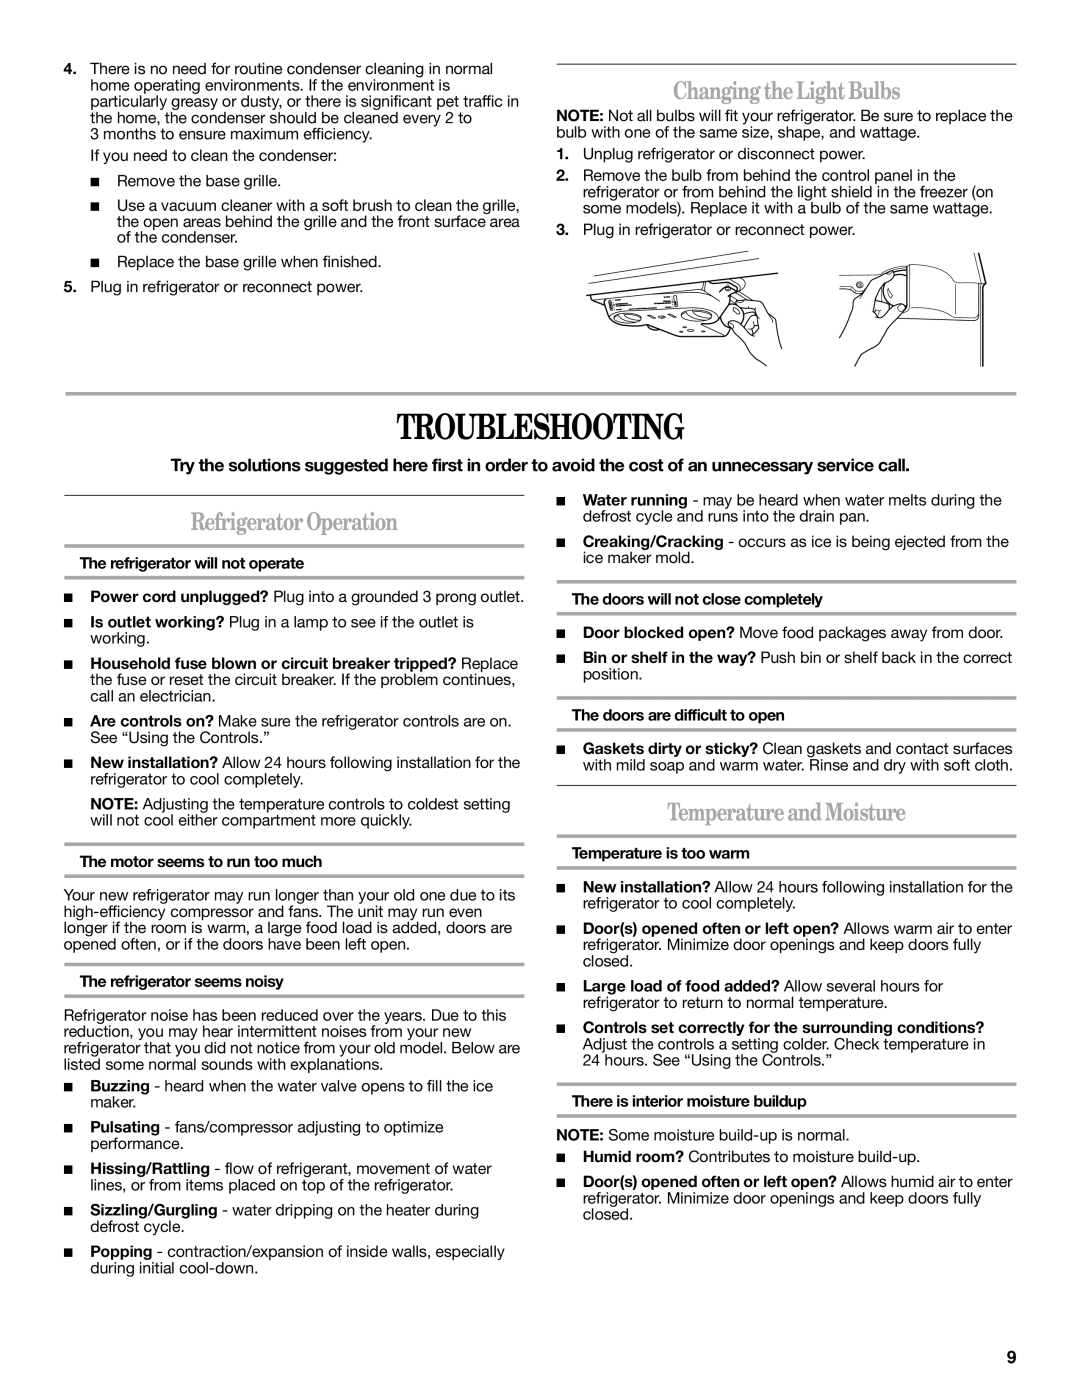
Changing theLightBulbs
NOTE: Not all bulbs will fit your refrigerator. Be sure to replace the bulb with one of the same size, shape, and wattage.
1.Unplug refrigerator or disconnect power.
2.Remove the bulb from behind the control panel in the refrigerator or from behind the light shield in the freezer (on some models). Replace it with a bulb of the same wattage.
3.Plug in refrigerator or reconnect power.
TROUBLESHOOTING
Try the solutions suggested here first in order to avoid the cost of an unnecessary service call.
RefrigeratorOperation
The refrigerator will not operate
■Power cord unplugged? Plug into a grounded 3 prong outlet.
■Is outlet working? Plug in a lamp to see if the outlet is working.
■Household fuse blown or circuit breaker tripped? Replace the fuse or reset the circuit breaker. If the problem continues, call an electrician.
■Are controls on? Make sure the refrigerator controls are on. See “Using the Controls.”
■New installation? Allow 24 hours following installation for the refrigerator to cool completely.
NOTE: Adjusting the temperature controls to coldest setting will not cool either compartment more quickly.
The motor seems to run too much
■Water running - may be heard when water melts during the defrost cycle and runs into the drain pan.
■Creaking/Cracking - occurs as ice is being ejected from the ice maker mold.
The doors will not close completely
■Door blocked open? Move food packages away from door.
■Bin or shelf in the way? Push bin or shelf back in the correct position.
The doors are difficult to open
■Gaskets dirty or sticky? Clean gaskets and contact surfaces with mild soap and warm water. Rinse and dry with soft cloth.
TemperatureandMoisture
Temperature is too warm
Your new refrigerator may run longer than your old one due to its
The refrigerator seems noisy
Refrigerator noise has been reduced over the years. Due to this reduction, you may hear intermittent noises from your new refrigerator that you did not notice from your old model. Below are listed some normal sounds with explanations.
■Buzzing - heard when the water valve opens to fill the ice maker.
■Pulsating - fans/compressor adjusting to optimize performance.
■Hissing/Rattling - flow of refrigerant, movement of water lines, or from items placed on top of the refrigerator.
■Sizzling/Gurgling - water dripping on the heater during defrost cycle.
■Popping - contraction/expansion of inside walls, especially during initial
■New installation? Allow 24 hours following installation for the refrigerator to cool completely.
■Door(s) opened often or left open? Allows warm air to enter refrigerator. Minimize door openings and keep doors fully closed.
■Large load of food added? Allow several hours for refrigerator to return to normal temperature.
■Controls set correctly for the surrounding conditions? Adjust the controls a setting colder. Check temperature in 24 hours. See “Using the Controls.”
There is interior moisture buildup
NOTE: Some moisture
■Humid room? Contributes to moisture
■Door(s) opened often or left open? Allows humid air to enter refrigerator. Minimize door openings and keep doors fully closed.
9