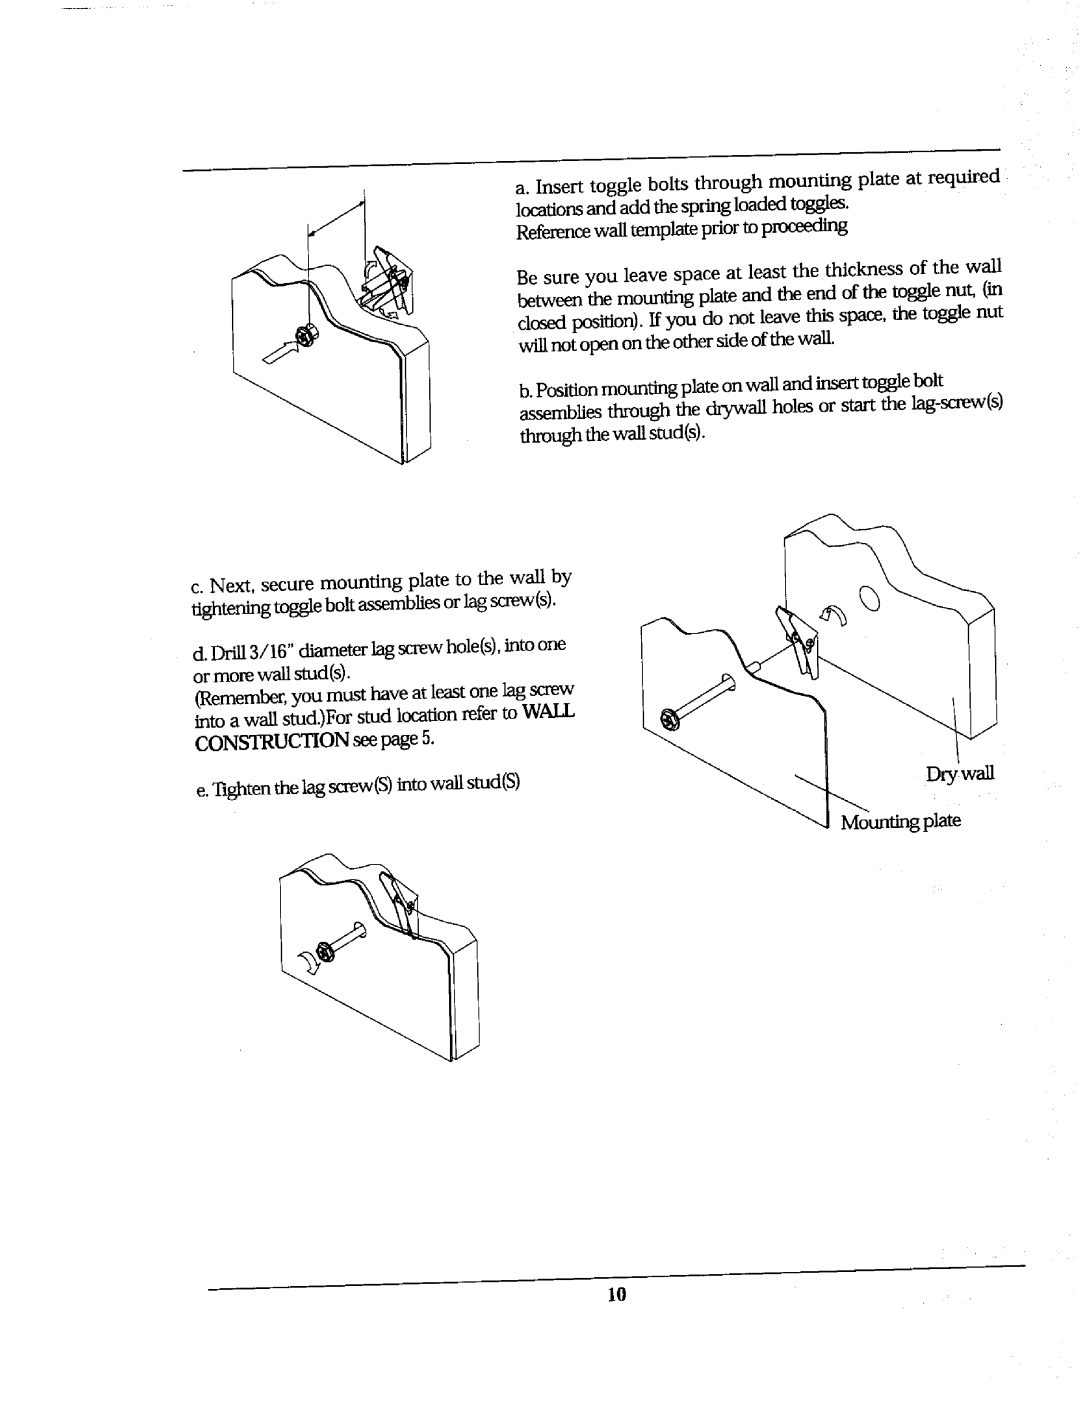
a. Insert toggle bolts through mounting plate at required locations and add the spring loaded toggles.
Reference wall template prior to proceeding
Be sure you leave space at least the thickness of the wall between the mounting plate and the end of the toggle nuL (in dosed position). If you do not leave this space, the toggle nut will not open on the other side of the wall.
b. Posl_on moun_g plate on wall and insert toggle bolt
assemblies through the drywall holes or start the
throughthewalstud(s)l .
c. Next, secure mounting plate to the wall by tightening toggle bolt assemblies or lag screw(s).
d. Drill 3/16" diameter lag screw hole(s), into one or more wall stud(s).
(Remember, you must have at least one lag screw into a wall stud.)For stud location refer to W.ALI.
CONSTRUCTION see page 5.
e. Tighten the lag screw(S) into wall stud(S)
lO