4.Push CANCEL/OFF pad.

5.Reinstall oven bake burner access plate.

Check Operation of Oven Broil Burner

1.Close the oven door.

2.Press the BROIL pad. Depending on your model, “HI” will appear in the temperature display

OR

“MAXI BROIL” and broil temperature will appear in the temperature display.

3.Press the START pad. On some models, “HEAT” and “ON” indicators will light.

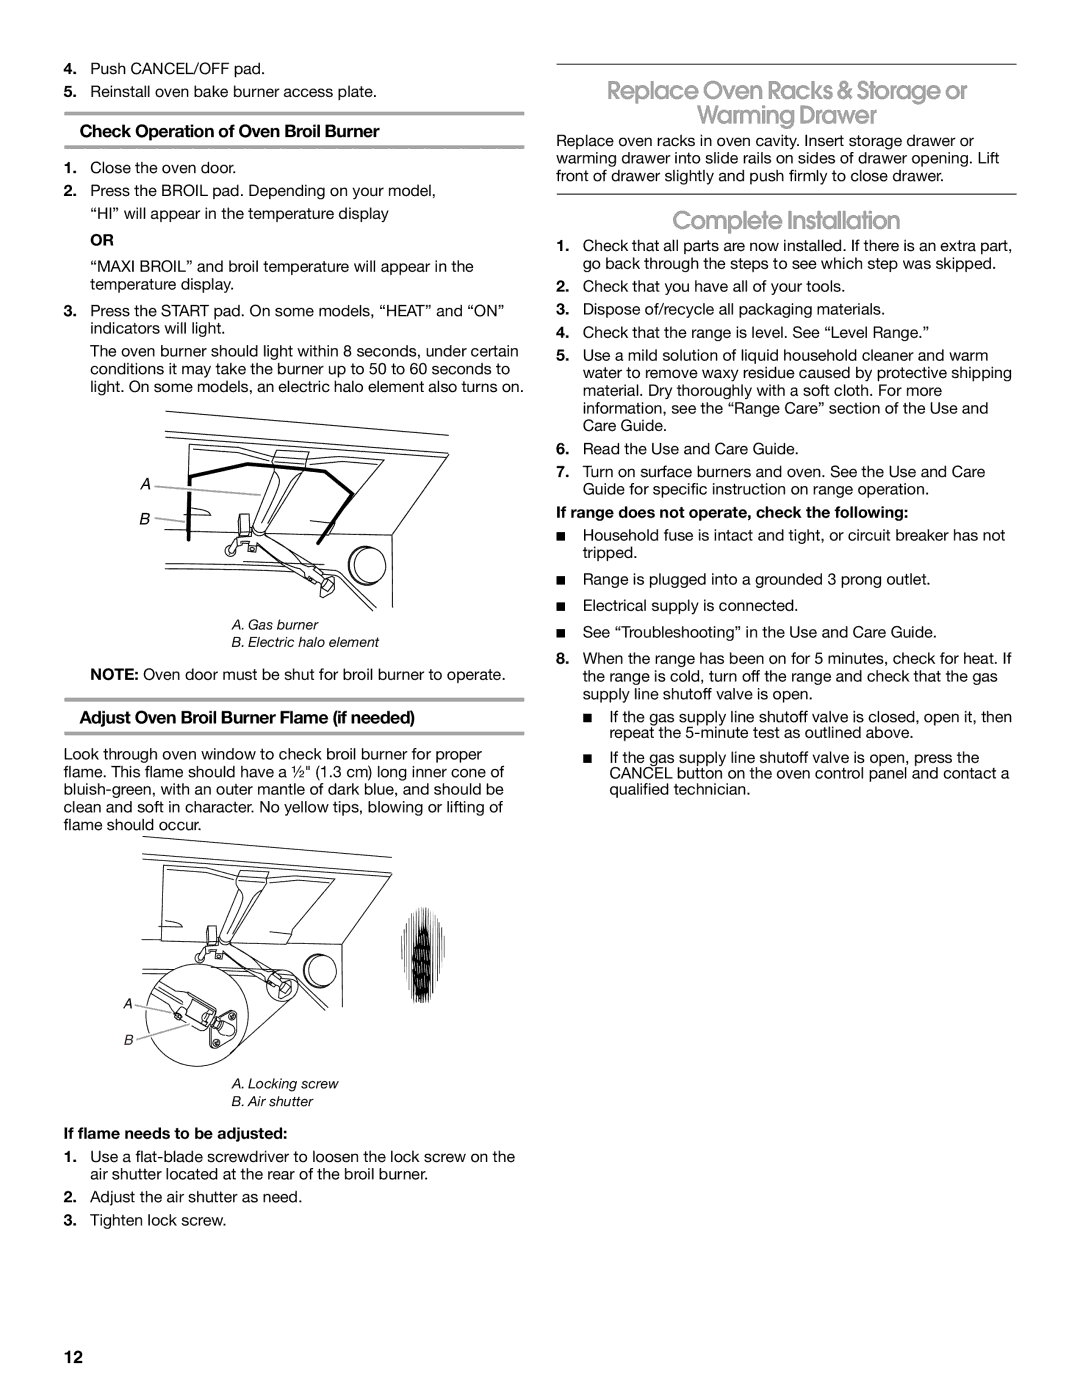
The oven burner should light within 8 seconds, under certain conditions it may take the burner up to 50 to 60 seconds to light. On some models, an electric halo element also turns on.

A

B

A. Gas burner

B. Electric halo element

NOTE: Oven door must be shut for broil burner to operate.

Adjust Oven Broil Burner Flame (if needed)

Look through oven window to check broil burner for proper flame. This flame should have a ½" (1.3 cm) long inner cone of bluish-green, with an outer mantle of dark blue, and should be clean and soft in character. No yellow tips, blowing or lifting of flame should occur.

A

B

A. Locking screw

B. Air shutter

If flame needs to be adjusted:

1.Use a flat-blade screwdriver to loosen the lock screw on the air shutter located at the rear of the broil burner.

2.Adjust the air shutter as need.

3.Tighten lock screw.

Replace Oven Racks & Storage or

Warming Drawer

Replace oven racks in oven cavity. Insert storage drawer or warming drawer into slide rails on sides of drawer opening. Lift front of drawer slightly and push firmly to close drawer.

Complete Installation

1.Check that all parts are now installed. If there is an extra part, go back through the steps to see which step was skipped.

2.Check that you have all of your tools.

3.Dispose of/recycle all packaging materials.

4.Check that the range is level. See “Level Range.”

5.Use a mild solution of liquid household cleaner and warm water to remove waxy residue caused by protective shipping material. Dry thoroughly with a soft cloth. For more information, see the “Range Care” section of the Use and Care Guide.

6.Read the Use and Care Guide.

7.Turn on surface burners and oven. See the Use and Care Guide for specific instruction on range operation.

If range does not operate, check the following:

Household fuse is intact and tight, or circuit breaker has not tripped.

Range is plugged into a grounded 3 prong outlet.

Electrical supply is connected.

See “Troubleshooting” in the Use and Care Guide.

8.When the range has been on for 5 minutes, check for heat. If the range is cold, turn off the range and check that the gas supply line shutoff valve is open.

If the gas supply line shutoff valve is closed, open it, then repeat the 5-minute test as outlined above.

If the gas supply line shutoff valve is open, press the CANCEL button on the oven control panel and contact a qualified technician.

12

Page 12
Image 12
Whirlpool Slide-In Electric Ranges Replace Oven Racks & Storage or Warming Drawer, Complete Installation

Slide-In Electric Ranges specifications

Whirlpool slide-in electric ranges are designed to bring convenience, style, and efficiency to the modern kitchen. These innovative appliances stand out not just for their aesthetics but also for their advanced features and technology that cater to a range of cooking needs.

One of the main characteristics of Whirlpool slide-in electric ranges is their seamless design. Unlike traditional freestanding models, slide-in ranges have a built-in appearance, fitting snugly between cabinets for a sophisticated look. This design eliminates the gap between the range and the countertop, preventing spills and crumbs from accumulating. Additionally, the front-control design places the controls at the front of the unit, allowing easy access and eliminating the need to reach over hot pots and pans.

Whirlpool electric ranges are equipped with powerful and precise cooking technologies. Many models feature advanced induction cooking options that provide rapid heating and consistent temperature control. Induction cooking utilizes electromagnetic energy to directly heat pots and pans, making it faster and more energy-efficient compared to traditional electric coils or radiant burners. For those who prefer traditional cooking, the ranges often come with smooth-top radiant elements, which provide a modern surface that is easy to clean.

In terms of oven features, Whirlpool slide-in electric ranges include convection cooking options, which circulate hot air throughout the oven for even baking and roasting. This technology ensures that food cooks consistently and eliminates the need for manual rotation. Additionally, many models offer self-cleaning options, making maintenance easier and freeing up time for users.

Another noteworthy feature is the FlexHeat Dual Radiant Element, offering flexibility in cooking. This element is equipped with both 6-inch and 9-inch zones, allowing cooks to match the size of their cookware with the burner size, optimizing energy use.

Connectivity is also a significant aspect of modern Whirlpool electric ranges. Many of their models are Wi-Fi-enabled, allowing users to control their ovens remotely using a smartphone. This means preheating the oven, adjusting cooking temperatures, and even setting timers can all be accomplished from anywhere in the home.

Whirlpool slide-in electric ranges combine functionality with stylish design, bringing energy-efficient cooking and advanced technology to kitchens. With features such as versatile cooking surfaces, advanced oven technology, and smart capabilities, these ranges are ideal for both seasoned chefs and home cooks alike. Whether you’re baking, broiling, or simmering, a Whirlpool slide-in electric range is designed to enhance culinary experiences while complementing any kitchen décor.