TES325G specifications
The Whirlpool TES325G stands out in the realm of kitchen appliances, particularly as a feature-rich built-in oven that caters to the modern cook's needs. This versatile model is designed to enhance culinary experiences with advanced technology and user-friendly features that facilitate cooking.One of the main highlights of the TES325G is its sleek design, which is not only aesthetically pleasing but also functional. The oven is crafted to fit seamlessly within built-in kitchen cabinetry, making it an ideal choice for those who value both style and efficiency in their kitchen layout. The compact size ensures that it can be integrated into smaller spaces without compromising on performance.
The TES325G features a generous cooking capacity, allowing users to prepare meals for families and gatherings alike. This oven is equipped with multiple cooking modes, including traditional baking, grilling, and convection. The convection technology is particularly noteworthy, as it circulates hot air within the oven, ensuring even cooking and browning of dishes. This results in perfectly cooked meals every time, with reduced cooking times and energy consumption.
Another standout feature of the Whirlpool TES325G is its intuitive control panel. The modern digital interface simplifies the cooking process, enabling users to select settings and cooking times with ease. Additionally, the oven includes pre-set cooking programs that cater to a variety of dishes, allowing even novice cooks to achieve professional-quality results.
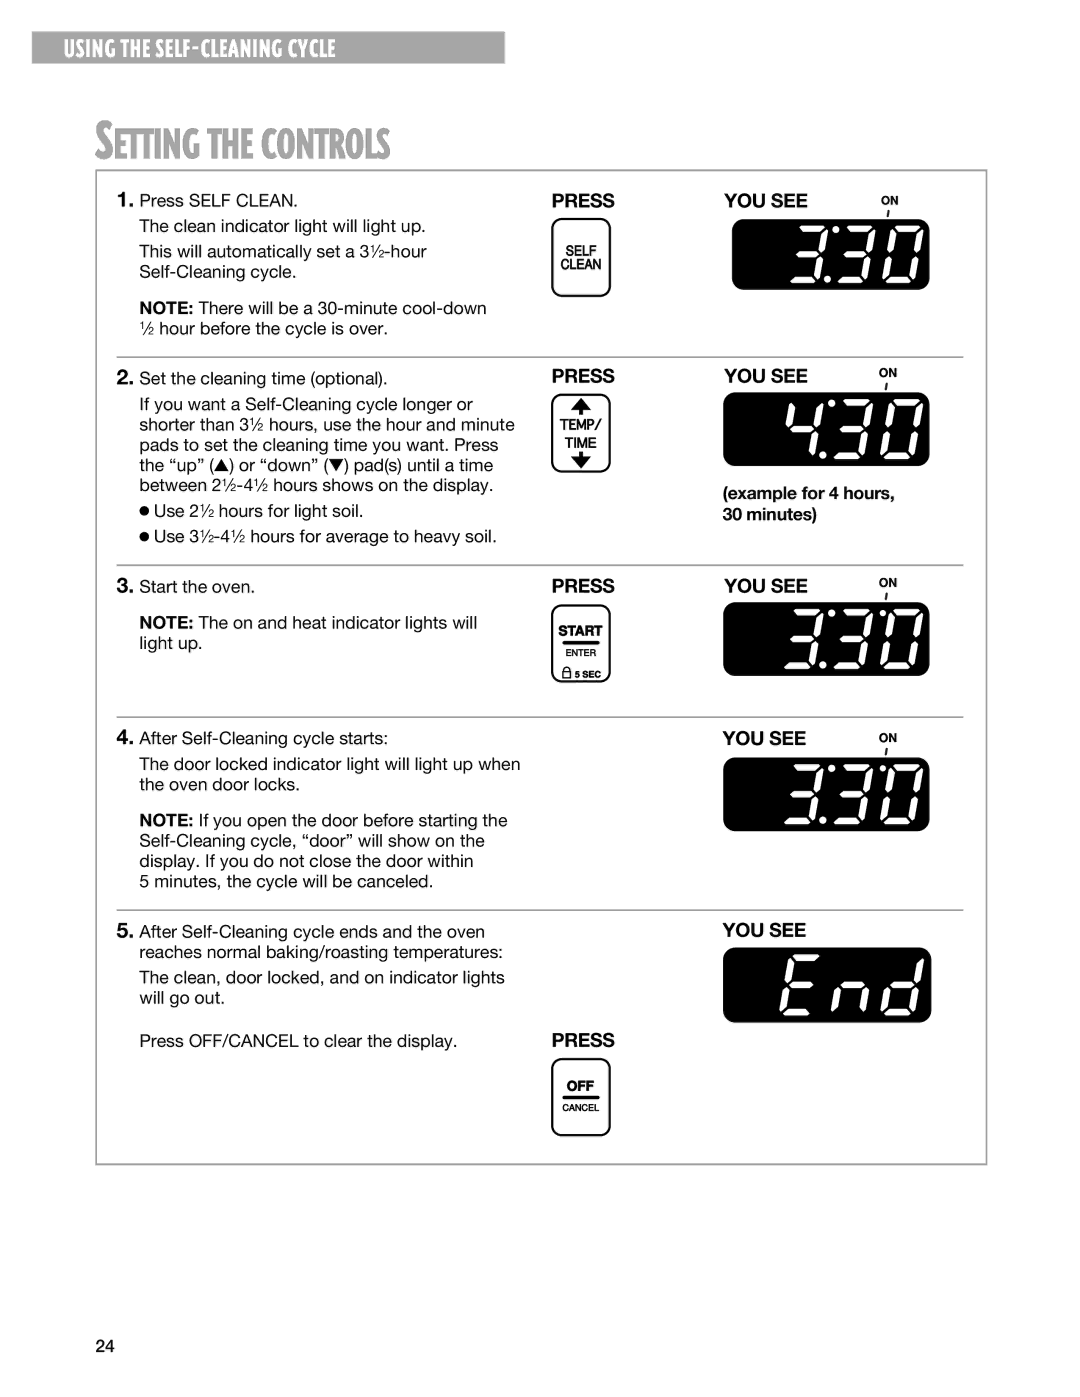
Safety is also a significant consideration in the design of the TES325G. The oven comes with features such as a child safety lock and cool-touch doors, ensuring that it can be operated safely in a home with children. The self-cleaning function is another welcome addition, making maintenance hassle-free and ensuring that the oven remains in top condition.
The energy efficiency of the Whirlpool TES325G is another important characteristic. It operates on lower energy consumption while providing consistent performance. This not only helps reduce electricity bills but also supports environmentally-friendly practices in the kitchen.
In summary, the Whirlpool TES325G is a sophisticated and efficient built-in oven that marries form and function. With its convection cooking technology, user-friendly controls, ample cooking capacity, and safety features, it is an excellent addition to any modern kitchen, making it easier for users to prepare a wide variety of delicious meals. Whether you are a seasoned chef or a cooking enthusiast, the TES325G offers the reliability and performance needed to elevate your culinary journey.

