REFRIGERATOR CARE

Cleaning

WARNING

Explosion Hazard

Use nonflammable cleaner.

Failure to do so can result in death, explosion, or fire.

Both the refrigerator and freezer sections defrost automatically. However, clean both sections about once a month to avoid buildup of odors. Wipe up spills immediately.

IMPORTANT: Because air circulates between both sections, any odors formed in one section will transfer to the other. You must thoroughly clean both sections to eliminate odors. To avoid odor transfer and drying out of food, wrap or cover foods tightly.

To Clean Your Refrigerator:

NOTE: Do not use abrasive or harsh cleaners such as window sprays, scouring cleansers, flammable fluids, cleaning waxes, concentrated detergents, bleaches or cleansers containing petroleum products on plastic parts, interior and door liners or gaskets. Do not use paper towels, scouring pads, or other harsh cleaning tools.

1.Unplug refrigerator or disconnect power.

2.Hand wash, rinse, and dry removable parts and interior surfaces thoroughly. Use a clean sponge or soft cloth and a mild detergent in warm water.

3.Wash stainless steel and painted metal exteriors with a clean sponge or soft cloth and a mild detergent in warm water.

To keep your stainless steel refrigerator looking like new and to remove minor scuffs or marks, it is suggested that you use the manufacturer’s approved Stainless Steel Cleaner & Polish, Part Number 4396095. To order the cleaner, call 1-800-442-9991U.S.A. or 1-800-807-6777Canada.

IMPORTANT: This cleaner is for stainless steel parts only!

Do not allow the Stainless Steel Cleaner & Polish to come into contact with any plastic parts such as the trim pieces, dispenser covers or door gaskets. If unintentional contact does occur, clean plastic part with a sponge and mild detergent in warm water. Dry thoroughly with a soft cloth.

4.There is no need for routine condenser cleaning in normal home operating environments. If the environment is particularly greasy or dusty, or there is significant pet traffic in the home, the condenser should be cleaned every 2 to

3 months to ensure maximum efficiency. If you need to clean the condenser:

Remove the base grille.

Use a vacuum cleaner with a soft brush to clean the grille, the open areas behind the grille and the front surface area of the condenser.

Replace the base grille when finished.

5.Plug in refrigerator or reconnect power.

Changing the Light Bulb

NOTE: Not all appliance bulbs will fit your refrigerator. Be sure to replace the bulb with an appliance bulb of the same size, shape, and wattage (no greater than 40 watts).

1.Unplug the refrigerator or disconnect power.

2.Remove the light shield, if necessary.

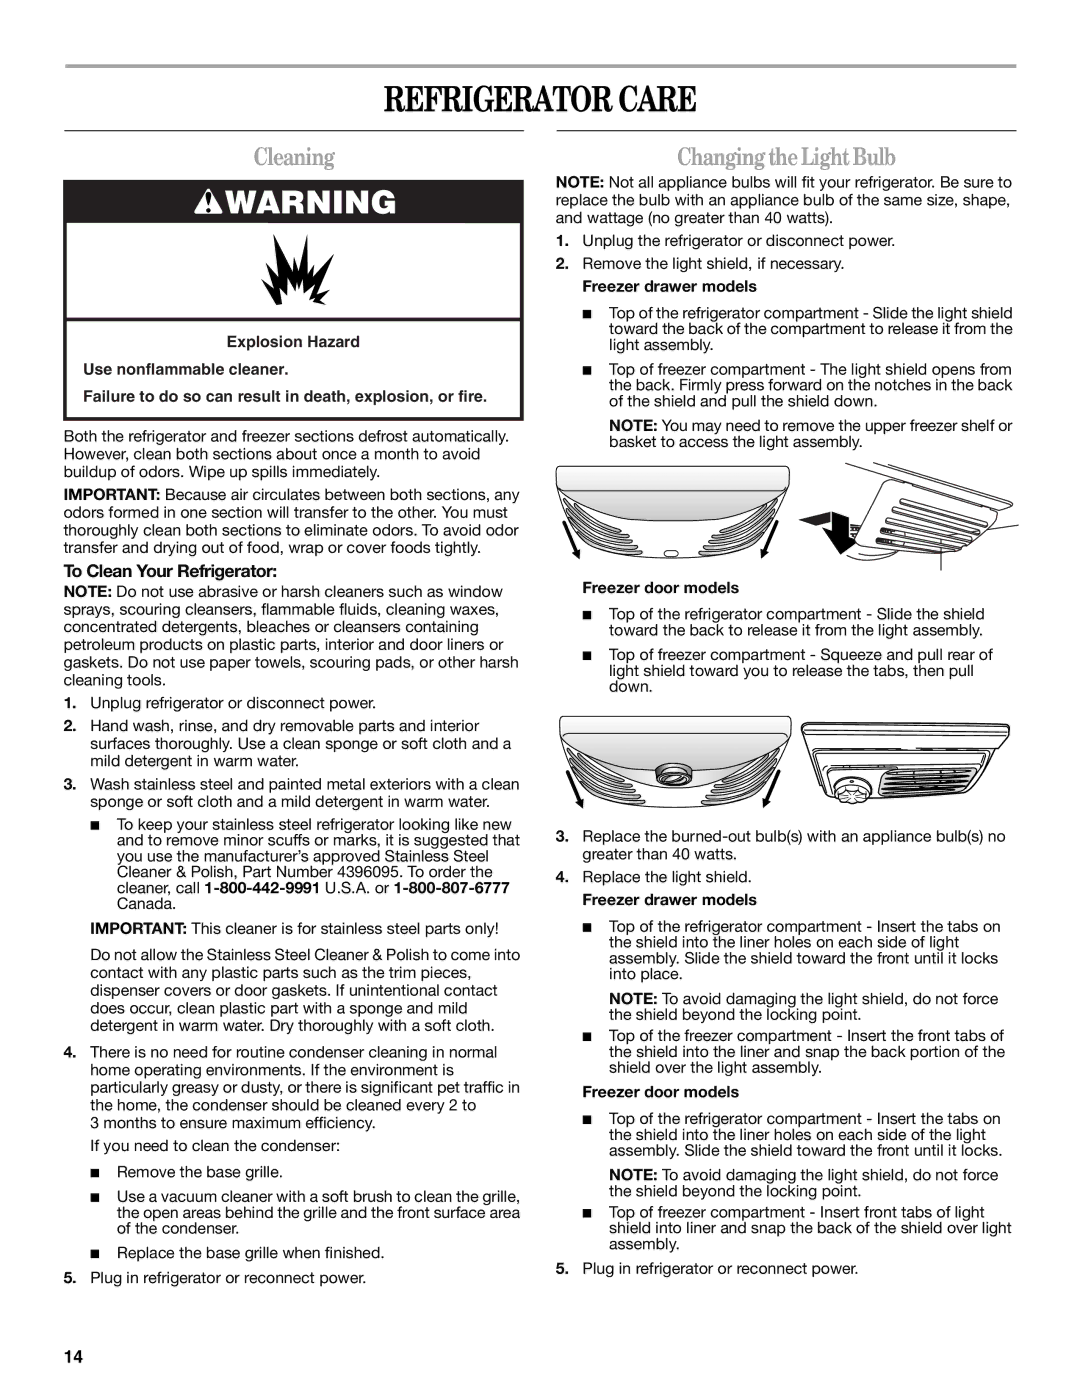
Freezer drawer models

Top of the refrigerator compartment - Slide the light shield toward the back of the compartment to release it from the light assembly.

Top of freezer compartment - The light shield opens from the back. Firmly press forward on the notches in the back of the shield and pull the shield down.

NOTE: You may need to remove the upper freezer shelf or basket to access the light assembly.

Freezer door models

Top of the refrigerator compartment - Slide the shield toward the back to release it from the light assembly.

Top of freezer compartment - Squeeze and pull rear of light shield toward you to release the tabs, then pull down.

3.Replace the burned-out bulb(s) with an appliance bulb(s) no greater than 40 watts.

4.Replace the light shield.

Freezer drawer models

Top of the refrigerator compartment - Insert the tabs on the shield into the liner holes on each side of light assembly. Slide the shield toward the front until it locks into place.

NOTE: To avoid damaging the light shield, do not force the shield beyond the locking point.

Top of the freezer compartment - Insert the front tabs of the shield into the liner and snap the back portion of the shield over the light assembly.

Freezer door models

Top of the refrigerator compartment - Insert the tabs on the shield into the liner holes on each side of the light assembly. Slide the shield toward the front until it locks.

NOTE: To avoid damaging the light shield, do not force the shield beyond the locking point.

Top of freezer compartment - Insert front tabs of light shield into liner and snap the back of the shield over light assembly.

5.Plug in refrigerator or reconnect power.

14

Page 14
Image 14
Whirlpool W10175487A Refrigerator Care, Cleaning, Changing the Light Bulb, To Clean Your Refrigerator

W10175487A specifications

The Whirlpool W10175487A is a high-efficiency washer and dryer that embodies modern home appliance technology. Designed to seamlessly integrate into any laundry space, it efficiently combines functionality with user-friendly features to streamline the washing process.

One of the main characteristics of the W10175487A is its advanced wash system, which utilizes an adaptive wash action. This feature tailors the washing motion based on the load size and fabric type, ensuring that clothes receive a thorough clean without being subjected to unnecessary wear and tear. This not only helps in maintaining the quality of your garments but also reduces energy consumption.

The machine is equipped with a large capacity drum that accommodates sizeable laundry loads, making it ideal for families. This generous size means fewer washes are required, saving both time and resources. Furthermore, the washer's load sensing technology automatically adjusts the water level, ensuring that each wash is as efficient as possible.

In terms of energy efficiency, the Whirlpool W10175487A boasts Energy Star certification, a testament to its low energy consumption and minimized environmental impact. The energy-saving mode allows for even further reduction in electricity use while still delivering superior cleaning performance.

The dryer that accompanies this washer offers an array of key features, including multiple drying cycles that cater to diverse fabric types. From delicate items to heavy-duty towels, the drying options are versatile enough to accommodate all needs. An integrated moisture sensor ensures clothes are dried to the perfect level, preventing shrinkage and fabric damage.

User-friendliness is a core focus of the W10175487A, evident in its easy-to-use control panel. With clearly marked settings and a simple interface, navigating through various wash and dry cycles is effortless, making laundry day less of a chore.

In summary, the Whirlpool W10175487A stands out for its advanced washing technology, energy-efficient design, large capacity, and user-friendly features. Ideal for households seeking a reliable laundry solution, it offers a perfect blend of performance and convenience, enhancing the overall laundry experience.