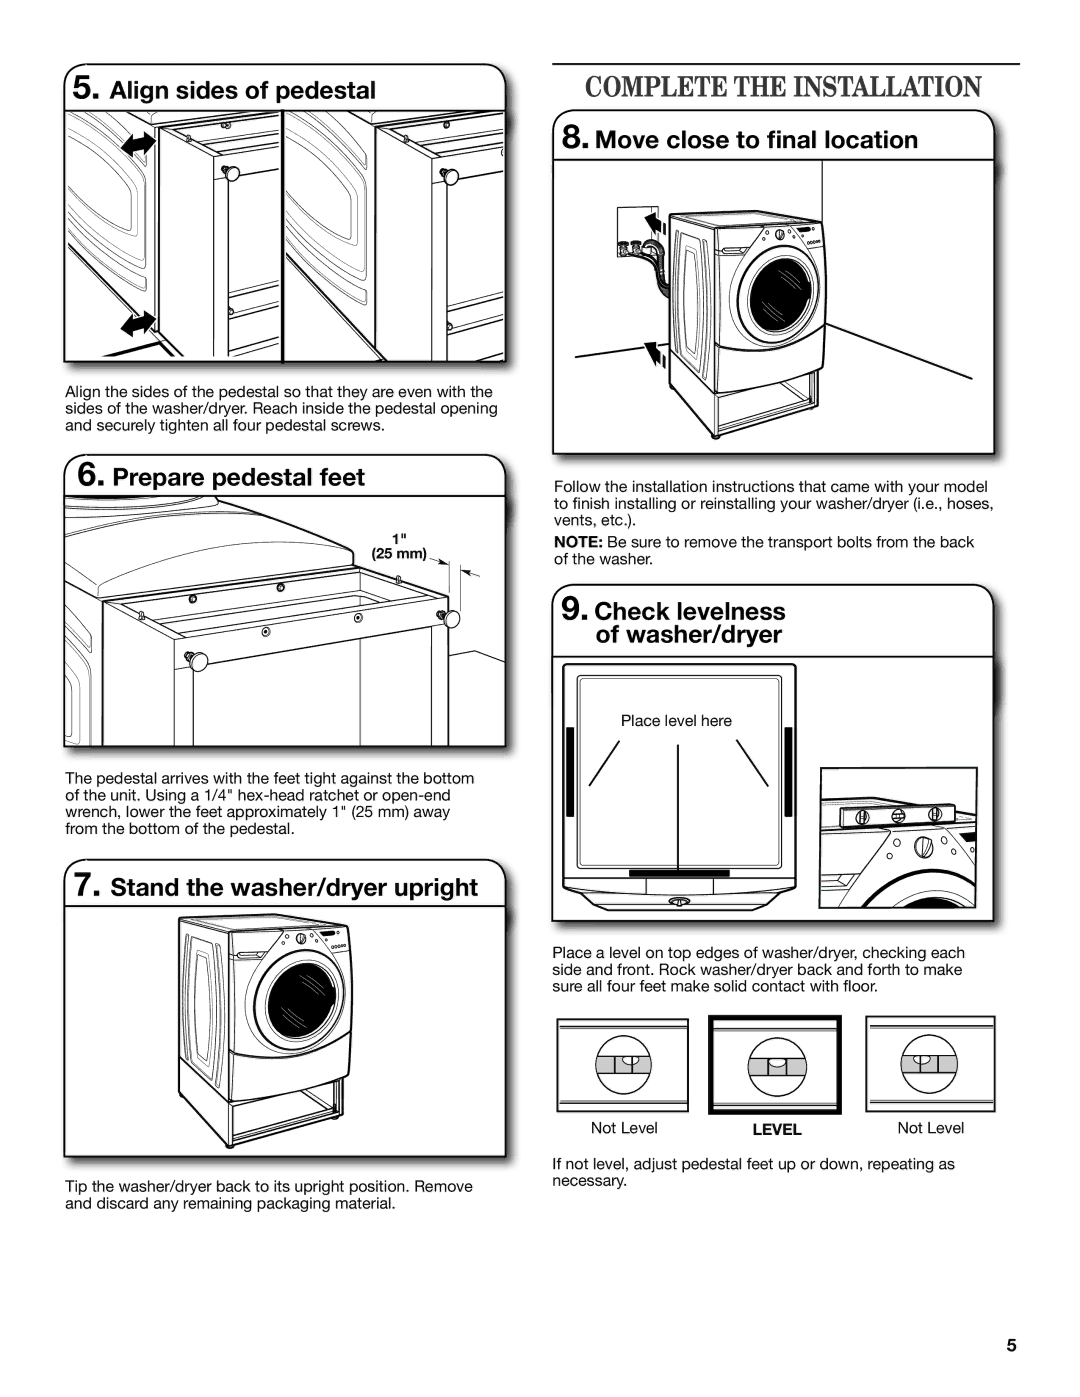
5. Align sides of pedestal | COMPLETE THE INSTALLATION |
8. Move close to final location
Align the sides of the pedestal so that they are even with the sides of the washer/dryer. Reach inside the pedestal opening and securely tighten all four pedestal screws.
6. Prepare pedestal feet
1" |
(25 mm) |
The pedestal arrives with the feet tight against the bottom of the unit. Using a 1/4"
7. Stand the washer/dryer upright
Follow the installation instructions that came with your model to finish installing or reinstalling your washer/dryer (i.e., hoses, vents, etc.).
NOTE: Be sure to remove the transport bolts from the back of the washer.
9. Check levelness of washer/dryer
Place level here |
Place a level on top edges of washer/dryer, checking each side and front. Rock washer/dryer back and forth to make sure all four feet make solid contact with floor.
Tip the washer/dryer back to its upright position. Remove and discard any remaining packaging material.
Not Level | Level | Not Level |
If not level, adjust pedestal feet up or down, repeating as necessary.
5
