INSTALLATION
!WARNING
Thermostat installation and all components of the control system shall conform to Class II circuits per the NEC code.
Remove Old Thermostat
Before removing wires from old thermostat, mark wires for terminal identification so the proper connections will be made to the new thermostat.
Installing New Thermostat
1.Pull the thermostat body off the thermostat base. Forcing or prying on the thermostat will cause damage to the unit.
2.Place base over hole in wall and mark mounting hole locations on wall using base as a template.
3.Move base out of the way. Drill mounting holes. If you are using existing mounting holes and the holes drilled are too large and do not allow you to tighten base snugly, use plastic screw anchors to secure the base.
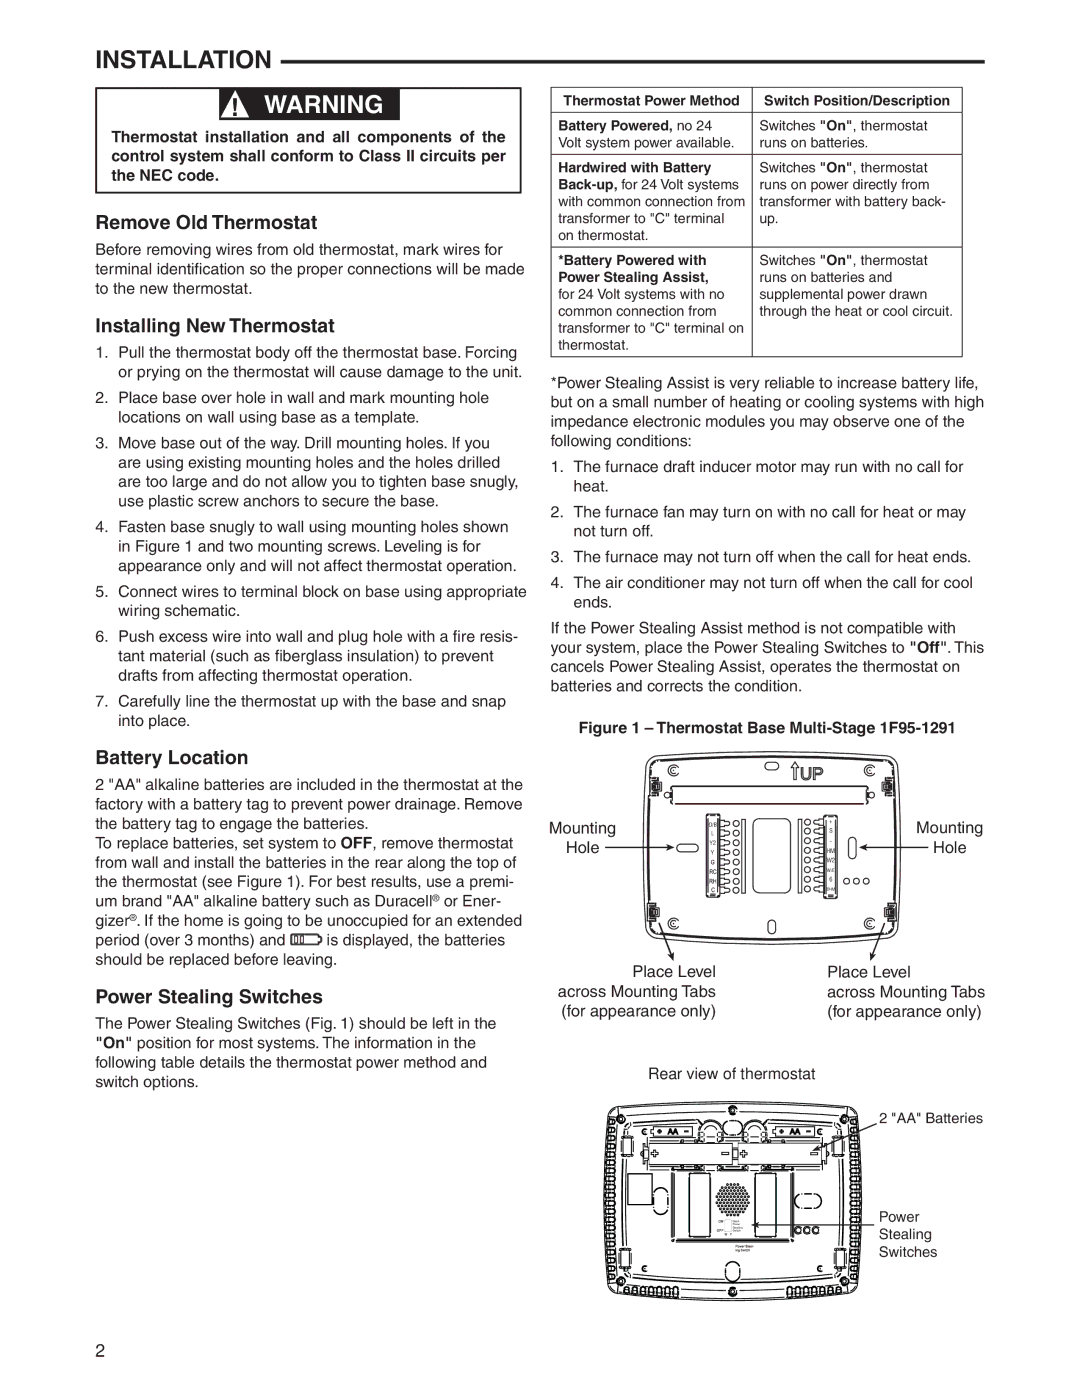
4.Fasten base snugly to wall using mounting holes shown in Figure 1 and two mounting screws. Leveling is for appearance only and will not affect thermostat operation.
5.Connect wires to terminal block on base using appropriate wiring schematic.
6.Push excess wire into wall and plug hole with a fire resis- tant material (such as fiberglass insulation) to prevent drafts from affecting thermostat operation.
7.Carefully line the thermostat up with the base and snap into place.
Thermostat Power Method | Switch Position/Description |
|
|
Battery Powered, no 24 | Switches "On", thermostat |
Volt system power available. | runs on batteries. |
|
|
Hardwired with Battery | Switches "On", thermostat |
runs on power directly from | |
with common connection from | transformer with battery back- |
transformer to "C" terminal | up. |
on thermostat. |
|
|
|
*Battery Powered with | Switches "On", thermostat |
Power Stealing Assist, | runs on batteries and |
for 24 Volt systems with no | supplemental power drawn |
common connection from | through the heat or cool circuit. |
transformer to "C" terminal on |
|
thermostat. |
|
|
|
*Power Stealing Assist is very reliable to increase battery life, but on a small number of heating or cooling systems with high impedance electronic modules you may observe one of the following conditions:
1.The furnace draft inducer motor may run with no call for heat.
2.The furnace fan may turn on with no call for heat or may not turn off.
3.The furnace may not turn off when the call for heat ends.
4.The air conditioner may not turn off when the call for cool ends.
If the Power Stealing Assist method is not compatible with your system, place the Power Stealing Switches to "Off". This cancels Power Stealing Assist, operates the thermostat on batteries and corrects the condition.
Figure 1 – Thermostat Base Multi-Stage 1F95-1291
Battery Location
2 "AA" alkaline batteries are included in the thermostat at the factory with a battery tag to prevent power drainage. Remove the battery tag to engage the batteries.
To replace batteries, set system to OFF, remove thermostat from wall and install the batteries in the rear along the top of the thermostat (see Figure 1). For best results, use a premi- um brand "AA" alkaline battery such as Duracell® or Ener- gizer®. If the home is going to be unoccupied for an extended
period (over 3 months) and ![]() is displayed, the batteries should be replaced before leaving.
is displayed, the batteries should be replaced before leaving.
Power Stealing Switches
The Power Stealing Switches (Fig. 1) should be left in the "On" position for most systems. The information in the following table details the thermostat power method and switch options.
Mounting | L | + | Mounting |
S | |||
| O/B |
|
|
Hole | Y2 | - | Hole |
Y | HM | ||
|
| W2 |
|
|
| W/E |
|
|
| 6 |
|
|
| DHM |
|
Place Level | Place Level |
across Mounting Tabs | across Mounting Tabs |
(for appearance only) | (for appearance only) |
Rear view of thermostat
2 "AA" Batteries
Power | Power |
Stack |
|
Stealing | Stealing |
Switch | |
| Switches |
2