
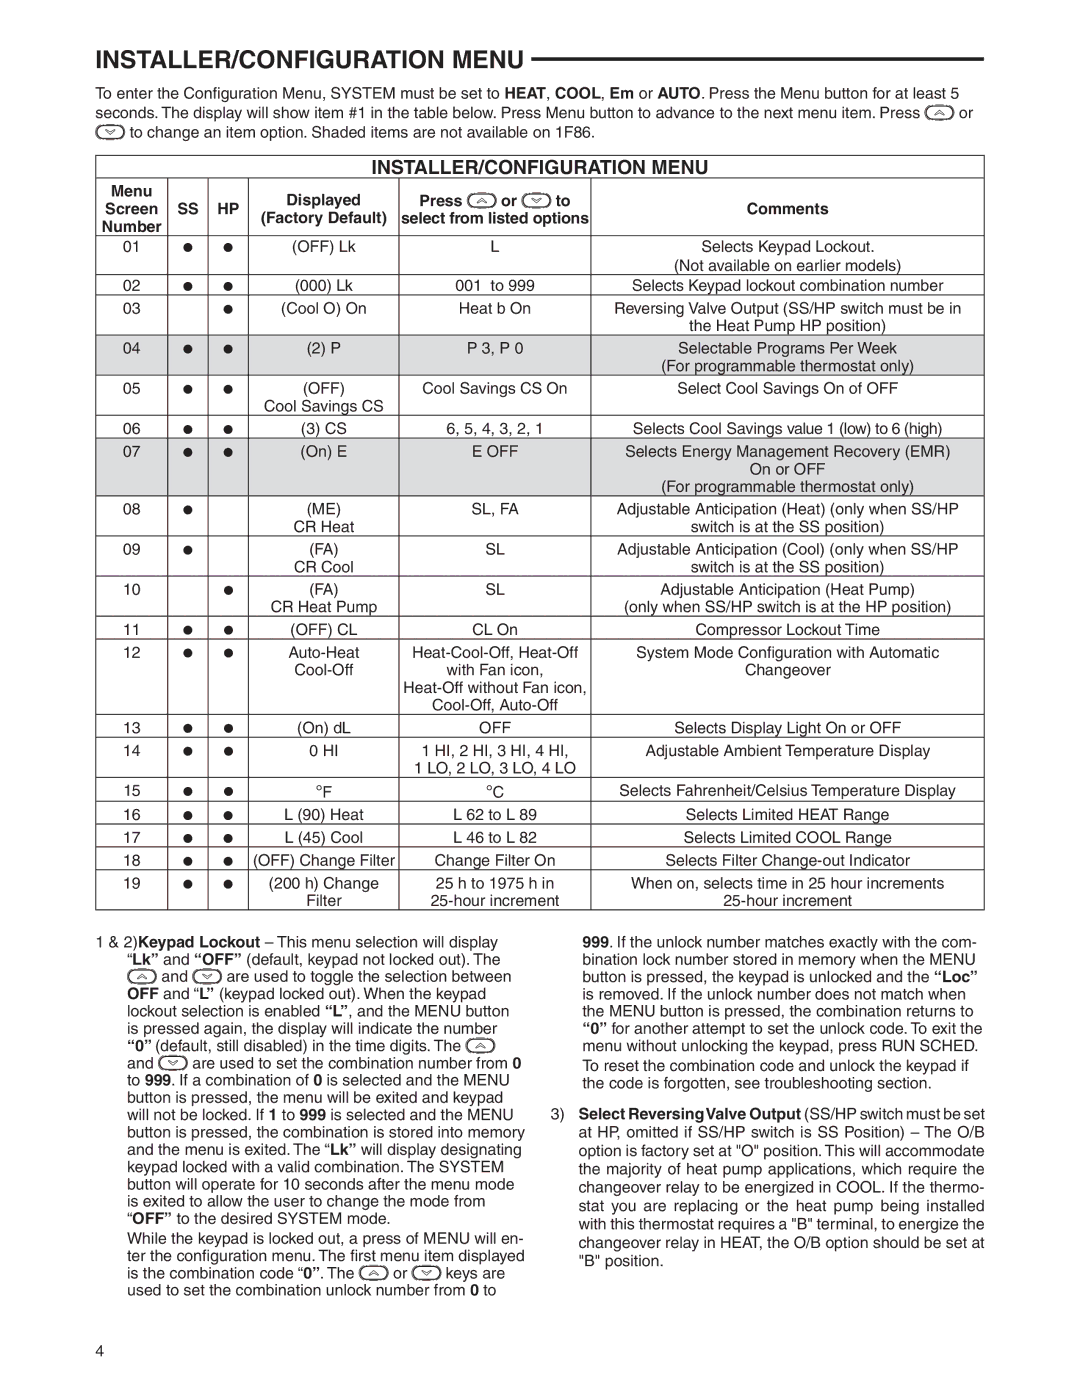
37-7248A specifications
The White Rodgers 37-7248A is a sophisticated multi-stage digital thermostat known for its reliability and user-friendly features, making it a popular choice among homeowners seeking precise temperature control. This thermostat is designed to work seamlessly with various heating and cooling systems, including central air conditioning and heating units, heat pumps, and gas furnaces.One of the main features of the 37-7248A is its compatibility with both single-stage and multi-stage heating and cooling systems. This versatility provides homeowners with greater flexibility when selecting their home’s climate control systems. The thermostat supports up to two stages of heating and two stages of cooling, which enables it to efficiently manage the temperature fluctuations that can occur in different conditions.
The digital display of the White Rodgers 37-7248A is another standout characteristic. It features an easy-to-read LCD screen, which allows users to quickly view the current temperature settings and make adjustments as needed. This thermostat also incorporates a set of intuitive buttons designed for straightforward navigation through various settings, ensuring that users can customize their comfort without a steep learning curve.
Energy efficiency is a key focus of the White Rodgers 37-7248A. It includes programmable features that allow homeowners to set specific heating and cooling schedules to align with their routines, thereby reducing energy consumption when the home is unoccupied. The thermostat supports a wide range of programming options, enabling users to create tailored schedules that fit both busy weekdays and relaxed weekends.
Furthermore, the 37-7248A includes advanced technologies such as anticipatory control, which helps to optimize HVAC system operation. This technology enables the thermostat to learn the heating and cooling patterns of the home, adjusting its operation to ensure that the desired temperatures are reached before scheduled changes.
In terms of installation, the White Rodgers 37-7248A is designed to fit most standard wall connections, making it relatively easy for both professional installers and DIY enthusiasts. Its robust construction ensures durability, providing a long-lasting solution for temperature regulation.
In summary, the White Rodgers 37-7248A is a multipurpose digital thermostat that excels in versatility, energy efficiency, and ease of use. Its array of features, including multi-stage compatibility, programmable scheduling, and anticipatory control technology, make it an excellent choice for enhancing home comfort while promoting energy savings. This thermostat is ideal for homeowners who seek a dependable and effective solution for climate control.