Setting and Adjustment
Initial Conditions
A.Set the Setting/Regulator switch (Figure
B.With the Setting/Regulator switch selector in ![]() position (right), press the Reset button, R, the display error EEE will appear. Move the Setting/Regulator switch, (Figure
position (right), press the Reset button, R, the display error EEE will appear. Move the Setting/Regulator switch, (Figure
1 2 3 4 5 6 7
0:00
1 2 3 4 5 6 7
E EE
1 2 3 4 5 6 7
C. | frozen. | 0:00 |
If the Setting/Regulator switch, (Figure |
| |
D. | If the Setting/Regulator switch, (Figure | 1 2 3 4 5 6 7 |
| frozen with the colon flashing. | 0:00 |
|
|
E.If the Setting/Regulator switch, (Figure ![]() position (right), the
position (right), the
☼ | 1 2 3 4 5 6 7 |
display is flashing: ,1,1. | |
Manual Operation | 1 ☼ |
| 0:00 |
Move the On/Off switch, (Figure
•The symbol of a light (☼) will appear on the display. In this condition the heater is controlled by the furnace thermostat and is independent of the timer program.
Move the On/Off switch, (Figure
•The symbol of the light (☼) on the display will disappear. In this condition the furnace is turned off.
Move the On/Off switch, (Figure
•The program function is activated. The furnace will operate according to the programs. The furnace is controlled both by the timer and by the furnace thermostat.
Day and Time Setting
A. The Setting/Regulator switch, (Figure
B.To set the day of the week, press the Day Selector button, (1….7, Figure
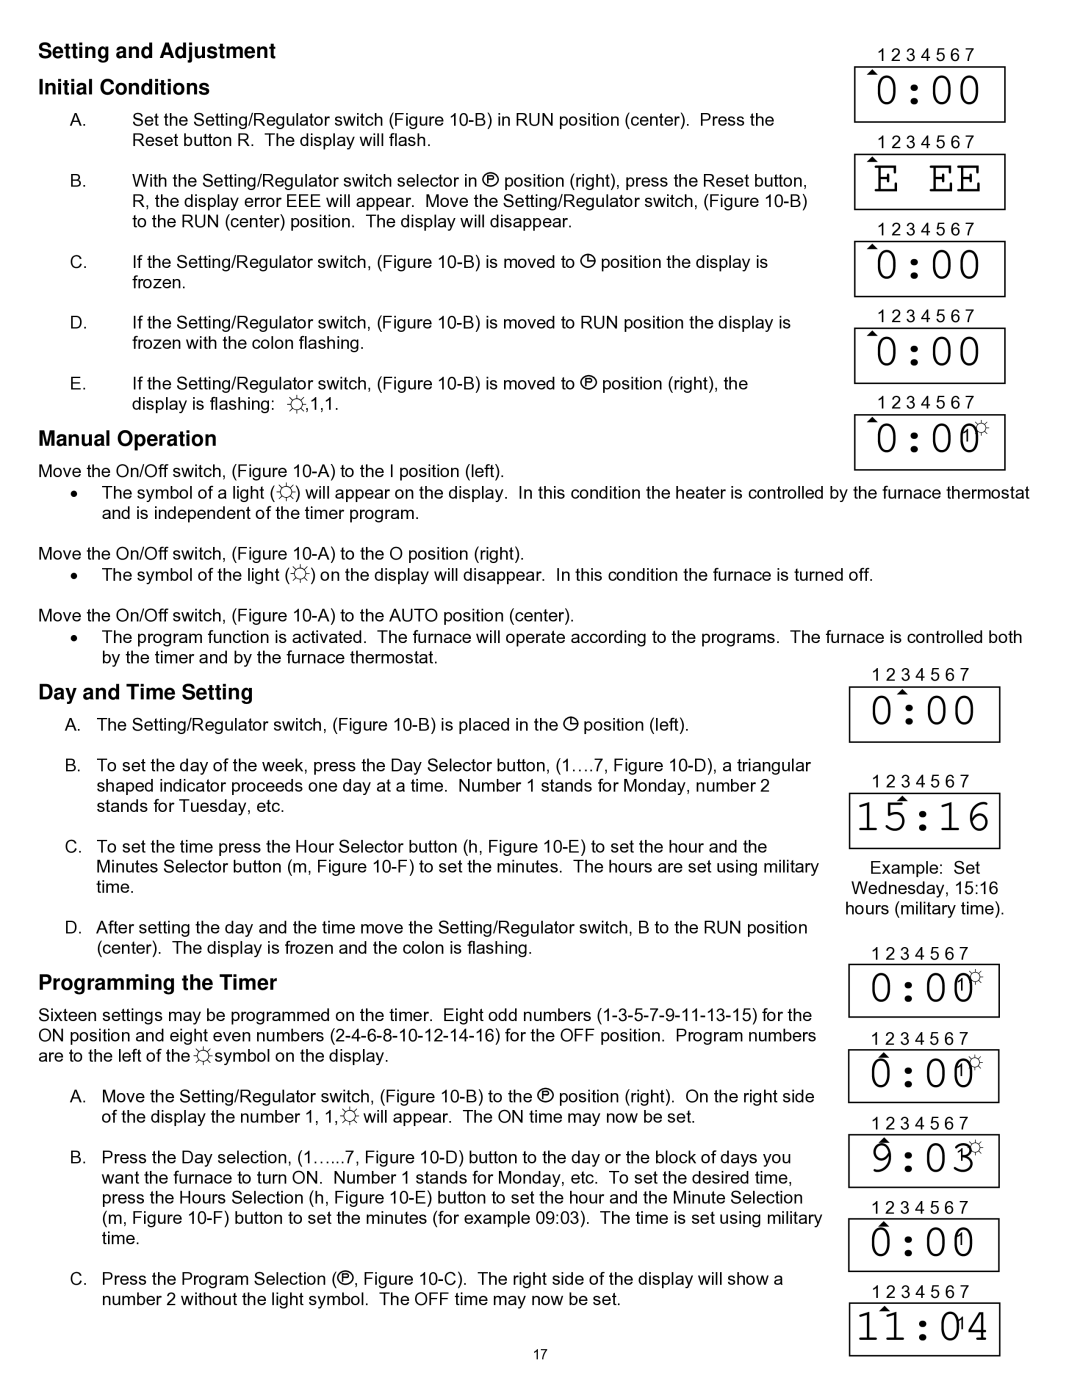
C.To set the time press the Hour Selector button (h, Figure
D.After setting the day and the time move the Setting/Regulator switch, B to the RUN position (center). The display is frozen and the colon is flashing.
Programming the Timer
Sixteen settings may be programmed on the timer. Eight odd numbers
A.Move the Setting/Regulator switch, (Figure ![]() position (right). On the right side of the display the number 1, 1,☼ will appear. The ON time may now be set.
position (right). On the right side of the display the number 1, 1,☼ will appear. The ON time may now be set.
B.Press the Day selection, (1…...7, Figure
C.Press the Program Selection (![]() , Figure
, Figure
17
1 2 3 4 5 6 7
0:00
1 2 3 4 5 6 7
15:16
Example: Set
Wednesday, 15:16 hours (military time).
1 2 3 4 5 6 7
0:001☼
1 2 3 4 5 6 7
0:001☼
1 2 3 4 5 6 7
9:031☼
1 2 3 4 5 6 7
0:001
1 2 3 4 5 6 7