USING THE PFM T32 TRANSMITTER
1.Install two (2) AA batteries. If you’re using rechargeable batteries, they must be charged before using. See battery information on page 13.
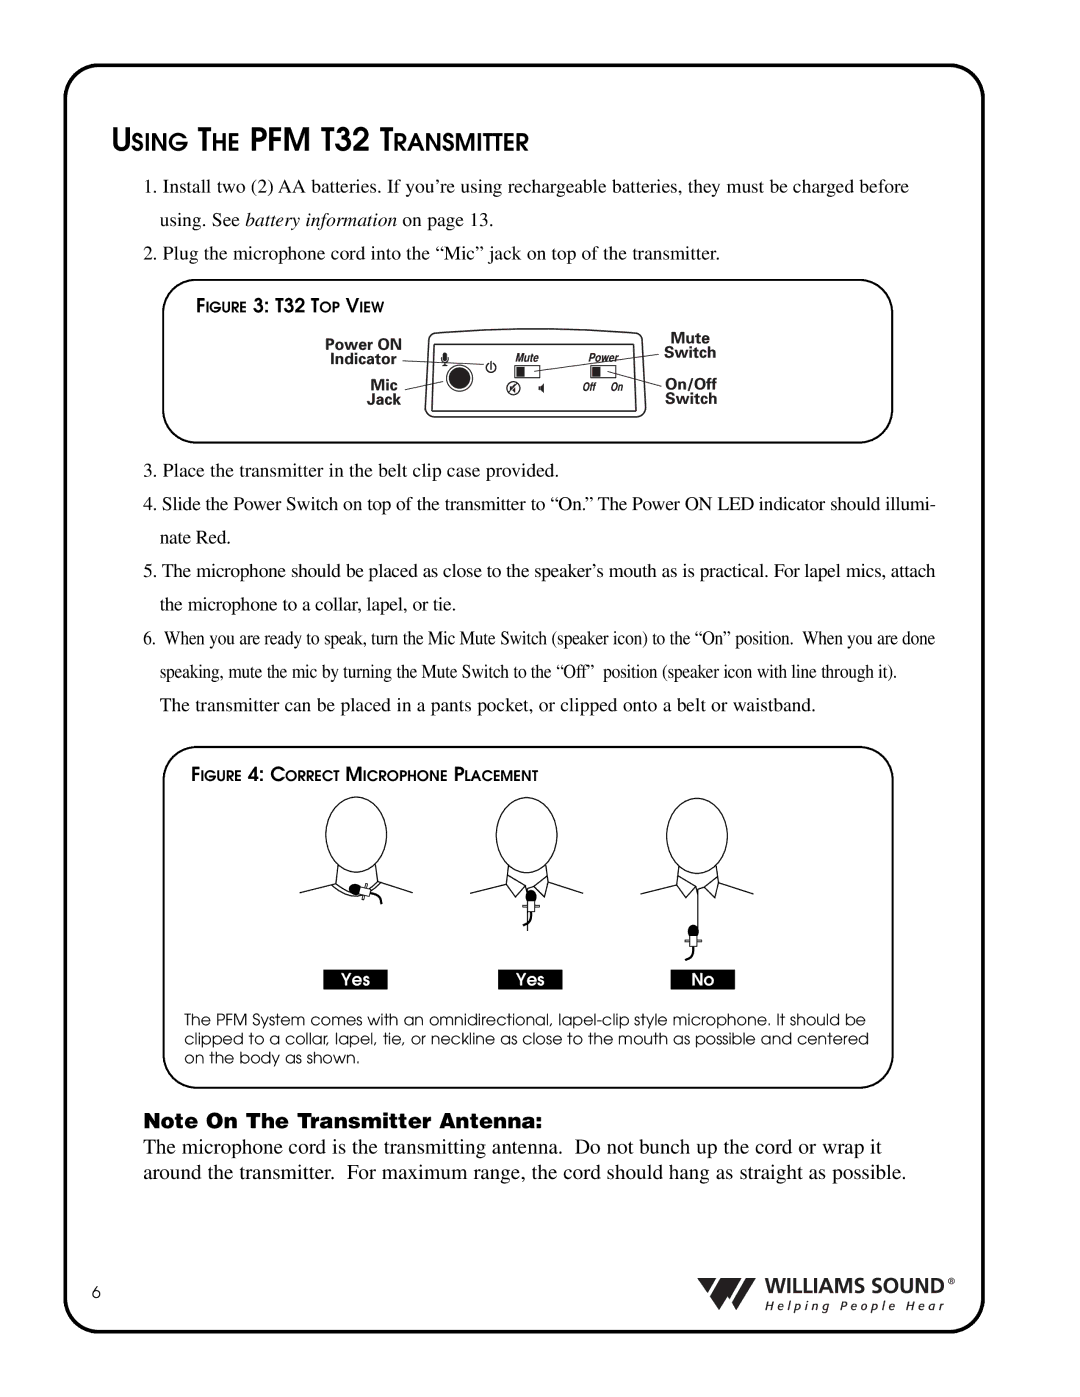
2.Plug the microphone cord into the “Mic” jack on top of the transmitter.
FIGURE 3: T32 TOP VIEW
3.Place the transmitter in the belt clip case provided.
4.Slide the Power Switch on top of the transmitter to “On.” The Power ON LED indicator should illumi- nate Red.
5.The microphone should be placed as close to the speaker’s mouth as is practical. For lapel mics, attach the microphone to a collar, lapel, or tie.
6.When you are ready to speak, turn the Mic Mute Switch (speaker icon) to the “On” position. When you are done speaking, mute the mic by turning the Mute Switch to the “Off” position (speaker icon with line through it). The transmitter can be placed in a pants pocket, or clipped onto a belt or waistband.
FIGURE 4: CORRECT MICROPHONE PLACEMENT
Yes |
| Yes |
| No |
The PFM System comes with an omnidirectional,
Note On The Transmitter Antenna:
The microphone cord is the transmitting antenna. Do not bunch up the cord or wrap it around the transmitter. For maximum range, the cord should hang as straight as possible.
6