4.Check the clearance between the table and the fence. The gap should be the same at the front of the table as it is at the rear. If the gap width is different, adjust the foot at the rear of the fence until the gap width is the same, Figure 11.
Note: You can also adjust the front rail, or rear rail up, or down to achieve the proper clearance.
5.With a square verify the fence face is perpendicular to the table top. If it is not the front rail will need to be adjusted parallel to the table top. This can be accomplished by measuring from the top of the table to the top of the front rail. The measurement should be the same at both ends of the table.
6.Move the fence assembly so that it aligns parallel to the blade, and lock the fence by pushing the lock handle down.
7.Loosen the four hex cap bolts that hold the fence, to the fence body, and align the fence to the blade. Tighten the four hex cap bolts.
8.Check to see that the pointer (F, Fig. 9) is aligned with the zero marking on the guide rail. If adjustment is necessary loosen the screw that holds the pointer in place and line up to the zero mark. Tighten the screw.
Note: If you cannot get the pointer lined up with the zero mark you can slide the guide tube and front rail left, or right to achieve the proper setting.
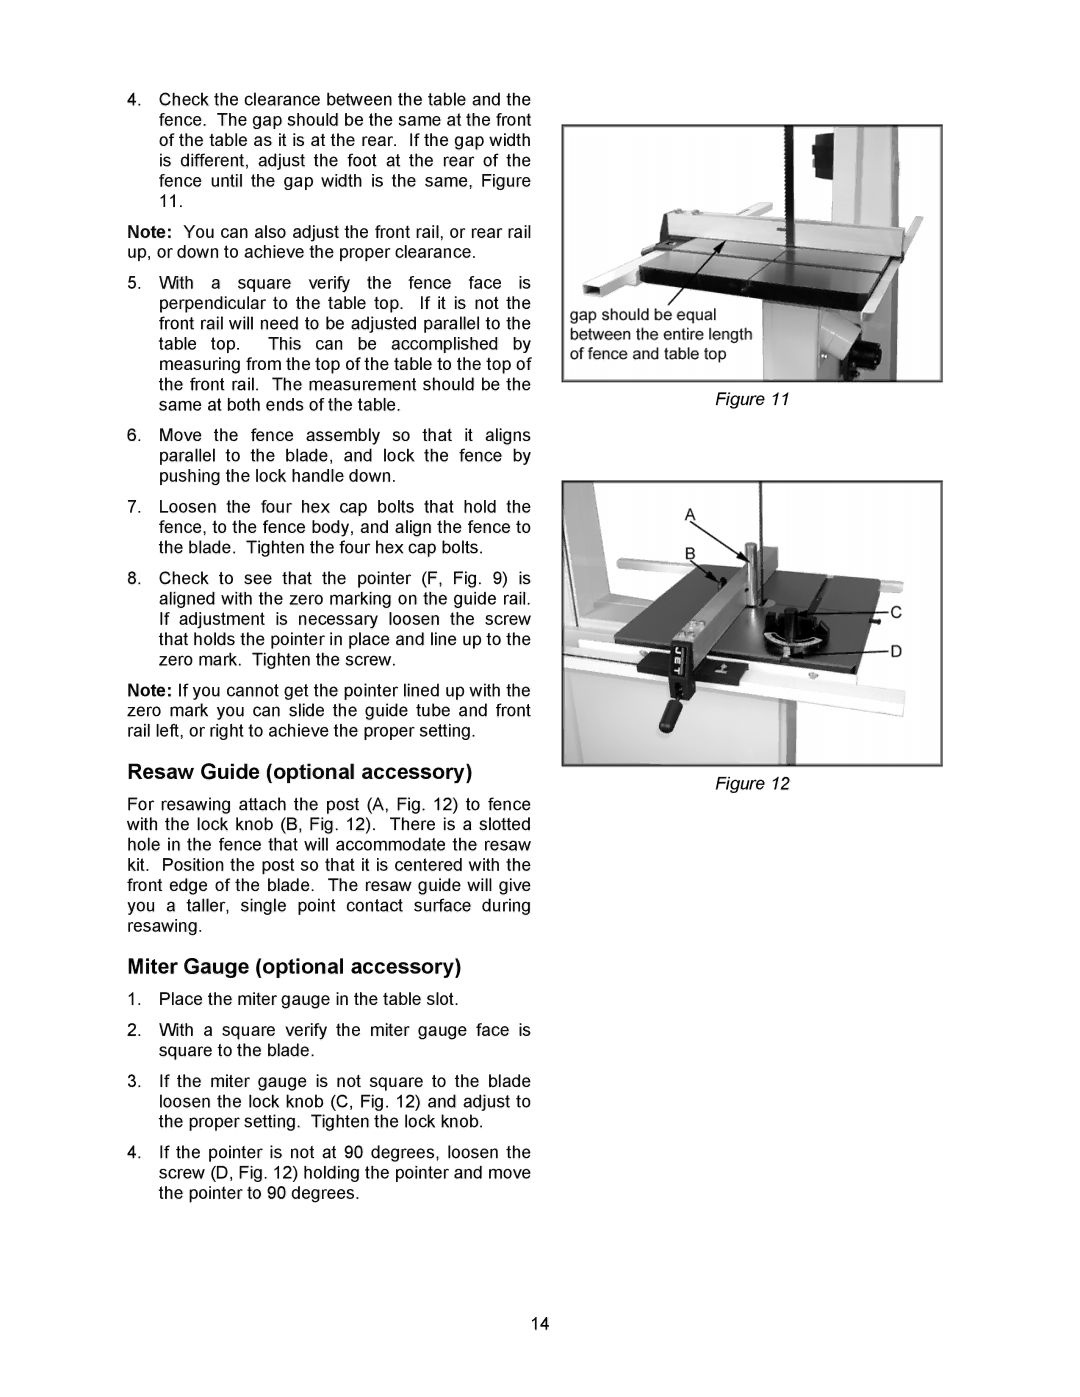
Resaw Guide (optional accessory)
For resawing attach the post (A, Fig. 12) to fence with the lock knob (B, Fig. 12). There is a slotted hole in the fence that will accommodate the resaw kit. Position the post so that it is centered with the front edge of the blade. The resaw guide will give you a taller, single point contact surface during resawing.
Miter Gauge (optional accessory)
1.Place the miter gauge in the table slot.
2.With a square verify the miter gauge face is square to the blade.
3.If the miter gauge is not square to the blade loosen the lock knob (C, Fig. 12) and adjust to the proper setting. Tighten the lock knob.
4.If the pointer is not at 90 degrees, loosen the screw (D, Fig. 12) holding the pointer and move the pointer to 90 degrees.
14
Figure 11
Figure 12